Een zoekopdracht beantwoorden
Zodra je het document hebt gedeeld, kunnen je contactpersonen de query zien in het deelvenster Mijn werk wanneer ze inloggen op Cloud. Ze kunnen het document selecteren om het te openen en reacties te geven.
Als de vraag het antwoordtype Eenvoudige elektronische handtekening heeft, kunnen contactpersonen kiezen of ze:
-
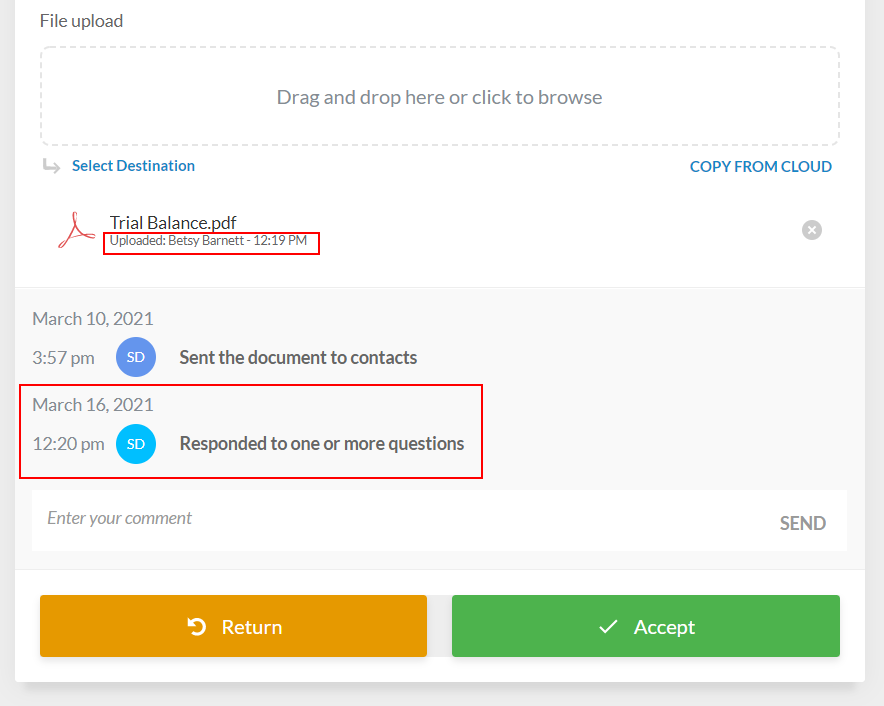
Elektronisch accepteren - Selecteer de knop Accepteren om te ondertekenen. Contactpersonen kunnen er ook voor kiezen om hun locatiegegevens te delen wanneer ze een handtekening zetten, wat wordt vastgelegd in het handtekeningenlogboek.
-
Ondertekend document uploaden - Download het bijgevoegde document en voeg de handtekening in of print en onderteken het document handmatig en upload het.
-
Ondertekend document uit Cloud kopiëren - Selecteer het eerder gedownloade, ondertekende en geüploade document van de Cloud-site van het bedrijf.
Contactpersonen kunnen de vragen waarop ze hebben gereageerd markeren door de knop Submit Response te selecteren.
Once they mark a question as responded, the button changes to read Response Submitted. Om gemakkelijker door de query te kunnen navigeren, kunnen contactpersonen ook vragen filteren terwijl ze door het document bladeren.
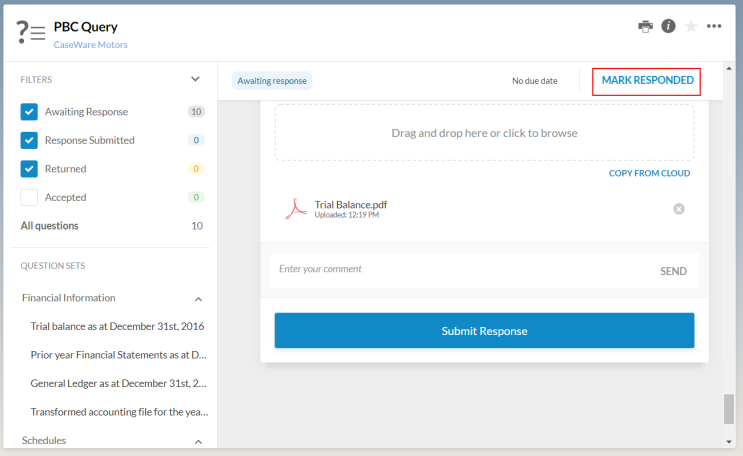
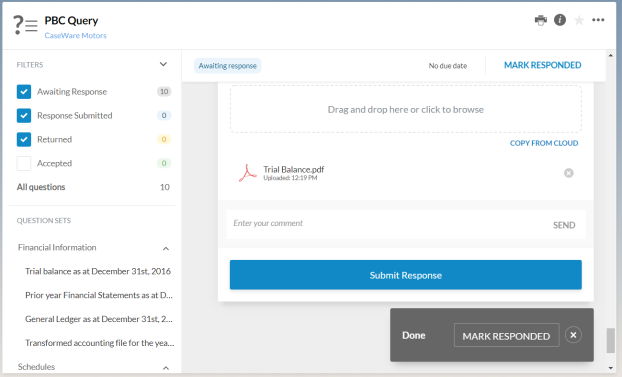
Tip: In plaats van elke beantwoorde vraag apart te markeren, kunnen contactpersonen gewoon de knop MARKEREN BEANTWOORD boven aan de pagina selecteren zodra ze antwoorden op alle vragen hebben gegeven. Hierdoor worden alle vragen automatisch gemarkeerd als beantwoord en wordt de status van de vraag gewijzigd in Gereageerd.
Zodra alle vragen zijn gemarkeerd als beantwoord, wordt er een melding weergegeven met de knop MARKER GEREPOND , zodat de contactpersoon eenvoudig door kan gaan naar de volgende stap in de workflow.
Zodra de status van de query verandert in Gereageerd, wordt het pictogram Gereageerd (![]() ) beschikbaar naast de query in de Documentenpagina.
) beschikbaar naast de query in de Documentenpagina.

Open de query om te beginnen met het bekijken van reacties. Merk op hoe de tijd van het antwoord en de naam van de contactpersoon die op elke vraag heeft gereageerd, worden weergegeven.