Create client entities
In Cloud, client organizations are represented by Client Entities. These entities can be categorized and organized in multiple ways, such as by forming associations between them or by assigning tags or workflow stages.
Creating client entities from a client list
Cloud enables you to add multiple client entities in a single procedure using a .csv file or a block of delimited text.
When using either method, ensure that:
-
Each row represents one client entity, and
-
Each column represents a property, such as their name, start date, and tags. To assign multiple tags, place the tags between quote marks and separate them with commas. Any tags that do not currently exist in Cloud will be created by performing the import.
-
The dates in the Client Since and Inactive Date column must be in the same format as the date format set in your personal regional settings.
In this example, an administrator wants to add two client entities:
Name, Location, Entity Number, Client Since, Fiscal Year End, Tags
Chockablock Industries, Toronto, 4829, 09/07/2012, December, "Retail, Partnership"
Superior Furniture, Toronto, 5937, 22 /08/2010, December, Retail
Entity Number values entered through CSV import can be 1–20 characters.
To import a list of entities:
-
Ensure that you have the Entities Admin role or equivalent privileges.
-
From the Cloud menu, select Entities.
-
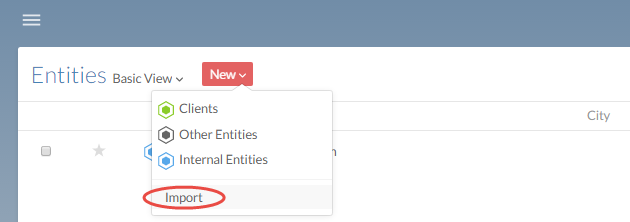
Select New | Import.
-
Select Import from CSV and browse to your .csv directory file, or paste your delimited list text into the text box.
-
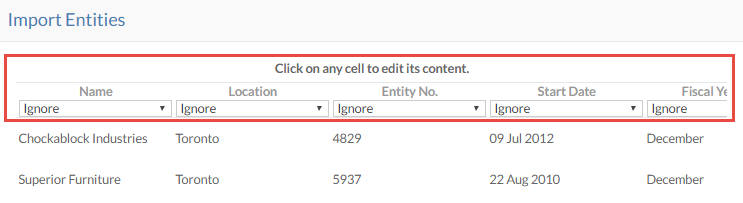
Choose the appropriate options, then select Next.

-
Map the property that matches each column. The Name (up to 60 characters) and Entity Number (1–20 characters) are required to complete the import. Entity Number values are case-sensitive. Any existing entities with the same Entity Number value will be modified.
-
Select Import.
The entities are added to Cloud. Any existing entities with the same Entity Number are modified.
Creating a single client entity
If you want to create organizations individually instead, you can do so from the Entities page.
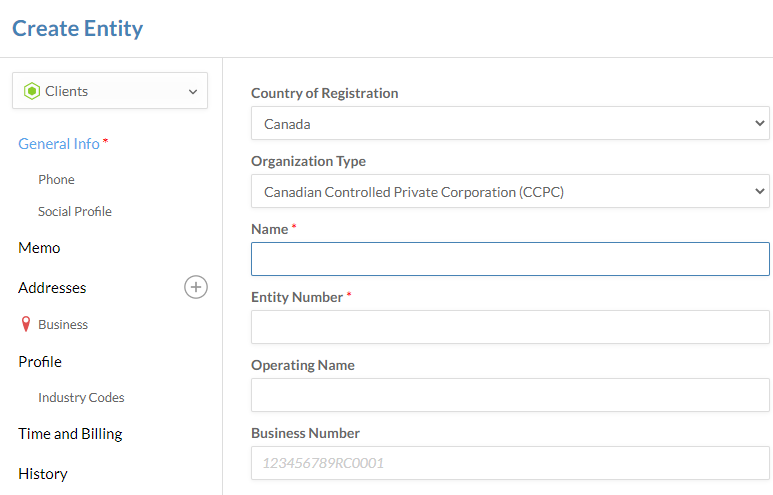
To create an entity:
-
Ensure that you have the Entities Admin role or equivalent privileges.
-
From the Cloud menu, select Entities.
-
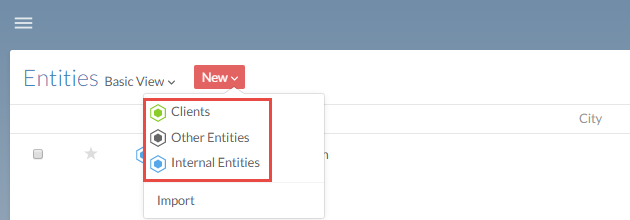
Select New and the appropriate entity type.
-
Choose a Country of Registration and an Organization Type. The available organization types vary based on which country of registration is selected. For more information, see Entity creation.
-
Enter a Name and Entity Number. These fields are required. Entity Number values can be 1–20 characters and are case-sensitive.
Note: The Entities page may not sort alphanumeric codes in the expected order if they vary in length (for example: 1 ABC, 23 DEF, 456 GHI). If you prefer consistent sorting, you may optionally zeropad your codes (for example: 001 ABC, 023 DEF). This is a visual preference only—Entity Number values themselves can be 1–20 characters and do not require padding for Cloud to accept them.
-
Select Save.
The entity is added and is displayed on the Entities page.
Tagging entities
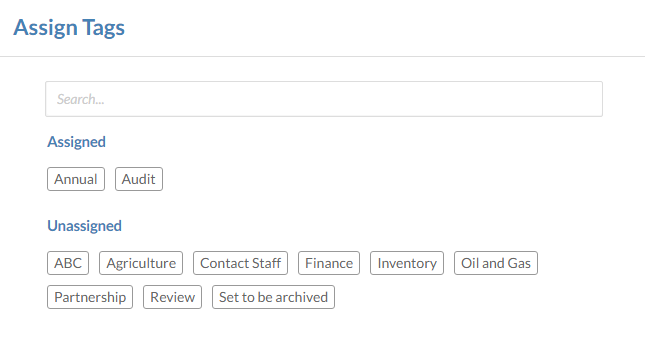
Assigning Tags helps to categorize and identify people, files, and entities in your organization. You may want to tag entities according to their industry, organizational structure, or the type of work your organization performs for them.
To tag entities:
-
Ensure that you have the Staff Editor role or equivalent privileges.
-
From the Cloud menu, select Entities.
-
Select the entity you want to edit the tags for. In the entity's menu, select Tag (
 ).
).
-
Choose appropriate Unassigned tags to assign them.
-
Select Save to apply your changes.
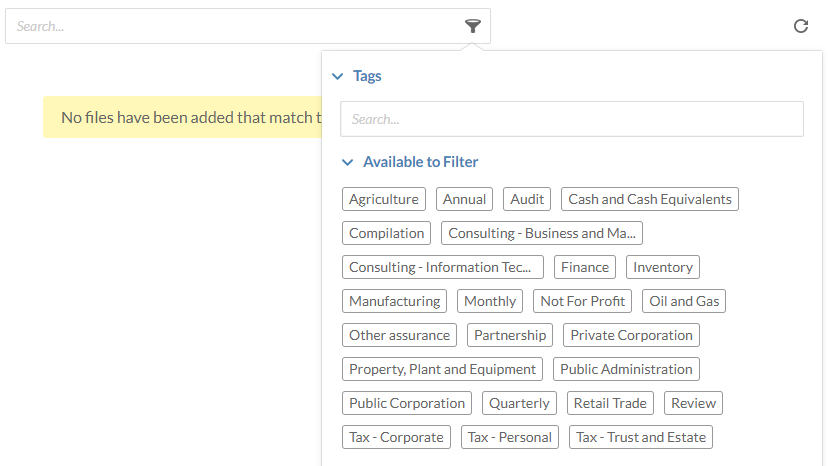
After you've assigned tags to an entity, you can filter entities based on their tags from the Search bar.
Categorizing client entities
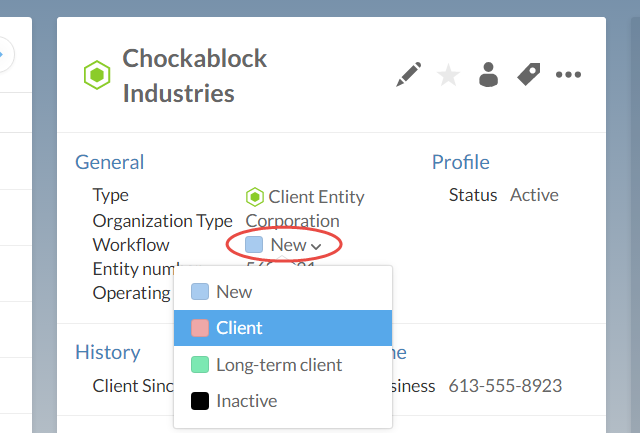
If you have created a workflow for client entities, you can use that workflow's stages to categorize your client entities appropriately. For more information on creating workflows, see Create custom fields, tags and workflows.
You can also categorize entities using the entity status. Both workflow stages and entity statuses are informational only and have no impact on what actions a staff member can take in the entity.
Before you start, ensure you have the Entity Access role or equivalent rights to the entity.
To set an entity's workflow stage:
-
From the Cloud menu (
 ), select Entities and then select the entity you want to edit.
 -
Select the entity's current workflow stage and then select the workflow stage you want to assign to the entity.
To set an entity's status:
-
From the Cloud menu (
), select Entities and then select the entity you want to edit. -
Select the Edit (
 ) button.
 -
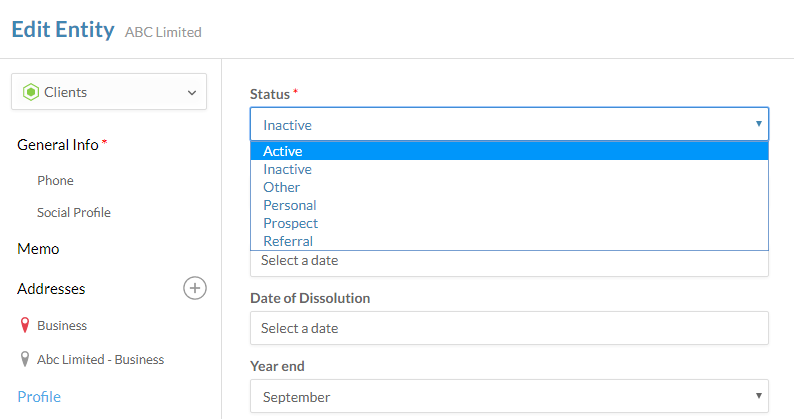
In the Edit Entity dialog, select the Profile tab.
-
Select the appropriate status from the Status dropdown.