Manage the engagement documents
While working on your engagement file, you will complete many work programs, create letters, and submit client requests. All of the documents involved are displayed on the Documents page.
Documents are grouped by the engagement stage they are completed in. Beside each of these high-level groupings a progress meter displays how much work has been completed for each stage as a percentage. Completion percentage is determined by how many documents have been reviewed and signed off.
Within these high-level groupings, documents are also organized into folders. Folder names have a different font color, and you can select the folder name to hide or display all of the documents under it.
Documents are displayed contextually: as you enter information in the planning documents, other documents relevant to your file will be added to the Documents page.
Create or upload a document
To add a document to the client file, select the Add Document icon (![]() ) beside the high-level grouping. This button is also displayed when you hover over folders, enabling you to add documents directly to the proper folder.
) beside the high-level grouping. This button is also displayed when you hover over folders, enabling you to add documents directly to the proper folder.
You can choose one of the following options:
-
Create a new document - choose one of the built-in document types to add it to your client file. You can also create new folders to organize your documents page, or create placeholder documents to represent files that you will add later in the engagement.
-
Upload a file - upload a file from your computer to the engagement file. See System requirements for information on the supported MS Office versions.
Note: The maximum upload size for files is 500 MB per file.
-
Copy a file from Cloud - add a copy of a file from the client entity in Cloud to the engagement file.
You can also drag and drop files from your computer to a folder or placeholder to upload them.
Note: You cannot use drag and drop to upload files from your computer to a phase.
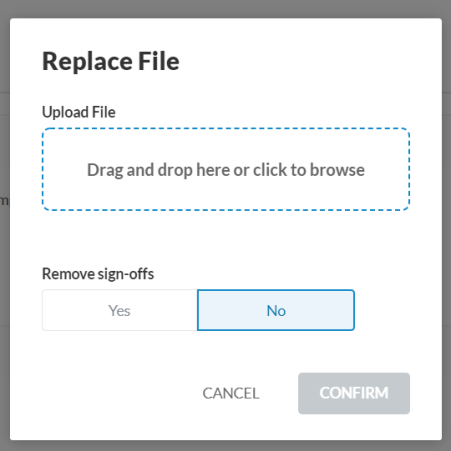
Replace external documents
You can replace external documents, such as PDFs, Word files and Excel files, that you have previously uploaded to the engagement.
Note: Document versioning is not supported (no version history is retained).
To replace an external document:
-
From the top menu, select Documents.
-
Go to the document you want to replace.
-
To replace the file, you can:
-
Drag and drop the new file from your computer onto the old file.
-
Use the More actions (
 ) menu to upload the file.
-
Select More actions (
) | Replace. -
Select the file to be uploaded, then select Open.
-
-
-
Select whether to remove pre-existing signoffs or retain them.
-
Select CONFIRM.
Rearrange documents
You can move documents to different folders and subfolders to better organize your engagement content. The order of documents within folders and subfolders is determined automatically based on the document name and number.
You can either move documents individually or in bulk.
To move an individual document:
-
Locate the document you want to move and select More actions (
 ) | Move.
 -
Navigate through the Phases, and select where you want to move the document.
- Select the desired folder, then click Move.
You have moved the document to a different folder.
Note: You can also drag and drop documents to rearrange them. Select a document and drag it into the desired location.
To move documents in bulk:
-
On the Documents page, select More actions (
) | Bulk actions.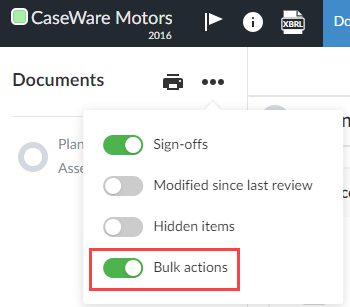
-
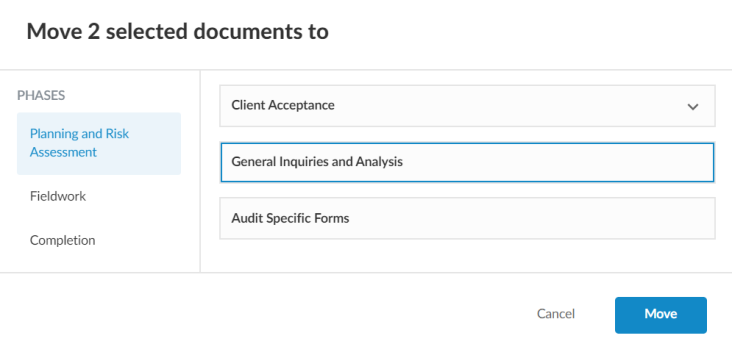
Use the check boxes to select the items you want to move then select Move documents.
-
In the dialog, select where you want to move the documents to, then select Move.
Rearrange folders
You can move folders and subfolders to better present and organize the documents in your engagement.
To move a folder or subfolder:
-
Go to the folder or subfolder that you want to move and select More actions (
 ) | Move.
 -
Select a blue arrow (
 ) to move the folder or subfolder to the location that the arrow marks.
_649x429.png)
-
Click Move to make the changes.
Hide a document
If your engagement file includes any documents that you will not need to complete, you can hide them on the Documents page.
To hide a document:
When you hover your cursor over a document, the visibility icon (![]() ) is displayed. Select visibility (
) is displayed. Select visibility (![]() ) to display the visibility pop-up.
) to display the visibility pop-up.
You can view the document's visibility conditions (if available) at the pop-up. Select Hide to hide the document.
Once a document is hidden, it is no longer displayed on the Documents page for any users in the current engagement.
If you need to review hidden documents, select the More actions button on the Documents toolbar, then select the checkbox beside Hidden Items.
Note: You can only display hidden items in an unlocked engagement. To unlock an engagement, select the entity name at the top left corner of the page to open the Engagement Properties dialog, then select Unlock.
Once hidden items are being displayed, you can make hidden documents visible by selecting the visibility icon and then selecting Show.
Delete documents
You can delete documents either individually or in bulk. Note that you can only delete documents created in the engagement, not documents that are part of the default content that comes with your product or that were added to the template by firm authors.
To delete an individual document, a folder or a subfolder, go to the item and select More actions () | Delete.
Note: If you delete a folder or a subfolder, all the items in it are moved outside any folder or phase.
If you want to delete multiple items at once, you can use the Bulk actions option. Note that only documents, external files, links and placeholders can be deleted using Bulk actions, not folders and subfolders.
To delete documents in bulk:
-
On the Documents page, select More actions (
) | Bulk actions.
-
Use the check boxes to select the items you want to delete then select Delete.
-
In the confirmation dialog, select Delete.
Add a link in the engagement file
You can add an external link to an engagement file to include help videos for your clients or other supplementary information.
To add a link in the engagement file:
-
Open the engagement file.
-
Select Documents from the top menu.
-
Select the Create a document icon (
 ), then choose Link.
 - Enter an identifier for the link in the Identifier field.
-
Enter a title for the link in the Name field.
-
Enter the web address for the link in the URL field.
-
Select Save.
The Document Properties dialog displays.
If you do not add a title, a default title for the link displays in the engagement file.
You can select Edit Visibility to modify the visibility conditions for the links you add.
Create and review issues
You can create notes for particular documents directly from the Documents page. When you move your cursor over a document line, the Issues icon (![]() ) is displayed.
) is displayed.
To add an issue for a document in the engagement:
-
Select the Issues icon (
 ).
). -
In the text box, enter a description for your issue.
-
Select the issue type from the drop-down menu at the bottom of the editor.
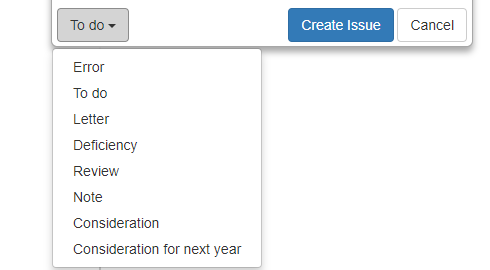
-
Select Create Issue.
You have created a new issue for the selected document.
If members of your engagement team have created notes on documents, the total number of added notes displays at the note icon as shown below. Select the note icon to review the notes and take the appropriate action (Reply, Resolve, or Clear).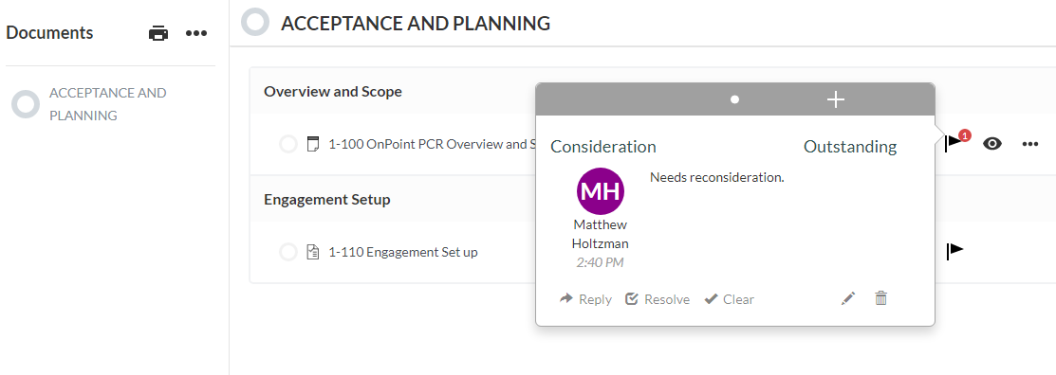
Sign off on a document
You can sign off on documents directly from the Documents page. When you hover over a document, sign-off icons that indicates its status display next to the document.
![]()
Roles that have not yet been signed off display as a gray circle with a pencil icon. Preparer roles that have been signed off display with the user’s initials and a blue pencil, while reviewer roles that have been signed off display with the user’s initials and a green checkmark.
![]()
The number of sign off icons displayed depend on how many sign off roles are assigned to the document.
You can hover over the sign-off icon to view when the document was signed off. If you select the icon you can sign off on the role or remove a previous sign off in the popover.

You can also sign off multiple documents at once using Bulk actions.
To sign off documents in bulk:
-
On the Documents page, select More actions (
) | Bulk actions. -
Use the check boxes to select the items you want to sign off.
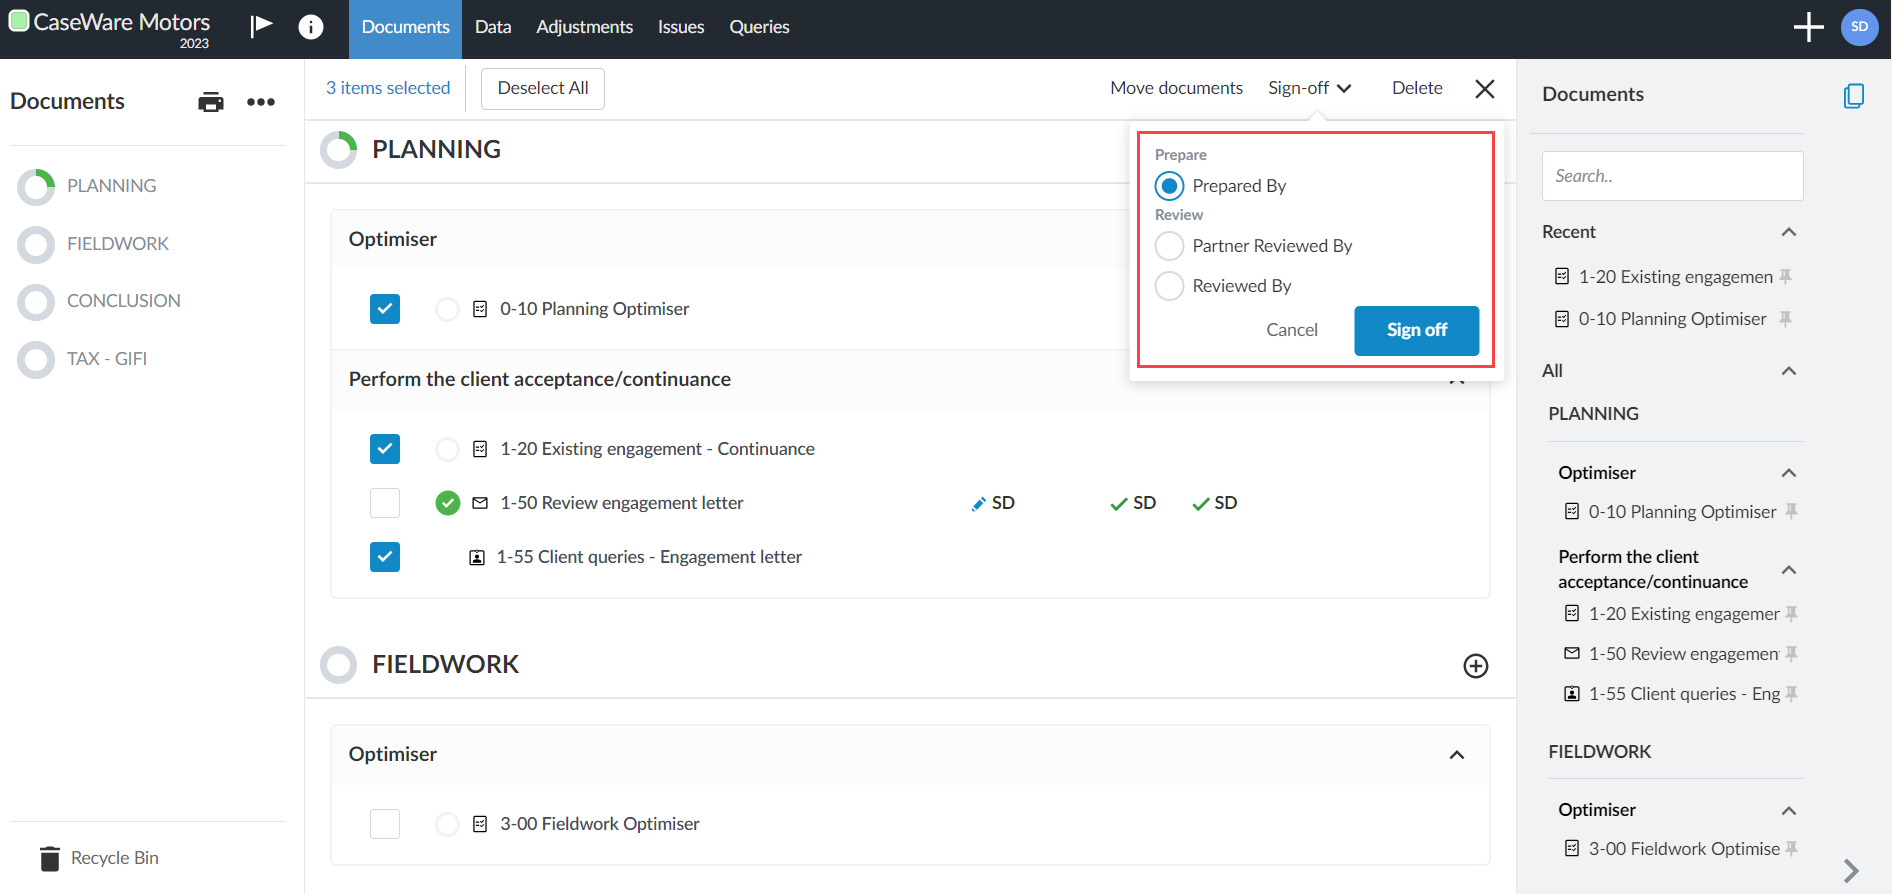
-
Select Sign off, then select which role you’re signing off on and select the Sign off button.
-
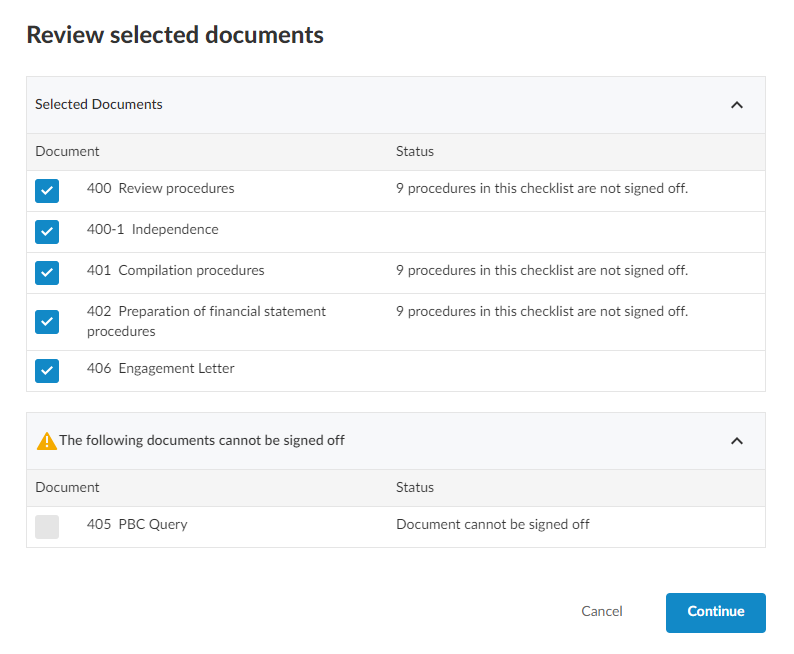
In the dialog, you can review the documents before you complete sign off.
The Status column in the Review select documents dialog informs you of additional information you may want to be aware of before you sign off on the documents. For example, if you are signing off on a checklist but not all the procedures have been signed off on, the Status column displays this information. You will also be informed if they have selected any documents that cannot be signed off on.
-
If there are any documents you do not want to sign off on after reviewing their status, deselect the check boxes for those documents.
Note that if you don’t have permission to sign off on certain documents, a warning message appears to inform you that you cannot sign off on the documents.
-
Select Continue to complete sign off.
Save a copy of a document to Cloud
You can save a copy of a document to Cloud to make a copy that other staff can access outside of the engagement.
To save a copy of a document, go to the desired document and select More actions ( ) | Save to Cloud.
A PDF version of the file is created and automatically added to the Files page for your client entity in Cloud.
Locate and access documents in the engagement file
You can access documents related to each task on the right panel of the engagement file. Similar to the Documents page, the right panel allows you to access all your documents grouped by engagement stage. Within the groups, documents are also organized in folders. When you open a document, your documents remain displayed in the panel for easy access.
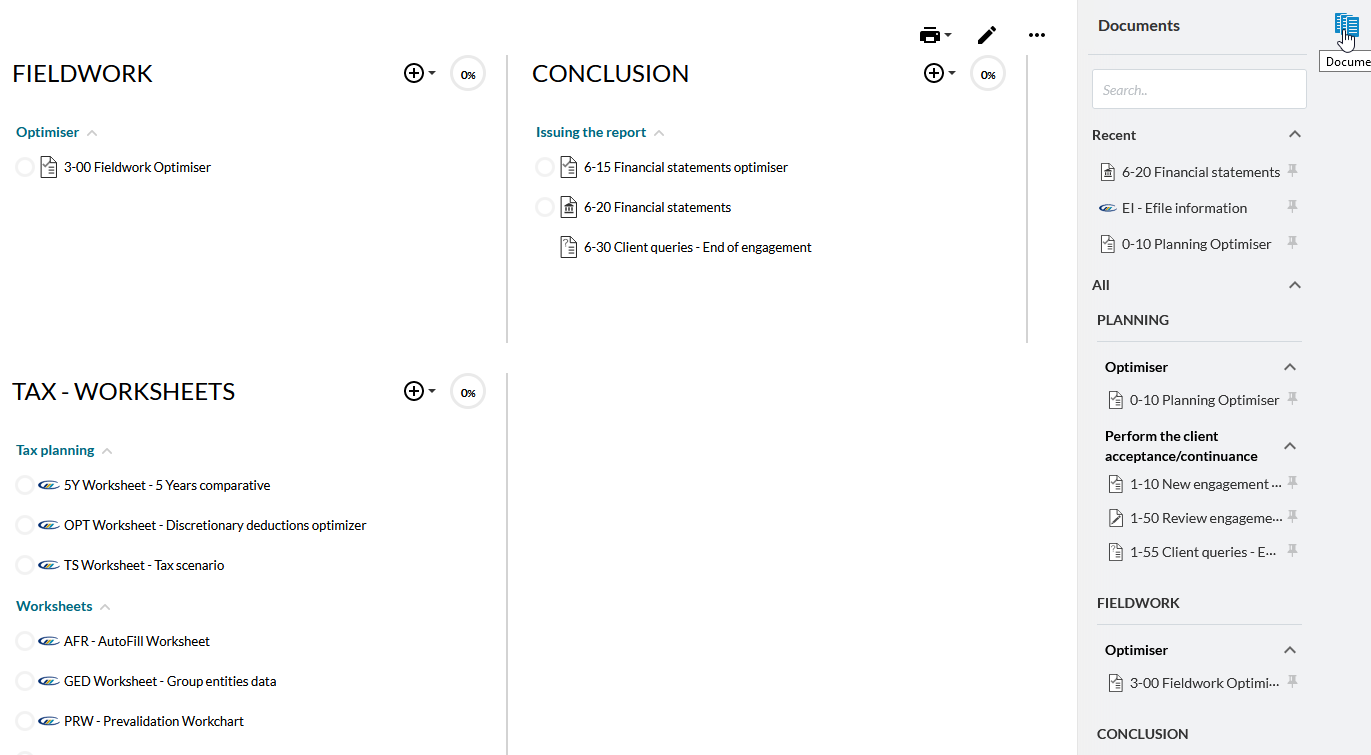
Additionally, you can use the following features in the right panel to help you locate specific information or documents for your engagement work:
-
Recent - Access documents that you've opened recently. If you use one of the recent documents often while completing an engagement, you can select the pin icon (
 ) beside it to pin the document to the top of the panel for convenient access.
 -
Search - Search for visible documents based on the document name.
You can open and close the right panel by selecting the arrow (![]() ) at the bottom or the (
) at the bottom or the ( ) icon at the top. Within the right panel, you can also expand and collapse the listed documents as well as the panel's other features by selecting the arrows (
![]() ) beside them.
) beside them.
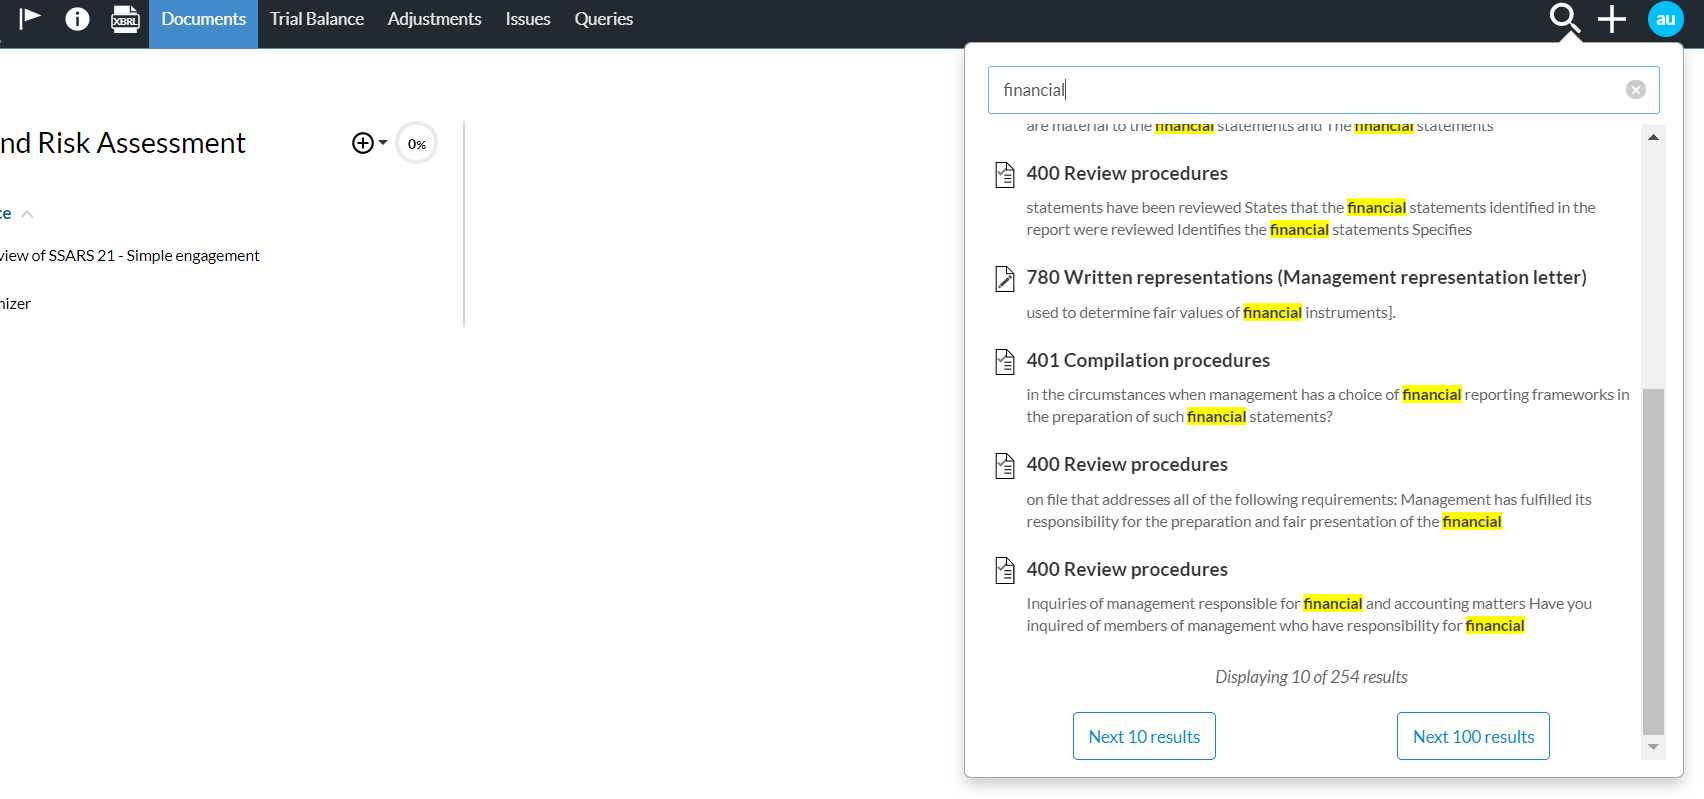
In addition to the document panel, you can use the search option in the top menu to locate documents. This option allows you to:
-
Search for documents based on the document name, number and content
-
Search for other content, such as risks, controls and adjustments.
Matching results display as you enter a keyword for search.
Note: Hidden documents and content are not included in search results.
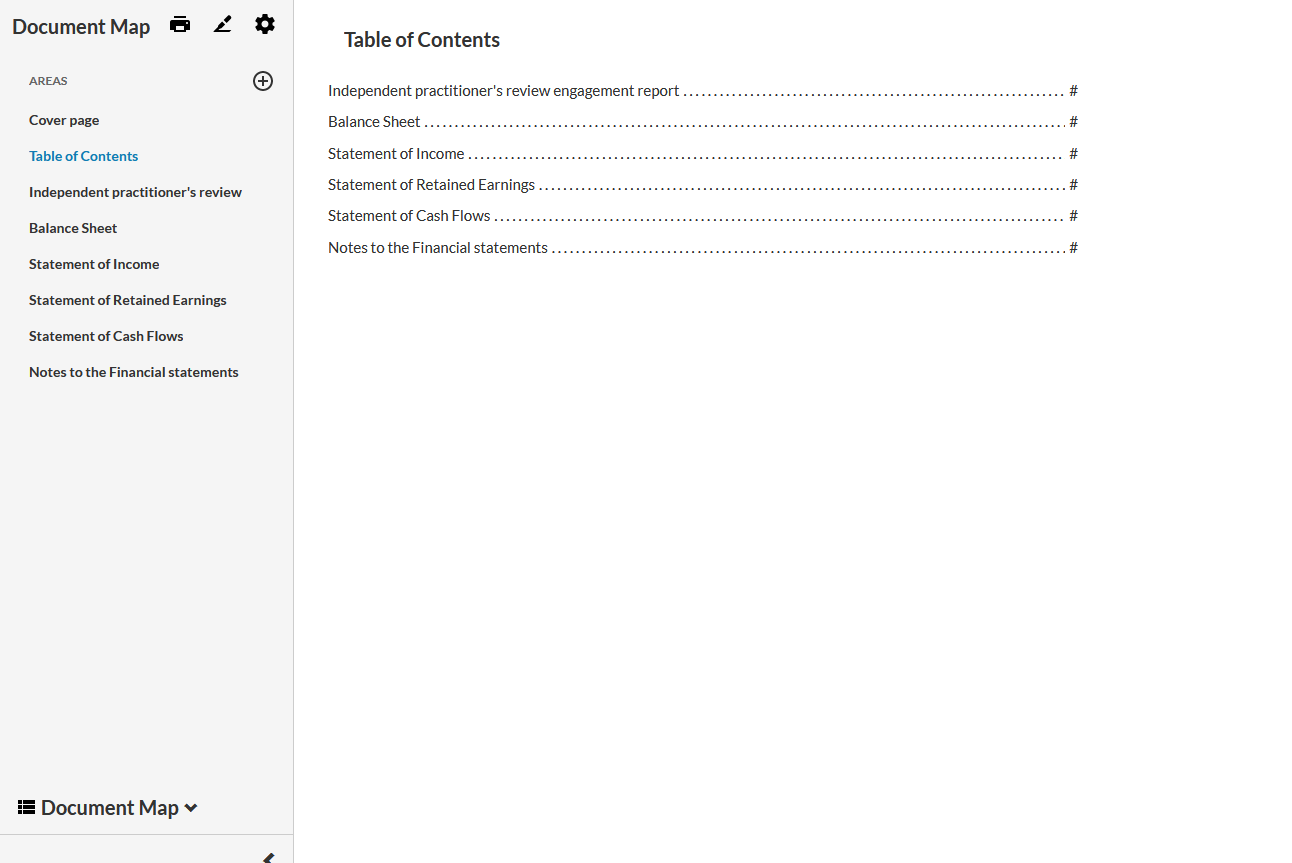
Once you've opened a document, you may see a list of its sections on the Document Map left panel, depending on the formatting applied to the document. You can select a section to jump directly to it. This saves you from having to scroll through a lengthy document, such as the financial statement, to view the relevant section.
Set up Bulk Print
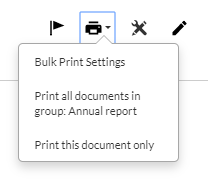
In the Documents page, you can use the Print (![]() ) | Bulk Print Settings option to merge and print the documents as a single PDF file.
) | Bulk Print Settings option to merge and print the documents as a single PDF file.
To create a document group:
-
From the Documents page, Select Print (
 ) | Bulk Print Settings.
The Bulk Print Settings dialog displays.
-
Select + NEW DOCUMENT GROUP, then enter a name for the new group.
Tip: You can select (
 ) to delete a group.
 -
Select + ADD DOCUMENT.
A list of the available documents displays.
-
Select a document from the list to add to the group
Note: You can include the same document in more than one group.
Tip: You can select and drag (
 ) to reorganize or select (
 ) to remove a document from the group. You can only rearrange documents in groups that you define. Firm authors cannot rearrange documents in groups predefined by primary authors. Users cannot rearrange documents in groups predefined by the firm authors or primary authors.
 -
Once you're done, select Close.
The document group displays in the Print (
) drop-down. It also displays in each document within the group.