Add review notes (issues)
Review notes can be added to an engagement workspace (entity) or to documents, checklists and other engagement artifacts in an engagement file (online and desktop). Review notes can signal to the engagement team that additional work is required on a document or that specific tasks must be completed for an engagement.
Note: In Caseware Cloud, review notes are referred to as tasks and are added to the engagement workspace (entities). In an engagement file (such as Working Papers), review notes are referred to as issues.
Best Practice: It's better to create a review note (issue) from within the engagement file so that your team can have context as to which document, checklist, line or engagement requires attention. For general review notes, consider using the tasks feature in the engagement workspace.
Add review notes to a client entity
Adding tasks to an engagement workspace enables you to define all the work that is required for a particular engagement. As the engagement team resolves tasks, you can track the engagement progress and assess when the expected completion date for the engagement will be.
To create a task:
-
Ensure you have the Entity Access role or equivalent rights to the entity.
-
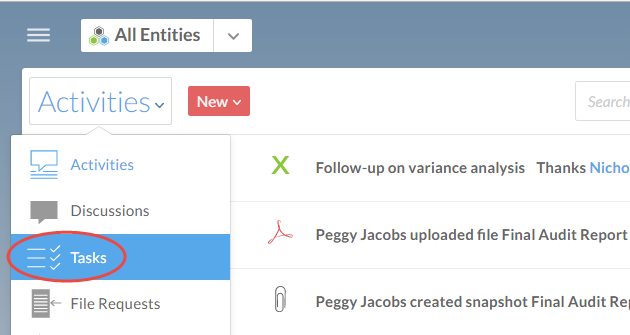
From the Cloud menu, select Activities.
-
From the Activities drop-down, select Tasks.
-
Select New from its menu.
-
Select an entity for this task and at a minimum complete the Subject line.
-
(Optional) Select an assignee from your staff list and specify a due date.
-
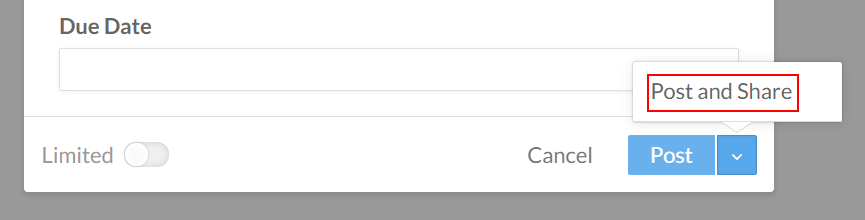
Select Post to create your task.
If you have attached files to the task, select Post and Share to ensure the assignee can access the files.
Review your assigned review notes
By applying a filter to the Activities page, you can view all open Tasks that are currently assigned to you.
To view tasks assigned to me:
-
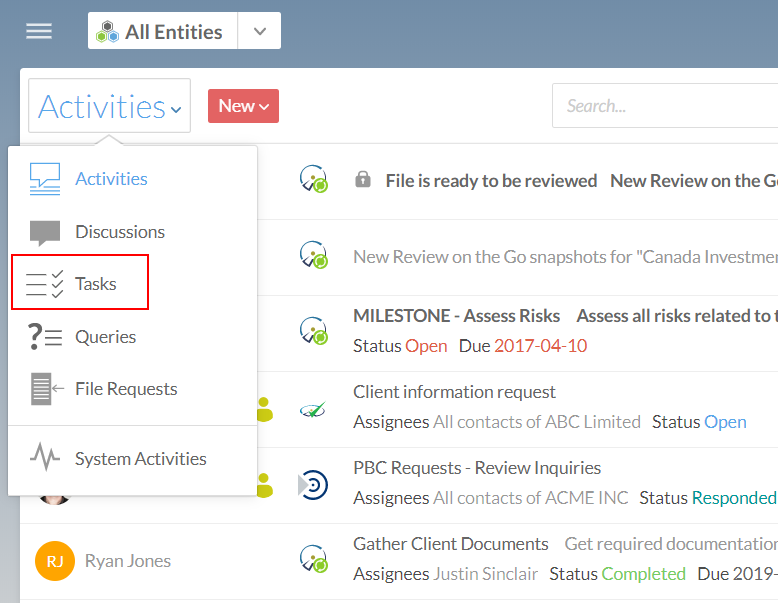
From the Cloud menu, select Activities.
-
From the Activities drop-down, choose Tasks.
-
Select Filter (
 ) | Assigned To | Me.
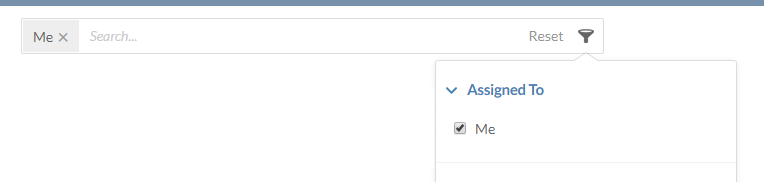
-
To only view currently open tasks, select Filter (
) | Status | Open. This will add a secondary filter so that only open tasks assigned to you are displayed.
A list of your assigned tasks is displayed.
Document issues in the engagement file
You can add issues to a specific document, a specific item in a document or globally (for the entire engagement).
To add a global issue for the entire engagement:
-
From the top menu, select the Add Issue icon (
 ).
).A pop-up displays on the page showing a text box with a formatting toolbar.
-
Enter a description for your issue in the text box.
If you want to tag other staff members to view the issue, you can enter the @ symbol and then select their name from the list. You can also select any contact who has access to the engagement.
-
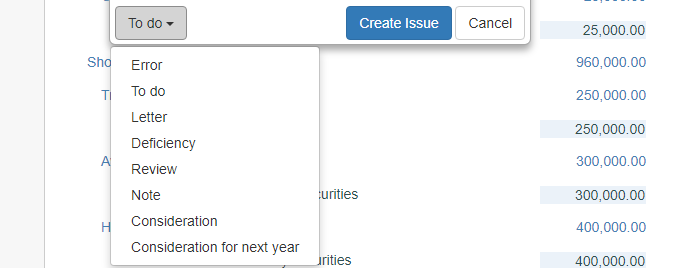
Select an issue type from the drop-down menu at the bottom of the editor.
-
Select Create Issue.
The Issues icon (![]() ) is also available at most items in engagement documents. You can follow the same steps to record issues at a specific document item. For example, a procedure in a checklist.
) is also available at most items in engagement documents. You can follow the same steps to record issues at a specific document item. For example, a procedure in a checklist.
To add an issue in a document item:
-
Open a document in your engagement and select the item that you want to record an issue for.
In this example, we are adding an issue in a trial balance line.
-
Select the Issues icon (
).A pop-up displays on the page showing a text box with a formatting toolbar.
-
Enter a description for your issue in the text box.
If you want to tag other staff members to view the issue, you can enter the @ symbol and then select their name from the list. You can also select any contact who has access to the engagement.
-
Select an issue type from the drop-down menu at the bottom of the editor.
-
Select Create Issue.
View a summary of issues
All issues that are outstanding, resolved or cleared are accessible on the Issues report. You can use this report to determine what issues currently require review, or to view the history of review on a document.
Note: It is recommended to clear an issue if you want to retain the history of the issue. If you delete an issue, it is removed from the engagement file and the Issues report.
To view a summary report of issues and review notes:
From the top menu, select Issues. The Issues report is displayed.
The report displays the following information for each issue in your current engagement:
-
Issue type
-
Description of the issue
-
Replies from engagement team members
-
Status changes
-
Current status
At the top of the report, issues are summarized by type. You can use the drop-down menus to filter the report by issue type and status.
The record of current and historical review notes is displayed. You can change the status of outstanding issues (Resolve, Clear, Delete) or edit them in this view.