Import the client's data from a CSV or Excel file
You can import your trial balance directly from a CSV or Excel file into your engagement.
There are several ways to import trial balance data into your engagement. To learn more about other methods, refer to: Import and manage data.
You would import using a CSV or Excel file, if the accounting software package you have is not supported by any of our import utilities. You can export your client data to a CSV (comma-separated value) or Excel file and then import this file to your engagement.
The format of the file can be either .xlsx or .csv and must meet the file requirements for successful import. To learn more, see Prepare a CSV or Excel file to import transactions or subledger data and Date format.
Note: If you are importing a trial balance containing dimensions, see Set up and import a trial balance containing dimensions for more information. This feature may not be available in your product.
After you upload the file, you need to assign the data fields in the file to predefined target fields in a Caseware dataset, to complete the import. To learn more about the dataset options, see Dataset types described. Note that some dataset types may not be available in your product.
Date format
In fields where a date is required, date format must be properly set:
Day
D: One digit for days below 10 (for example, 2 for the 2nd day of the month)
DD: Two digits (for example, 02 for the 2nd day of the month)
DDD: Day of the year (for example, 365 for December 31st)
DDDD: Three-digit day of the year (for example, 002 for January 2nd)
Month
M: One digit for months below 10 (for example, 4 for April)
MM: Two digits (for example, 04 for April)
MMM: Three-letter abbreviation (for example, Apr for April)
MMMM: Full month name (for example, April)
Year
YY: Two digits (for example, 19 for 2019)
YYYY: Four digits (for example, 2019)
Time
H HH: Hours in 24-hour time (for example, 0 for midnight, 23 for 11 PM)
h hh: Hours in 12-hour time used with AM/PM (for example, 1 for 1 AM, 12 for noon)
k kk: Hours in 24-hour time from 1 to 24 (for example, 1 for 1 AM, 24 for midnight)
a A: Post or ante meridiem (for example, am for morning, pm for afternoon)
m mm: Minutes (for example, 0 for the top of the hour, 59 for the last minute of the hour)
s ss: Seconds (for example, 0 for the start of the minute, 59 for the last second of the minute)
S SS SSS ... SSSSSSSSS: Fractional seconds (for example, 0 for no fractional second, 999999999 for the last fractional second)
Z ZZ: Offset from UTC as +-HH:mm, +-HHmm, or Z (for example, +12:00 for 12 hours ahead of UTC)
Example Transaction
Let's say we have a transaction that occurred on April 2, 2019, at 1:30:45 PM with 123 milliseconds, and the UTC offset is +02:00. Here’s how it would look in different formats:
-
Date: 2/4/19 or 02/04/2019
-
Time: 13:30:45.123 +02:00
Import client data
To import client data from an Excel or CSV file:
-
Go to the Data page. The Data page opens to the Datasets tab.
-
If you’ve previously imported data, select Add data.
-
If your engagement is consolidated and has internal subsidiary entities, select the entity for which you want to import data from the list.
-
Under DATA FILE UPLOAD, browse or drag the CSV or Excel file to the file upload area. If the file has already been uploaded to the Documents tab, select Import from Documents, then select it from the list of available documents in the engagement.
-
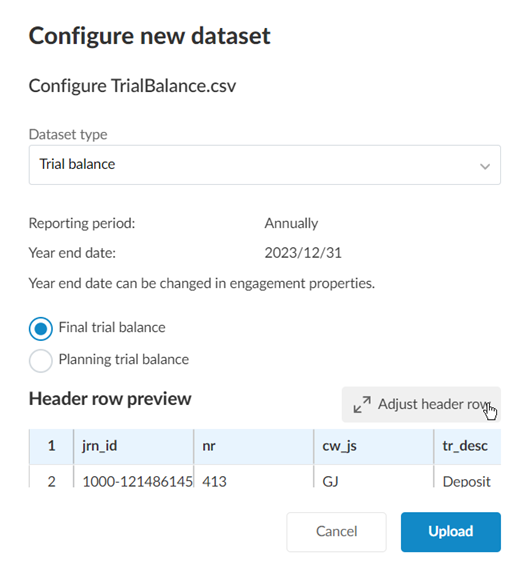
In the Configure new dataset dialog, select the Dataset type from the dropdown.
To learn more about the dataset options, see Dataset types described. Note that some dataset types may not be available in your product.
If you are importing a trial balance, in Dataset type, select Trial balance. If planning balances are enabled in your product, select whether you are importing the Final trial balance or a Planning trial balance.
-
Review the automatically selected header row to ensure the correct header has been selected. If you want to manually select the header row, select Adjust header row and select the correct row.
If you are importing a CSV file and want to change the delimiter to something other than the default comma (,), select Adjust header row and select the correct delimiter.
Note: Both the automatic header detection and manual header selection only take into account the first 30 rows of the imported file. Rows beyond the first 30 rows cannot be selected as a header.
-
Select Upload.
-
On the Datasets tab, click Configure to assign columns in the imported data to Caseware fields.

You can assign columns automatically or manually:
To autoassign columns:
-
After importing your trial balance, from the Assign Fields window, select Assign columns. Columns are autoassigned.
-
Review the autoassignment. Make any adjustments as necessary.
-
Columns that are autoassigned with the use of AI will have headers marked with a symbol to differentiate those that are manually assigned or those that are unassigned.

Note: AI-column autoassignment supports all English-language trial balance data imports. AI-column autoassignment also works on non-English trial balances, but the results will not be as accurate. Always review the column assignment before importing any data.
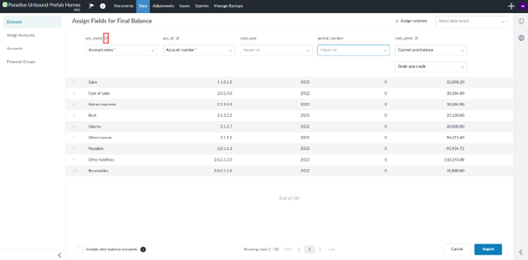
To manually assign columns, on the Assign Fields page,
-
Use the dropdowns to manually assign a field to each column in the imported file.
-
Use the Select data layout dropdown to apply a previously saved data layout and automatically assign the fields. To learn more, see Save a data layout.
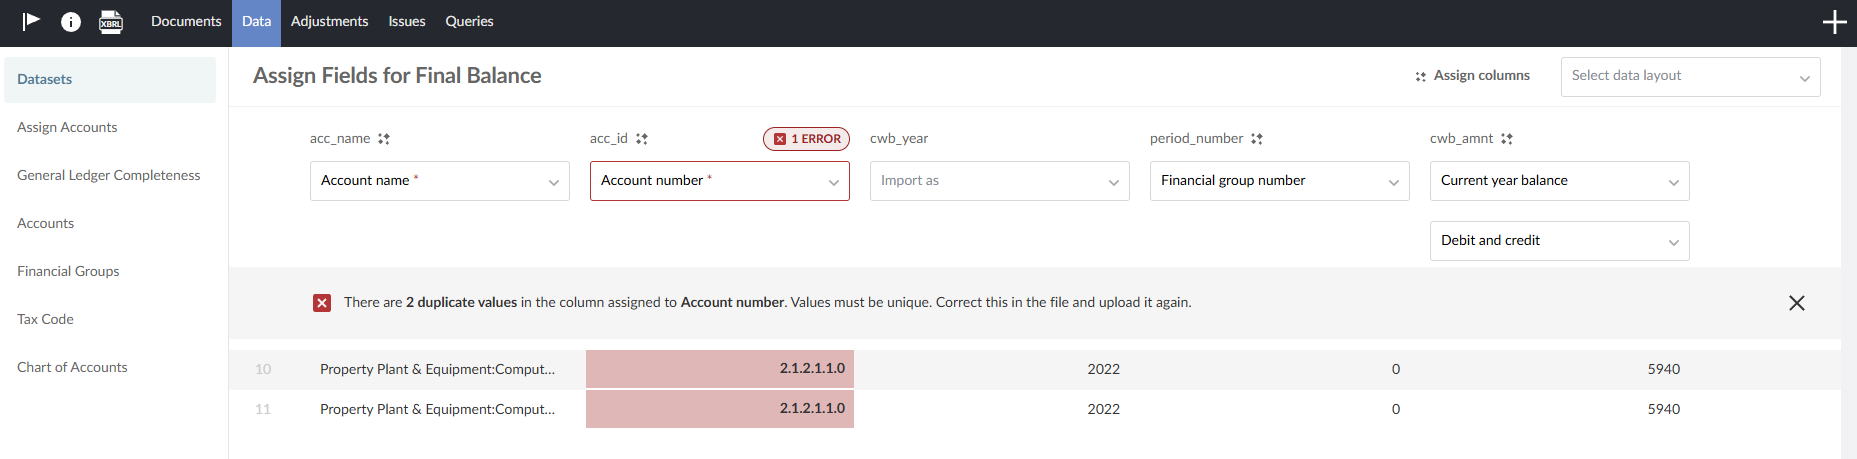
If there are any errors, an indicator displays for the columns that contain the errors. You can then select the indicator and the error to view more information about the error and the specific rows that have been flagged.
-

-
If you are importing a trial balance, select Include zero-balance accounts if you want to include accounts with a balance of zero in the import.
-
Select Import.
To view the imported data, click View data next to the dataset you imported.
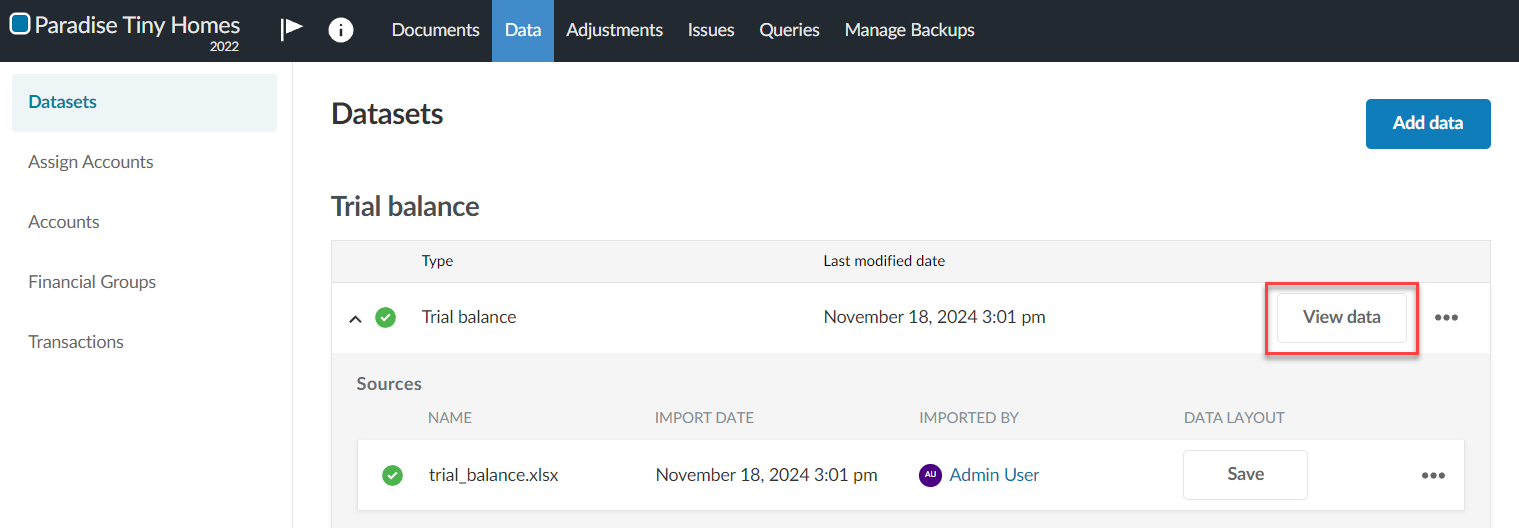
If you imported a trial balance, the Accounts tab appears. If general ledger or any of the subledgers, a new page appears displaying the dataset.
By default, all the columns in your dataset display. Click Columns to deselect those you want to hide.
Click Filters to filter the data displayed in the dataset.
See View the client's general and subledger data, for more information.
Reimport the trial balance
After you complete the import, you can reimport the trial balance data at any point in time or import a new trial balance:
When you reimport data,
-
Account names and balances will be overwritten with the reimported data for accounts that already exist in the engagement
-
Any new accounts in the reimported data that do not already exist in the engagement will be added to the engagement.
-
Accounts that exist in the engagement that are not included in the reimported data will be deleted, unless:
-
The existing account has a balance for a period, balance type or other entity that is not included in the reimported data. For example, if the existing account has a prior year balance but the reimported data only includes data for current year balances, the existing account will not be deleted.
-
The existing account has a corresponding adjustment, issue or annotation.
-
-
Any adjustments, issues and annotations made prior to reimport will remain after the data is reimported.
Note: If you reimport the data from a different source (from a different file name, for example) and there are accounts in the existing data that are not in the new data, the balance of these existing accounts is set to 0.
Note: In engagement files created from carry forward, account balances from prior years are not overwritten or deleted by the new data from reimport.
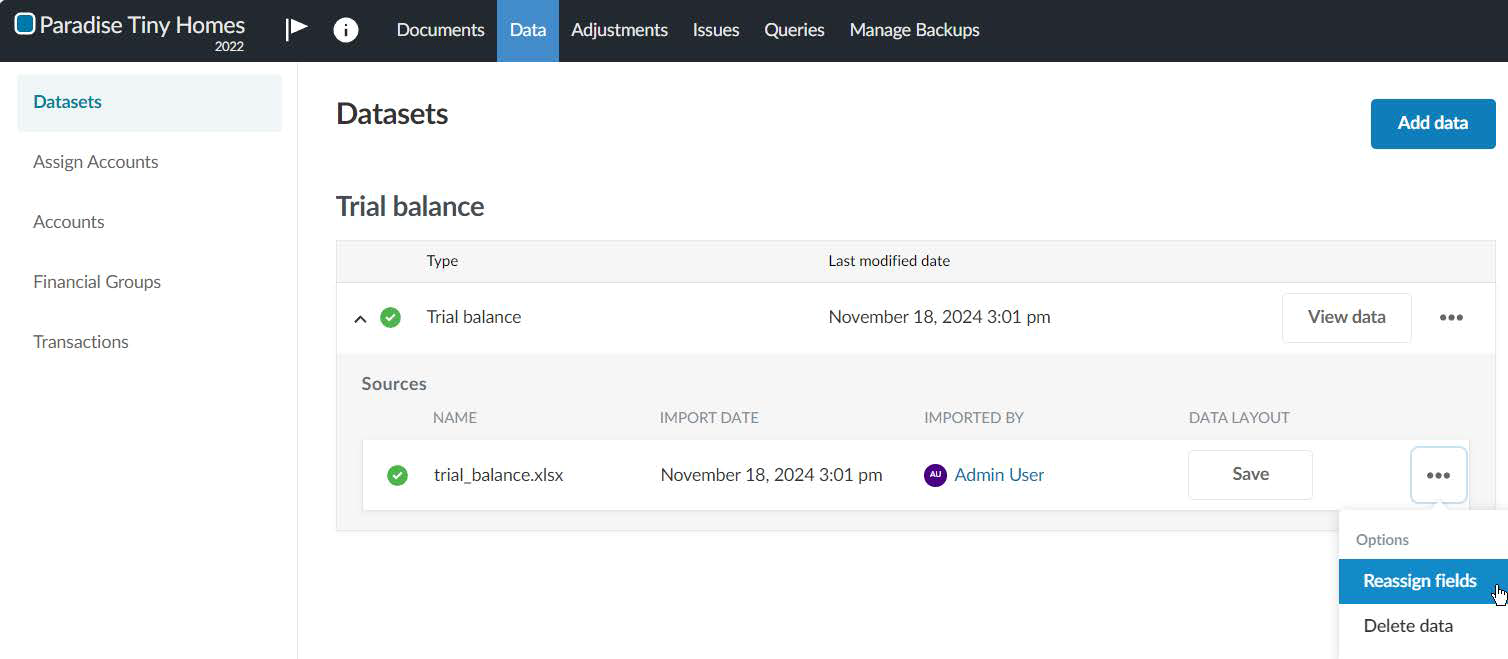
To reimport the trial balance:
-
Reassign the fields in the trial balance. Select Options (
 ) | Reassign fields on the Datasets tab on the Data page.
-
In the dropdowns, make any necessary changes in how fields in the data file are assigned to Caseware fields. Select Reimport.
Import a new trial balance
In an engagement where you have already imported a trial balance, you can import a new trial balance. Delete the existing trial balance and then proceed to import the new trial balance.
To import a new trial balance:
-
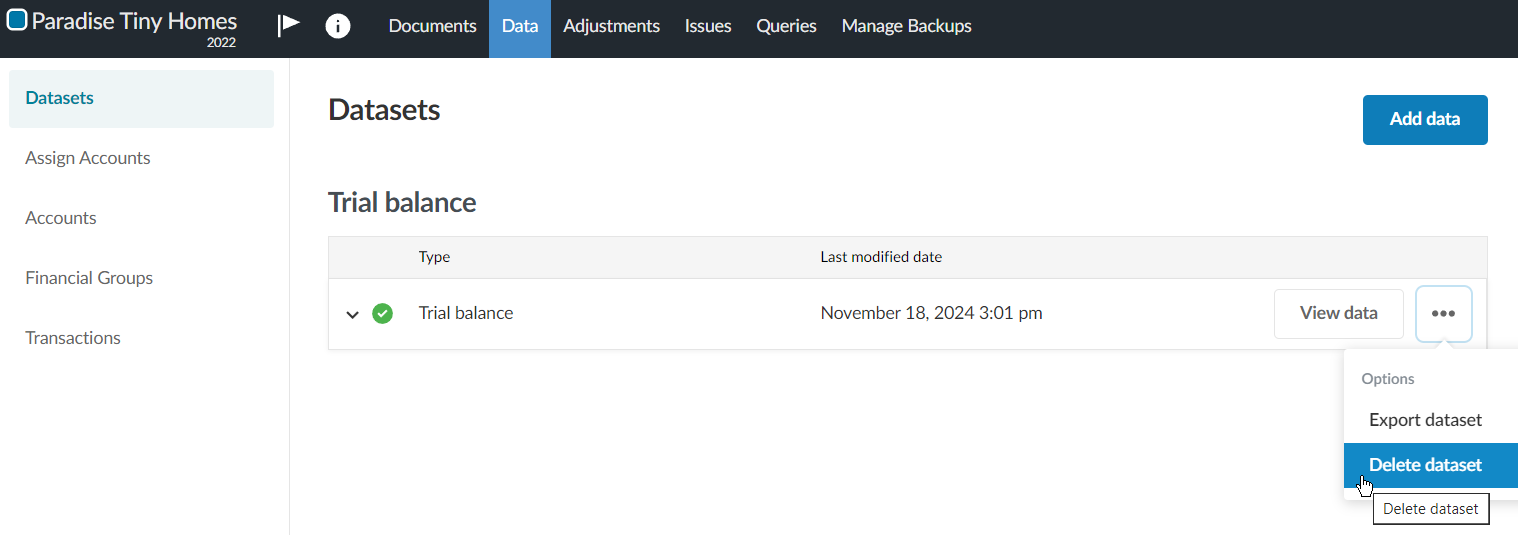
Delete the existing trial balance. Select Options (
) | Delete data on the Datasets page.
-
Proceed to import the new trial balance. Under DATA FILE UPLOAD, browse or drag the CSV or Excel file to the file upload area.
Resolve a partial trial balance import
When you import or reimport a trial balance, the system overwrites the balances of any existing accounts in the engagement that have the same account number as accounts in the imported file — for example, accounts from a previous import or a user-entered account.
The Partial data imported indicator appears only if some accounts fail to import — for example:
-
Due to a technical duplication or other validation issue.
-
Because of a system error such as a timeout.
Note: This article does not address cases where a fresh import file (for example, CSV or Excel files) contains duplicate account numbers within the file itself. To learn more about how to resolve duplicate account numbers in the same import file, refer to Resolve duplicate account numbers in the same import file.
To resolve a partial import:
-
On the Datasets tab, select the Partial data imported indicator.
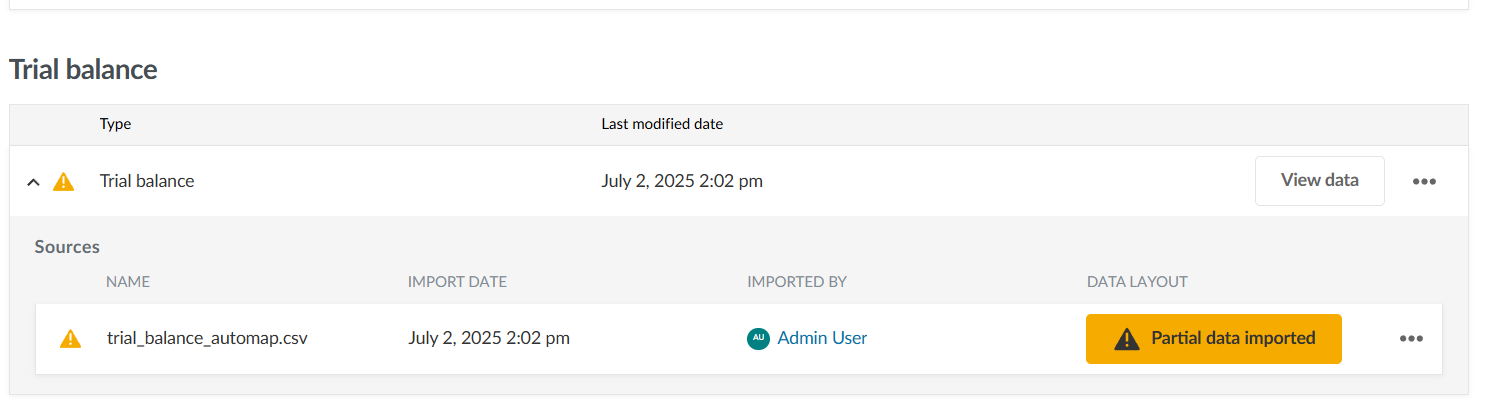
A Trial balance data partially imported dialog appears.

-
Choose one of the following options:
-
Export a list of duplicate accounts that were not imported, then select Accept to continue with the import.
-
Accounts with unique numbers are imported regardless of the option you choose.
-
Warning: Once you select Accept, you can no longer export the list of duplicate accounts.
-
Select Cancel to close the dialog.
-
You can correct the duplicate accounts in the source file and reimport the trial balance.
-
Accounts with unique numbers are imported regardless of the option you choose.
-
If you reimport after correcting duplicates, any existing accounts that are also in the reimported file are overwritten.
-
-
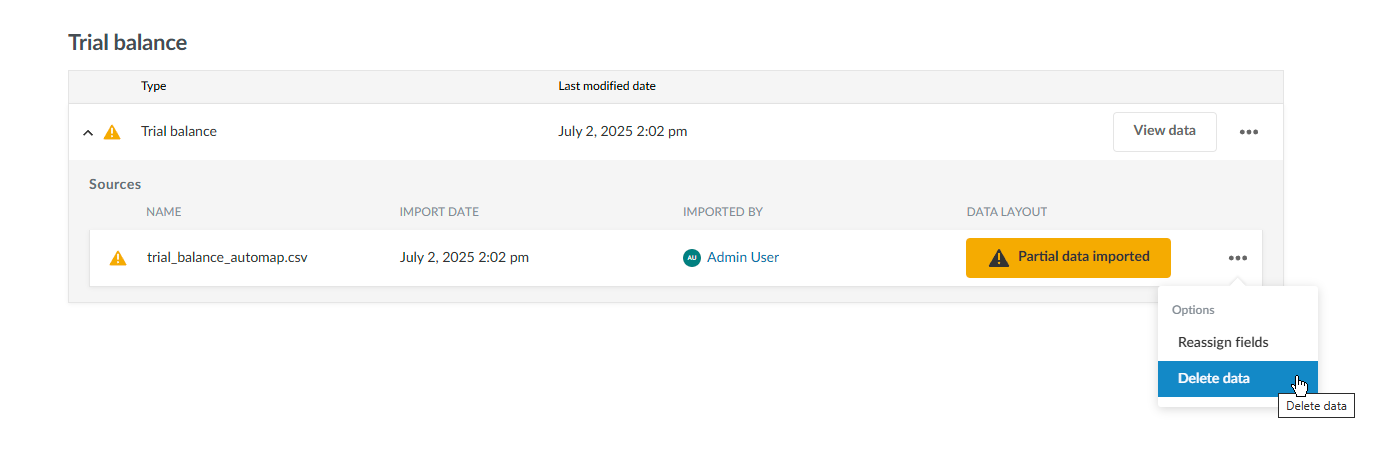
To delete the partial import:
-
On the Datasets tab, select the View more actions (
 ) menu next to the imported file.
 -
Select Delete data.
-
After deletion, correct the duplicate account numbers in the source file and reimport the trial balance.
Resolve duplicate account numbers in the same trial balance import file
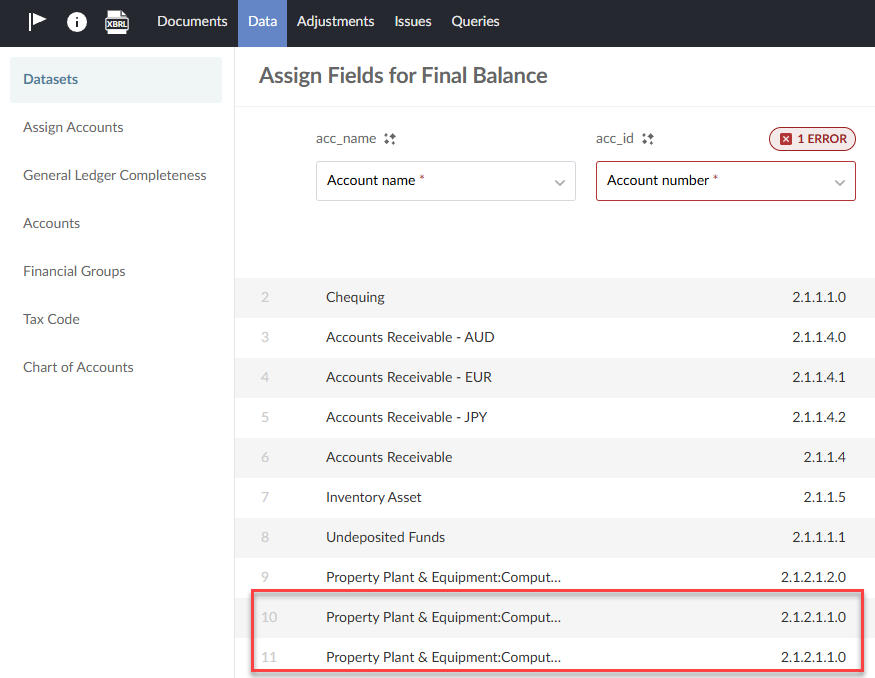
Where there are two or more identical account numbers in the trial balance you are importing, an indicator is displayed for the columns with errors.
-
Select the error indicator to view more information about the error and the specific rows that have been flagged.
-
If the error is related to duplicate account numbers, the Error: Duplicate Values option appears. Select it to view the duplicate values.
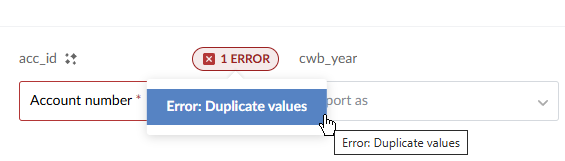
The duplicate values are highlighted.
-
Delete the trial balance and reimport.
-
Select the Datasets tab.
-
You are prompted with a warning that you have unsaved changed. Select Discard changes.
-
Delete the trial balance file you just imported by clicking the Delete icon
 nearest the file.
 -
In the file, remove the duplicate accounts and reimport.