Controlling access to Caseware Working Papers files

Content in this topic requires Caseware Working Papers.
If your organization uses the Working Papers security feature on Cloud, you get the best of two worlds. Working Papers security combines the ease of user management available on Cloud with the detailed protection settings available in Working Papers files.
Working Papers security works very similarly to the security roles used in Cloud for managing access for your users and groups. First, you create Working Papers roles in Cloud, and then you can enable Working Papers security for your organization. Once security is enabled, you can activate this advanced protection on Working Papers files that your organization has published to Cloud, assigning the Working Papers roles to your staff members to grant them access to the appropriate areas of the file.
How to import security configuration settings from Working Papers
If your organization already uses the protection settings available in Working Papers, you can export your data from the Data Store Administration Tool and then import these settings into Cloud.
To import security configuration settings from Working Papers:
-
Ensure that you have the Settings Admin role or equivalent privileges.
-
From the Cloud menu, select Settings.
-
Select Working Papers | Working Papers Security. The Working Papers Security page is displayed.
-
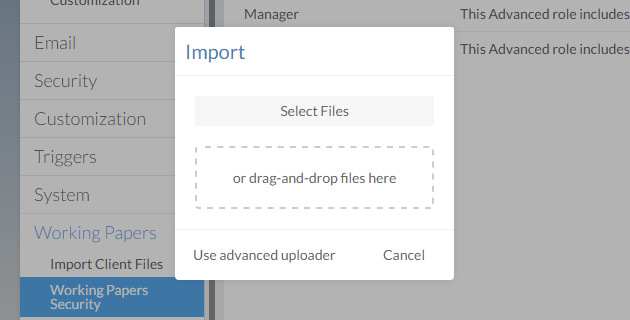
Select the New button, then select Import. The Import dialog is displayed.
-
Select the Select Files button.
-
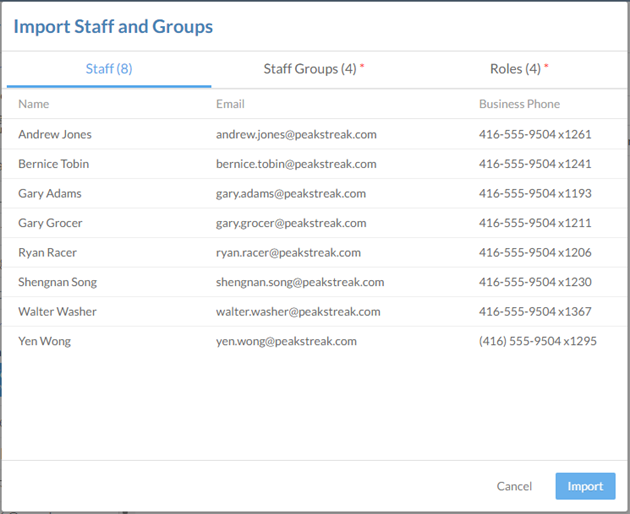
Select the .txt file you have exported from the Data Store Administration Tool, and select Open. The Import Staff and Groups dialog is displayed.
-
Review the staff members, the groups, and the roles that will be imported. You can rename any groups or roles and edit their descriptions.
-
Once you have finished reviewing the import content, select Import.
The security roles from your Working Papers file are created in Cloud. You will automatically create new staff profiles for any users in the import who did not already have a profile, and you will also automatically create groups.
How to create Working Papers security roles
If your organization does not use Working Papers protection, you can create Working Papers security roles in Cloud. These advanced roles use the same list of permissions that Working Papers supports.
To create Working Papers security roles:
-
Ensure that you have the Settings Admin role or equivalent privileges.
-
From the Cloud menu, select Settings.
-
Select Working Papers | Working Papers Security. The Working Papers Security page is displayed.
-
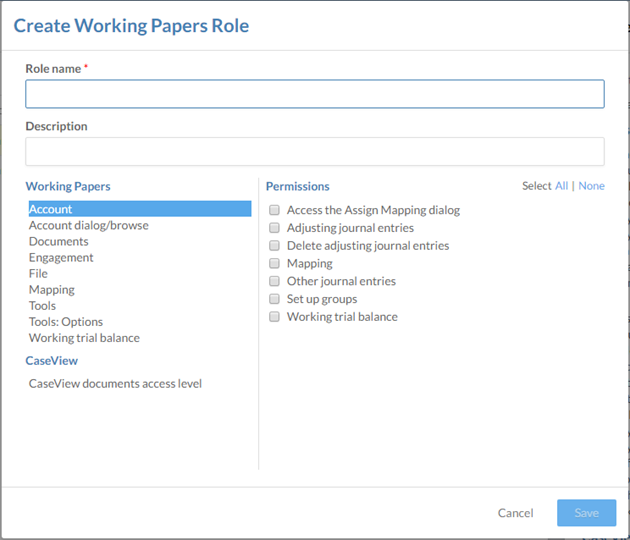
Select the New button, then select Create. The Create Working Papers Role dialog is displayed.
-
Enter a role name. You can also enter a description.
-
Choosing a category on the left will display its permissions on the right. Select all Working Papers permissions that apply to your new role.
-
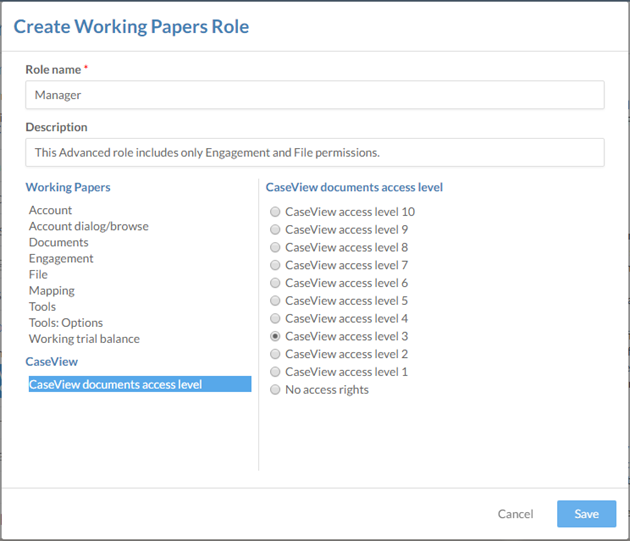
If your organization uses CaseView access levels, select the CaseView documents access level category on the left and select an access level appropriate for your role.
-
Select Save.
You have now created the new Working Papers security role. Once you have created a few roles that reflect the type of protection you need, you should be ready to enable Working Papers security.
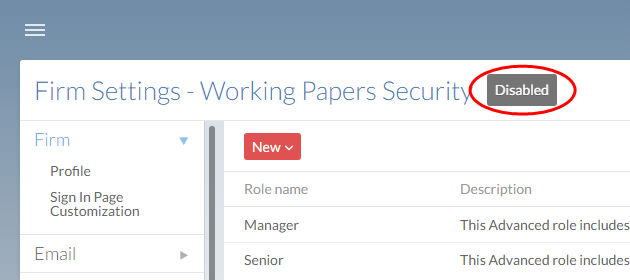
How to enable Working Papers security
Once you have Working Papers security roles created on Cloud, you can enable Working Papers security. This is a system-wide setting that will enable users to activate advanced protection on specific Working Papers files.
To enable Working Papers security:
-
Ensure that you have the Settings Admin role or equivalent privileges.
-
From the Cloud menu, select Settings.
-
Select Working Papers | Working Papers Security. The Working Papers Security page is displayed.
-
Select the Disabled button.
-
Select Yes when prompted.

You have now enabled Working Papers Security for the entire organization, which means that you can enable advanced protection on Working Papers files.
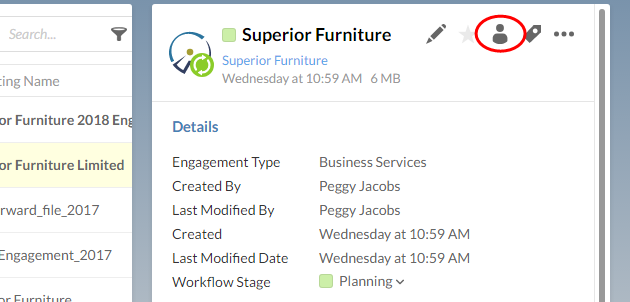
How to enable advanced protection on a Working Papers file
Once Working Papers security is enabled for the organization, owners for published Working Papers files can enable advanced protection for them. This will let you grant access to staff members by assigning them Working Papers security roles on published files.
To enable advanced protection on a Working Papers file:
-
Ensure that you have the Owner role or equivalent privileges for the Working Papers file.
-
From the Cloud menu, select Working Papers.
-
Select a Working Papers file, then select the Share button (
 ).
).
-
Select the More Actions (
 ) | Enable Advanced Protection.
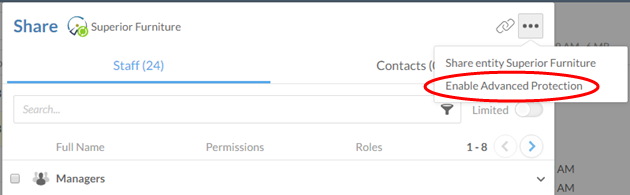
-
Select one or more users to whom you will give the Advanced Role for this Working Papers file.
-
Select the Assign Roles to (#) button at the bottom left corner of the Share dialog, then select the applicable Advanced Role.
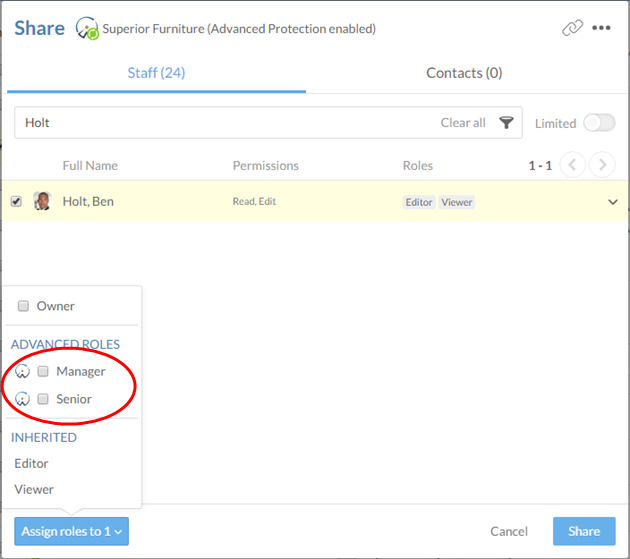
-
Select Share.
You have now enabled advanced protection for this Working Papers file. The users you selected will have access to the areas of the file based on their role, and they will gain all corresponding Working Papers permissions for it.