What's new - OnPoint Audit New Industry Content (August 2024) Release (v2.1959.0)
Here is what’s new in the OnPoint Audit New Industry Content Release (August 2024):
New industry content—Automobile Dealerships and Real Estate (residential and commercial)
OnPoint Audit now includes new content for the automobile dealership and real estate (residential and commercial) industries. Checklists, documents, financial groupings and financial statements have been updated accordingly to include content specific to these industries in areas of Planning, Risk Assessment, Fieldwork and Completion.
To access this industry-specific content, select Automobile dealership or Real estate as the industry in the 1-200 Engagement setup to bring in the industry-specific content throughout the engagement.

Cash flow import tool
Our new Cash flow import/copy-paste tool lets you easily transfer balances from Excel or CSV files into dynamic tables within the financial statements.
You can opt to use this tool by making your selection on the 7-500 Financial statement setup checklist.

As an end user, you are required to document the following information:
- Specify whether the amounts you want to import or copy are already rounded or not.
Note: - Financial statements can be rounded to thousands, millions and billions.
- Specify whether the amounts imported/copied are already rounded as per the financial statements' rounding settings.
- If the amounts are not rounded, the form will automatically apply the same rounding settings as specified in the financial statements rounding settings.
- To enable rounding in the financial statements refer to Customize rounding in the financial statements.
- Select the method that you want to use to report cash flow: Direct method or Indirect method.
Note: The cash flow import tool supports two ways of inserting the amounts into the Cash flow statement: - CVS Import: Import the amounts using the predefined CSV template file provided.
- Copy-Paste: Allows you to directly copy and paste the amounts for each of the applicable cash flow sections.
- Select if you want to import Prior Year amounts or not.
- Review the Summary section to ensure the cash flow statement is in balance.
Note: CSV Import supports loading the information from a CSV template file with a predefined format/structure. Click the link that appears to download the CSV template file.
New features and enhancements in OnPoint Audit
In addition to the content updates and new workflow improvement tools, we have included the following new features and enhancements in OnPoint Audit.
Cloud Connector updates
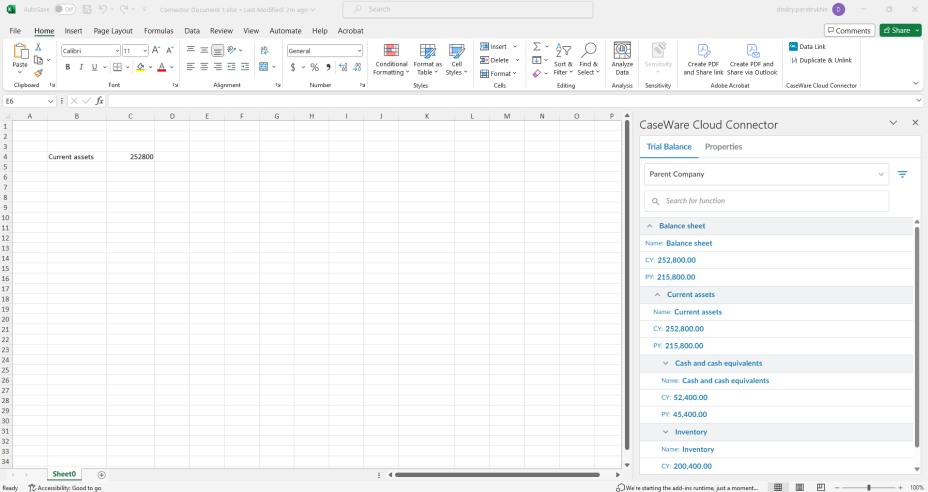
Several improvements have been made to Cloud Connector as part of this release:
- The Cloud Connector pane now features a new design.
- A loading indicator has now been added to the pane so you are aware your data is still loading.
- Accounts and groups with a zero balance are now hidden by default. You can select the Include zero-balance items checkbox to show these items.
- Cloud Connector formulas now support using parent entity, subsidiary, and consolidated data for consolidation engagements.
- When you add a group to your spreadsheet from the Cloud Connector pane, all visible subgroups of that group are now also added.
Planning balances
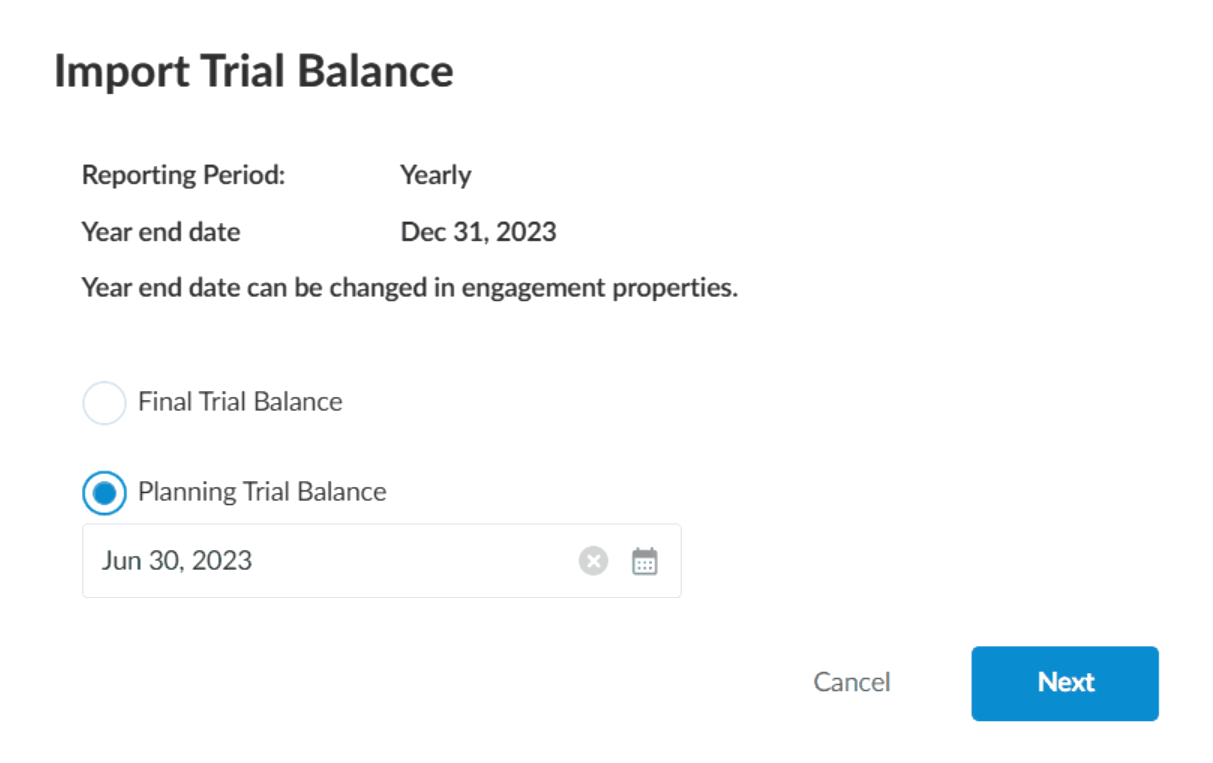
OnPoint Audit now supports planning balances, which allow you to record and track interim balances before the year end.
You can upload a planning balance for the current or prior years on the Data page by selecting the Import tab, then Excel or CSV | Planning Trial Balance.
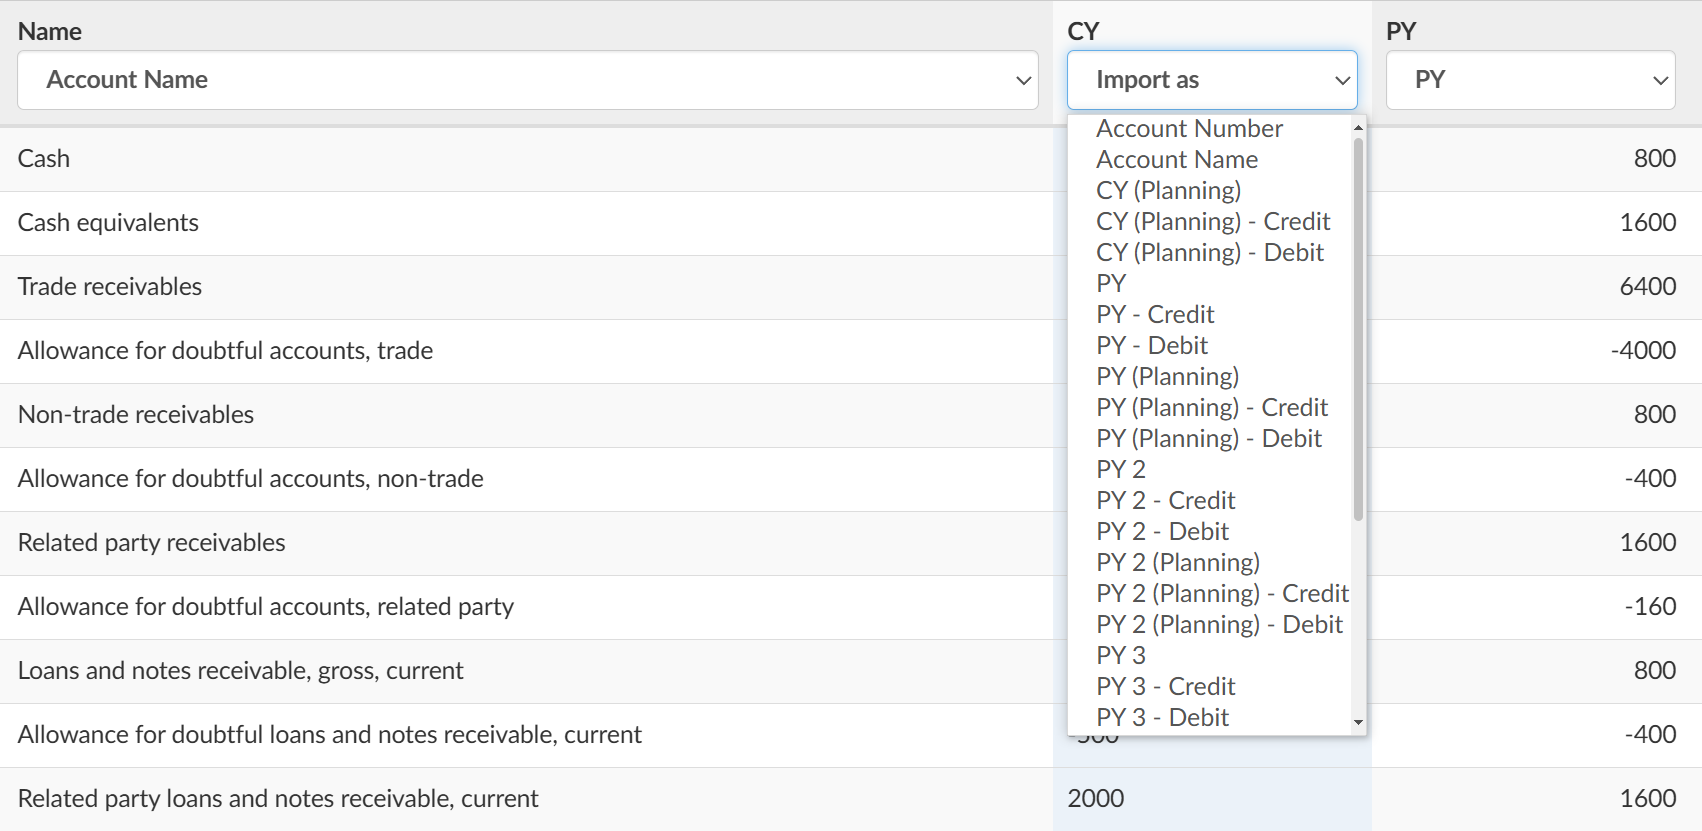
Where applicable, select from the new Planning column headers to indicate planning balances.
When the import is complete, you can easily compare the changes between your uploaded planning balances and the final balances on the Accounts tab.

You can also use planning balances:
-
When viewing analysis charts.
-
In the materiality document.
-
In the risk and risk assessment reports by including related information.
-
In Excel documents by linking balance values using Caseware Cloud Connector.
Note that,
-
Visibility conditions and dynamic text with Trial Balance conditions are evaluated based on the planning balance until the final balance is imported.
-
The financial statements document currently does not currently support planning balances.
-
You can only import planning balances from an Excel or CSV file and if your engagement has an annual reporting period.
Bulk actions for documents
The Documents page now features the option to make changes to multiple documents at once.
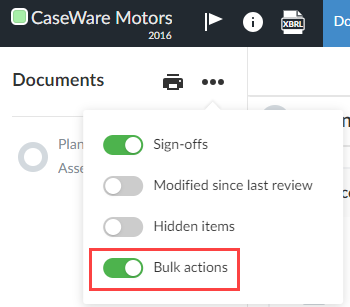
When you turn on the Bulk actions option from the More actions ( ) menu on the Documents page, you can select multiple documents and then move, delete or sign off on all of those documents at once.
Document permissions:
- Firm authors: Can't delete documents available in the app by default.
- End users: Can't delete documents available in the app by default or those created by firm authors.
- Bulk Sign-off: This option is only available within engagements.
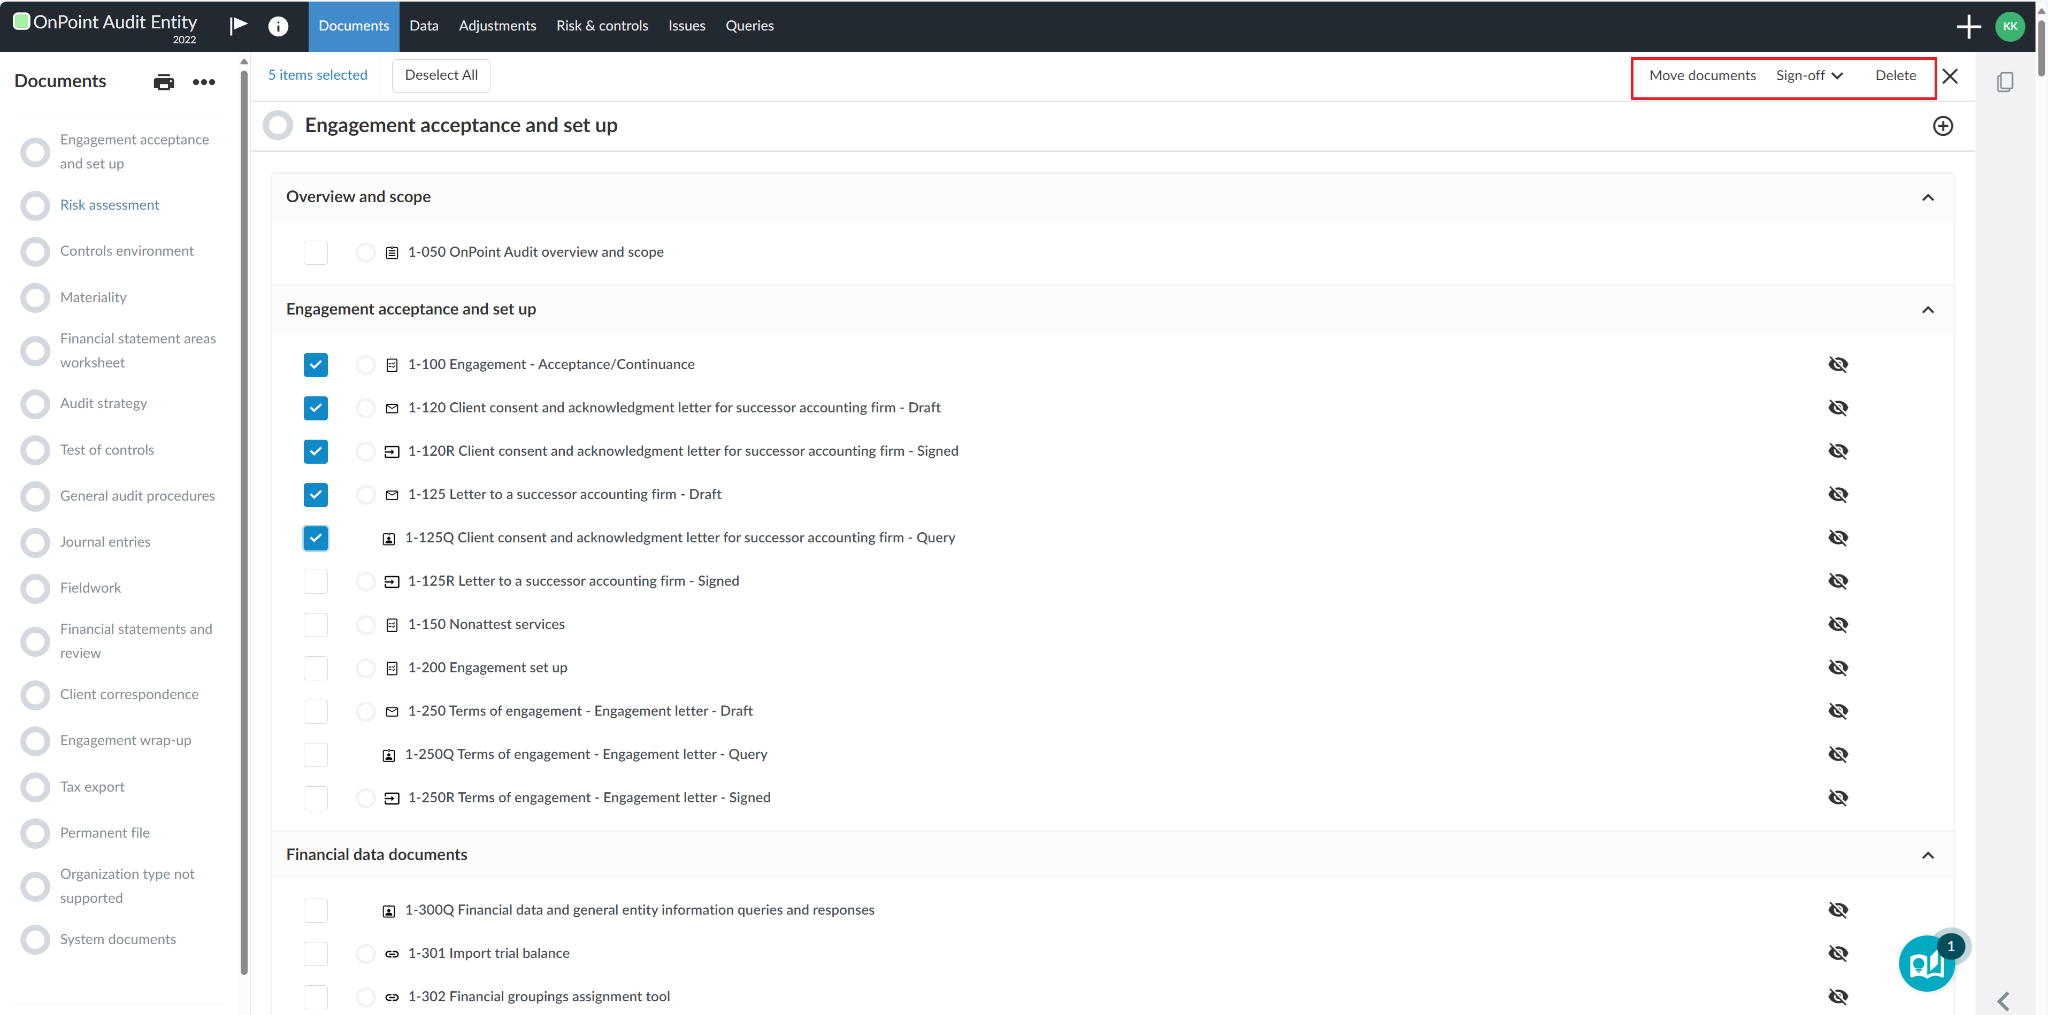
If you try to delete documents without permission, a confirmation dialog will list the documents you can't delete.
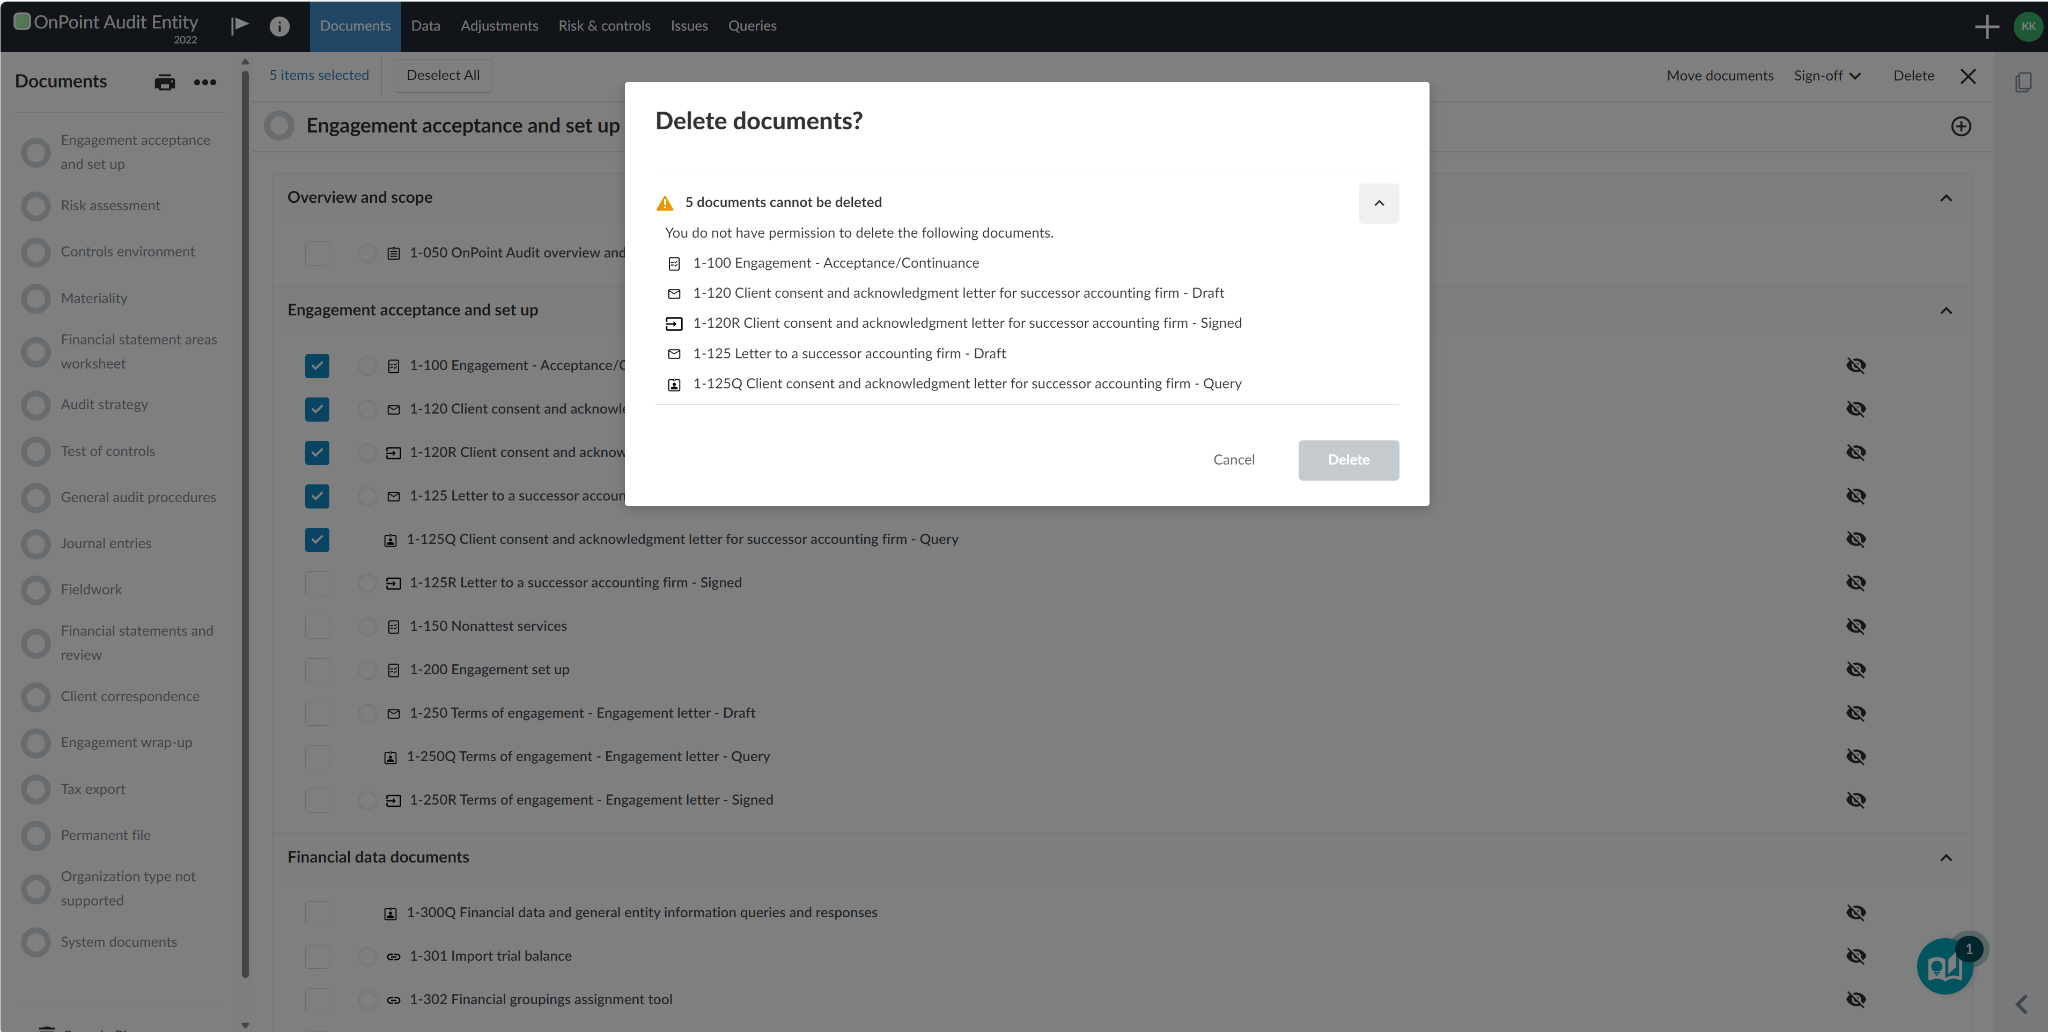
During bulk sign-off, you can review documents before finalizing. The Review dialog displays a Status column highlighting any important information you should be aware of.
For instance, if you're signing off on a checklist, the Status column will indicate if any procedures still need to be signed off on. Similarly, the dialog will alert you if you've selected any documents that cannot be signed off on at this time.
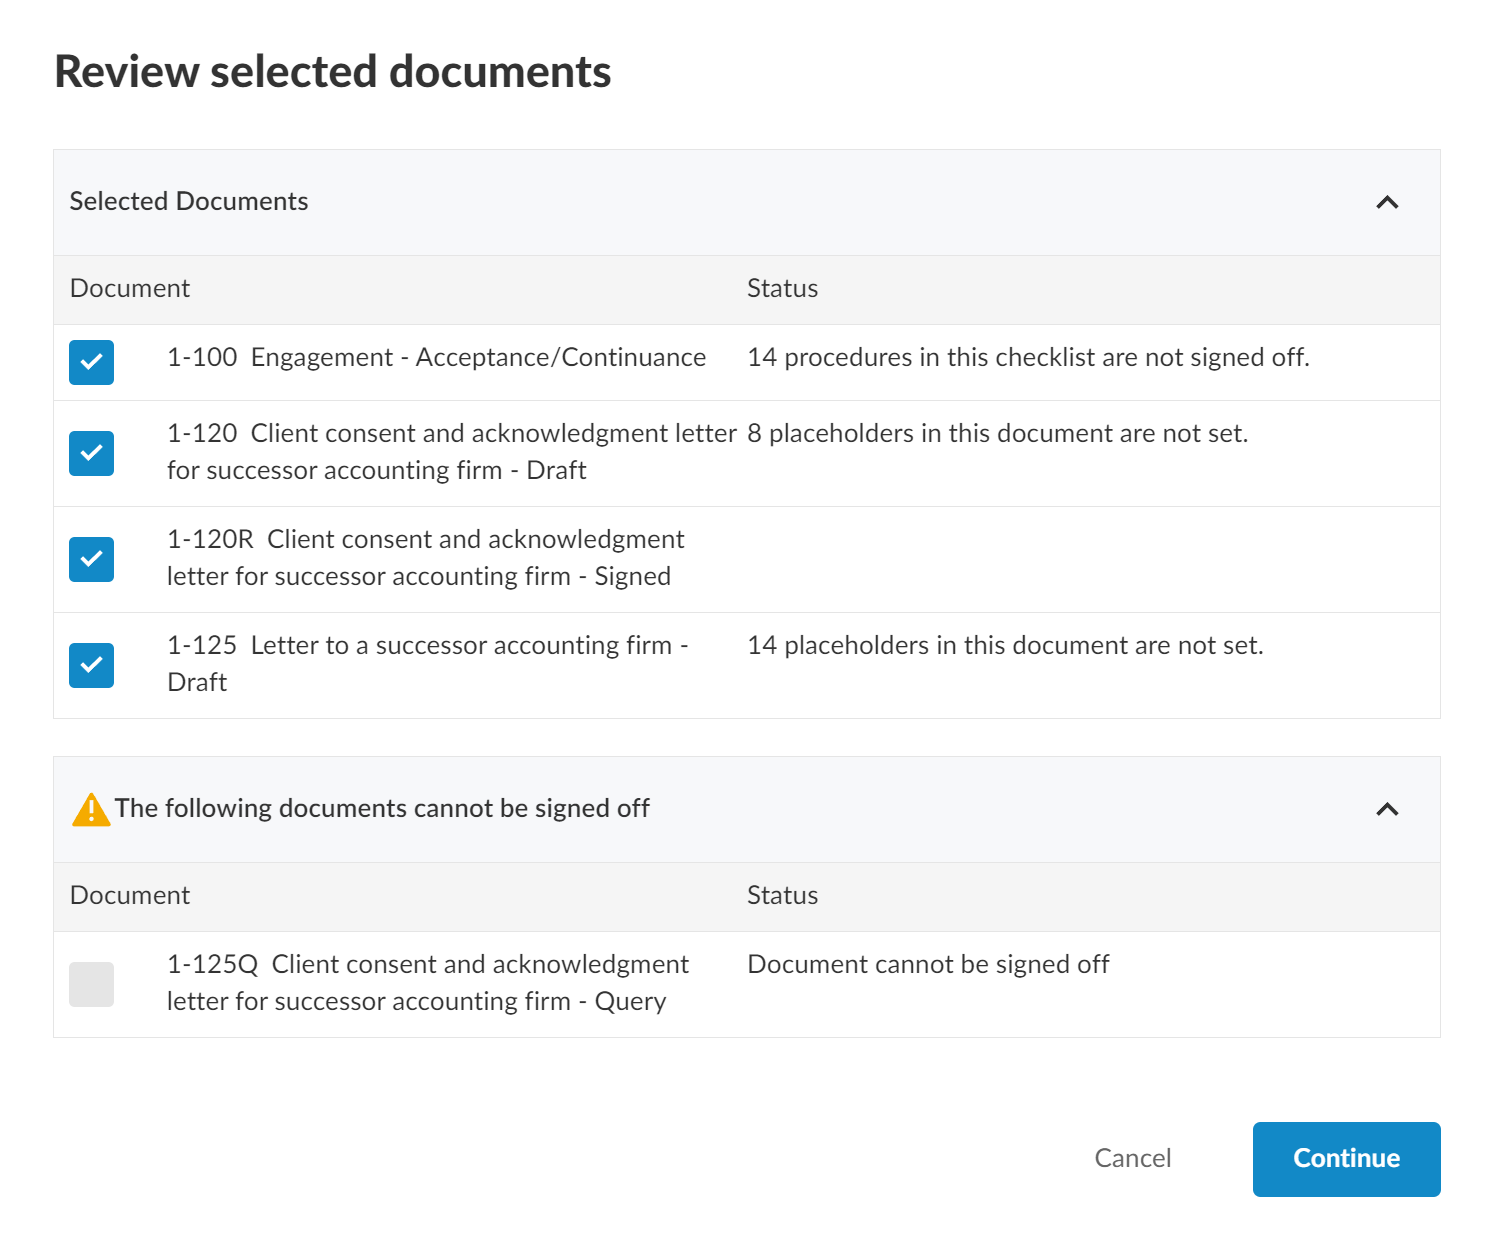
When you have completed the actions you want to take you can turn off Bulk actions from the More actions ( ) menu or select the Close (
![]() ) icon.
) icon.
Risk Library design updates
Several changes have been made to the design of the Risk Library page to improve usability, including
- The VIEW BY filter is now set to Indicators by default. The Categories option for the filter has been renamed to Cycles or Areas depending on whether cycles or areas are used in the risk library. If indicators are not used in the risk library, the risks are displayed by cycles or areas instead.
- Collapsed risk cards now display any assertions applied to the risk as well as the cycle or area associated with the risk, if applicable.
- The number indicator for risk groups is now larger and displays next to the group name instead of on the far right side of the screen.
- The Category dropdown is now the Cycles or Areas dropdown depending on whether cycles or areas are used in the risk library. Risk groups are displayed in the dropdown as subcategories of the cycles or areas they’re associated with.
- A Cycles filter is now available so you can filter risks by cycle.
- You can now collapse and expand all cycles or all risk groups.
Hide zero balance columns in dynamic tables
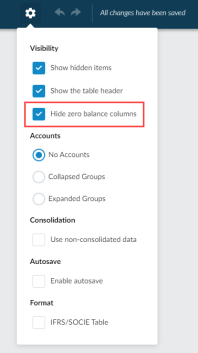
You can now set dynamic table columns to hide automatically if the column contains only zero balances from the table settings.
When you create a new dynamic table in a template or engagement, the Hide zero balance columns setting is turned on by default. The setting is turned off for any existing dynamic tables created before this release.
Customize headings in financial statements
The following updates have been made to give you more customization options for headings in financial statements:
- The Formatting Options dialog now includes a field to set the font size for area titles.
- You can now add numbering for area titles in the Numbering Heading Options dialog. While previously the numbering was only displayed in the Document Map, it is now also displayed when you navigate to the area in the financial statements as well as in the table of contents
- All five heading levels for areas and notes can now be displayed in the table of contents.
- You can now hide individual headings for areas and notes from the table of contents as well as hide the numbering for an individual heading from the More actions (
 ) menu for an area or note.
Page numbering settings for financial statements
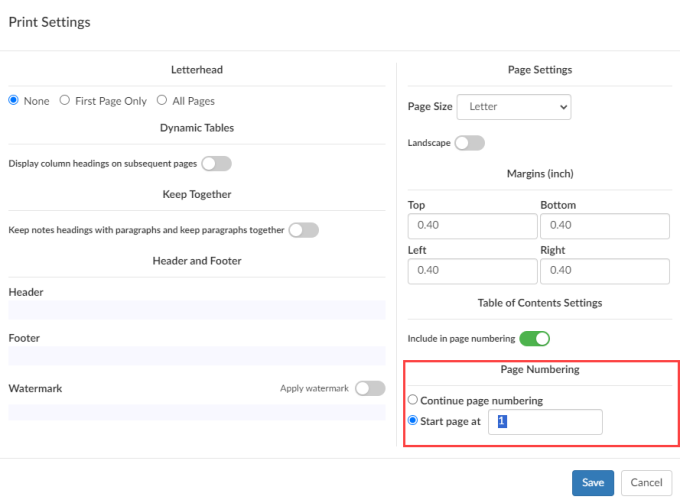
The print settings for financial statement areas now include a Page Numbering section. You can choose whether to continue the page numbering from the previous area or restart the numbering.
Design update for the Product Settings dialog
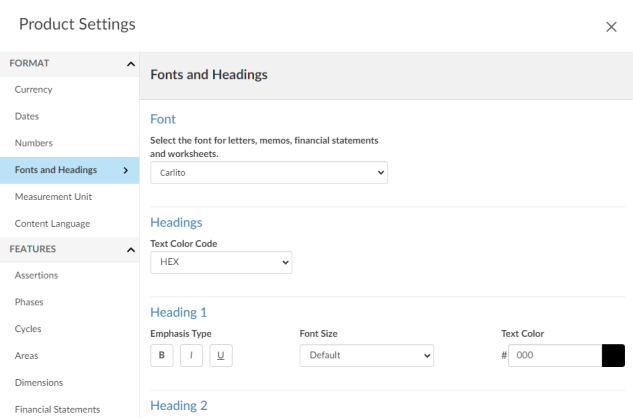
This release features a brand new design for the Product Settings dialog to provide a consistent look and feel across each tab of the dialog.
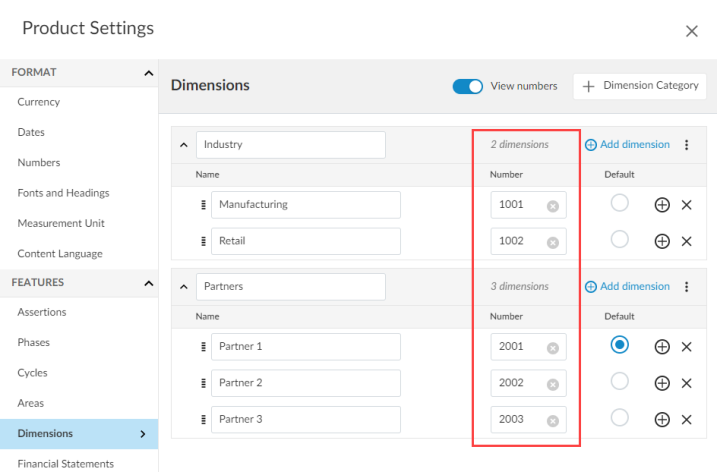
Dimensions now have a Number field so you can define a unique identifier for each dimension. This unique identifier can be used as a field when importing transactions to assign transactions to a dimension.
If you do not want to use dimension numbers, you can turn the View numbers option off and hide the Number column.
Sync trial balance across engagements
During data import, a new option called Sync Trial Balance lets you automatically link data from another engagement. Any changes you make to the source data will be reflected in the synced engagement, keeping everything up-to-date.
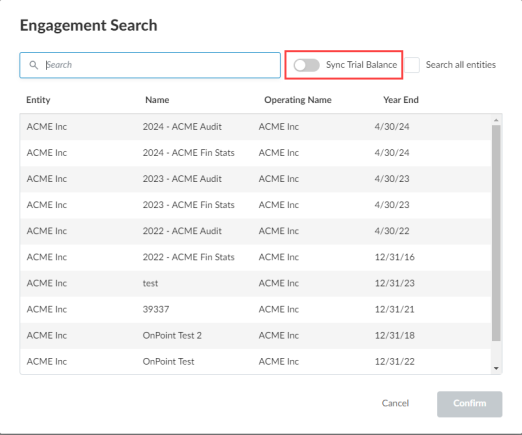
When engagement data is synced from another engagement:
- A link to the source engagement is displayed on the Data page.
- You cannot edit accounts, groups or adjustments synced from the source engagement.
- You cannot assign accounts that have been synced from the source engagement.
- You can create issues and annotations for synced accounts and groups but cannot create annotations for synced adjustments.
- When changes are made to the source engagement, users in the destination engagement receive a notification to inform them that those changes have been applied to their file. Engagements are resynced every five minutes.
- If you lock down an engagement that contains data synced from a source engagement, changes made in the source engagement are no longer synced.
- If both the source and destination engagement are carried forward, the carried forward files are automatically linked so you can continue to sync data from the current year's source engagement.
Financial groups on the Data page
When you access the financial groups tabs of the Data page, you can now
- Reorder groups
- Expand and collapse groups
Add accounts for internal subsidiaries
In consolidation engagements, you can now manually add and edit accounts for internal subsidiaries.
Carry forward for adjustments
You can now edit and delete prior year adjustments in engagements created from carry forward.
Link annotations to checklist procedures
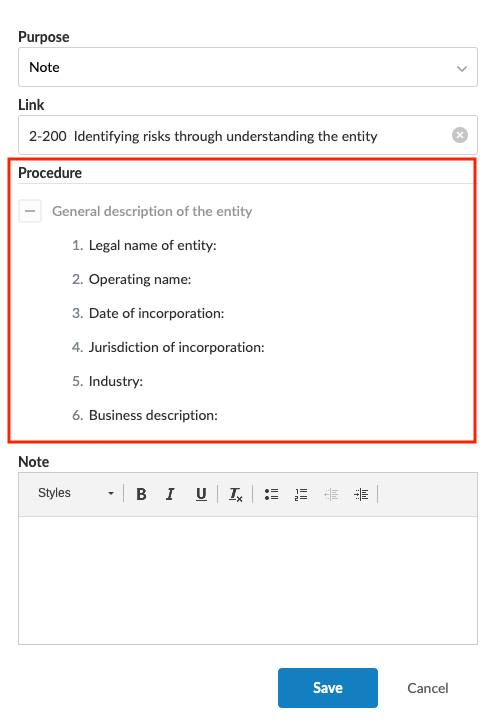
You can now link annotations to specific checklist procedures instead of the checklist document as a whole. You can select a specific procedure after they select a checklist document from the Link dropdown. They can expand and collapse groups and procedures with subprocedures to find the procedure they’re looking for. The selected procedure is displayed in blue.
Edit planning balances on the Data page
You can now edit planning balances on the Data page even after the final balance has been imported.
Select multiple dimensions when posting adjustments
When you post adjustments to groups, you can now select multiple dimensions for each group line in the adjustment.
