Create custom security roles
In the course of regular business for your organization, you need to control access to your client files. Different engagement teams require access to their specific client files, but they are restricted from accessing other clients' materials. Some staff require access to all client files for an engagement, while others only need to access the documents assigned to them.
You can manage access to your organization's engagements and the related engagement material in Cloud using security roles.
The built-in security roles cover the more common types of security access that you might want to give to your users. You can, however, also create custom roles for your organization.
To create custom security roles:
-
Ensure that you have the Settings Admin role or the equivalent privileges.
-
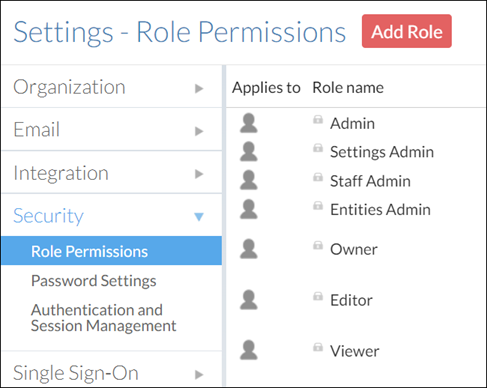
From the Cloud menu, select Settings.
-
Select Security | Role Permissions.

-
Select Add Role.
-
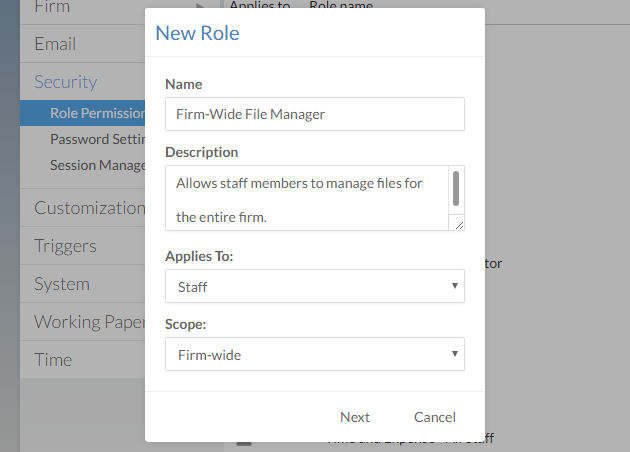
In the New Role dialog, complete the fields as required.

Scope Description Organization-wide Provides administrative privileges to the entire organization (all business units). This scope only differs from System-wide in firms utilizing business units.
Assignable only at the Staff level.
System-wide
Provides administrative and content privileges to an entire Cloud site (one business unit). This scope only differs from Organization-wide in firms utilizing business units.
Assignable only at the Staff level.
Content within entities Provides content privileges to an individual entity.
Assignable only at the Entity level
System-wide or content with entities Provides content privileges to all entities (staff level) or individual entities (entity level) in a Cloud site (one business unit).
Assignable at the Staff or Entity level.
-
Select Next.
-
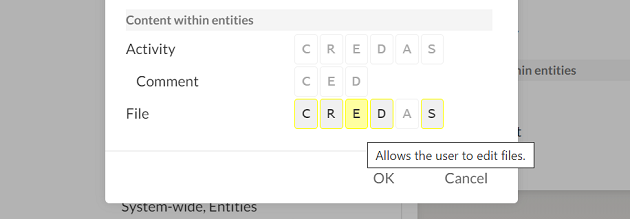
Select one or more permissions to add those permissions to the role. When you are finished, select OK.

Best Practice: Note that there are two Share permissions: A and S. The Share (A) permission allows the user to share all available entity or entity content permissions to themselves and other users, even if it would grant them a higher level of access than they currently possess.
For example, if you create a custom system-wide role that has only the Share (A) permission for entities, users with this role will be able to grant themselves and other users the Owner role on any entity.
If this is a security concern for your firm, we recommend using the Share (S) permission instead, which offers the same functionality but restricts the user from sharing entities or entity content that they cannot access. To learn more, see Built-in roles.
