Set staff rates and work codes

Content in this topic requires CasewareCloud Time.
Classify your staff's billable and non-billable time and expenses by creating custom work codes. For example, if you want your staff to keep track of the time spent on internal administrative duties, you could add an appropriately configured non-billable time work code.
Create new work codes
You can create new work codes from the Settings page.
To create a work code:
-
Ensure that you have the Settings Admin role or equivalent privileges.
-
From the Cloud menu, select Settings.
-
Select Time and, under Work Codes, select Time or Expense.
-
Select New | Add.
-
Complete the fields as appropriate. The only mandatory field is the Work Code.
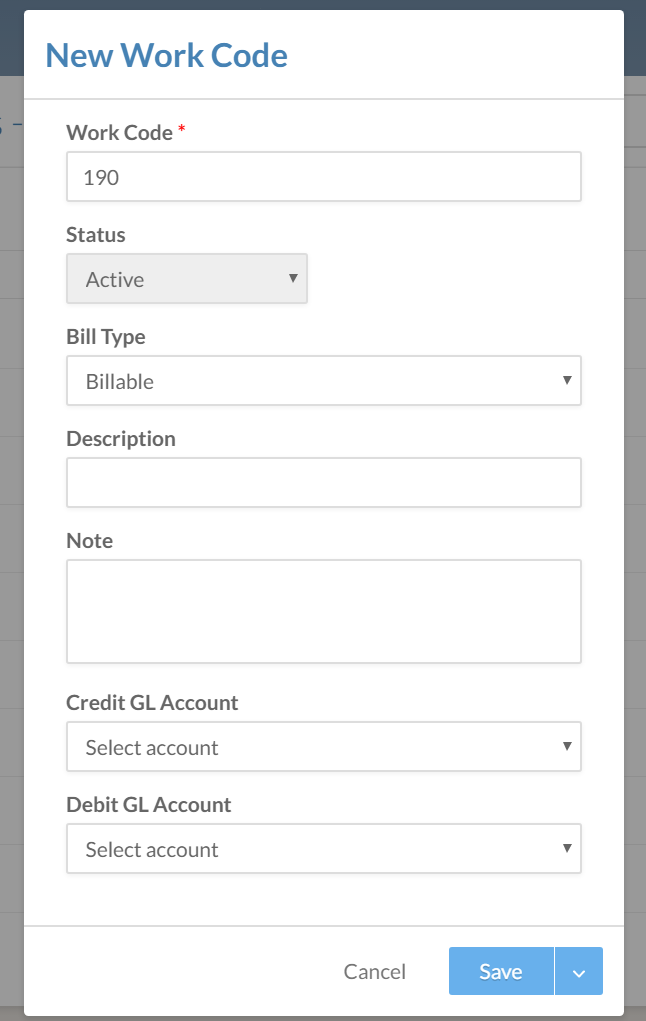
Note: The list of work codes may not sort correctly if it contains alphanumeric codes with inconsistent lengths (e.g. 1 ABC, 23 DEF, 456 GHI). To correct this, pad each number with zeroes to ensure a consistent length (e.g. 001 ABC, 023 DEF, 456 GHI) or use numeric codes.
-
Select Save.
Your new work code is added.
Note: The Note field is intended for use within your organization, and will be omitted when you generate an invoice or a report.
Import a list of work codes
You can also add work codes in bulk using a block of delimited text or a .csv file. You'll need a list of work codes in a .csv file or delimited block of plain text.
For either method, ensure that:
-
Each row represents one staff member, and
-
Each column represents a property, such as their name, email, or user group. To include a staff member in more than one group, place a tilde (~) between each group name.
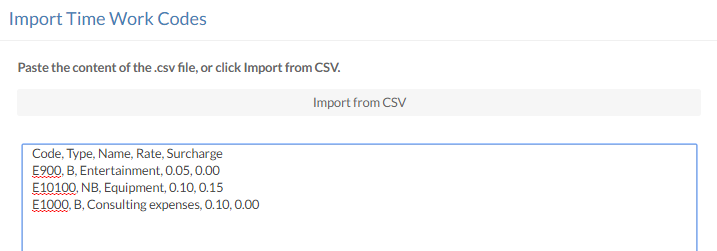
In this example, an administrator wants to add three expense codes:
Code, Type, Name, Rate, Surcharge
E900, B, Entertainment, 0.05, 0.00
E10100, NB, Equipment, 0.10, 0.15
E1000, B, Consulting expenses, 0.10, 0.00
To import a list of work codes:
-
Ensure that you have the Settings Admin role or equivalent privileges.
-
From the Cloud menu, select Settings.
-
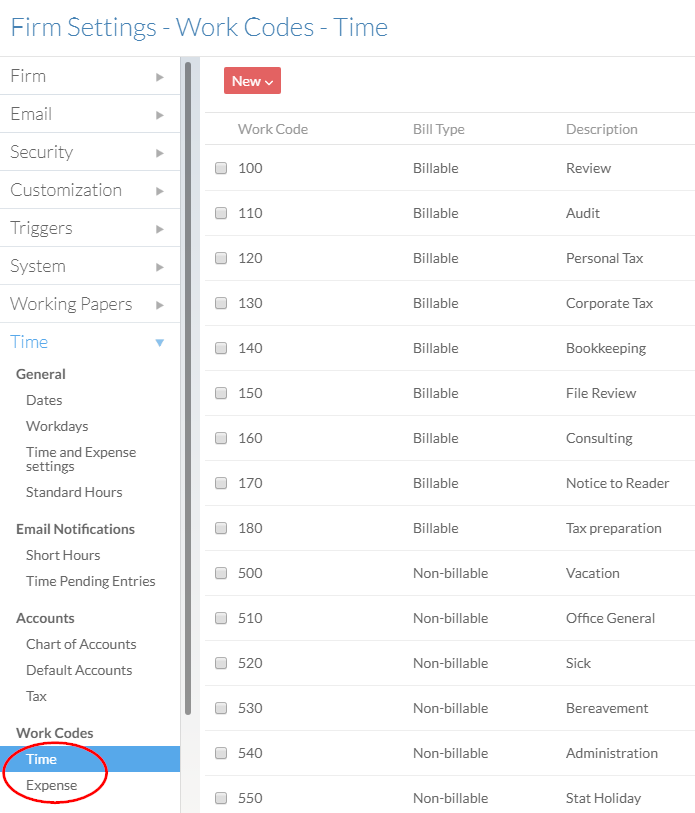
Select Time and, under Work Codes, select Time or Expense.
-
Select New | Import.
-
Select Import from CSV and browse to your .csv directory file, or paste your delimited list text into the text box.
-
Select the appropriate options at the bottom of the dialog, then select Next.

-
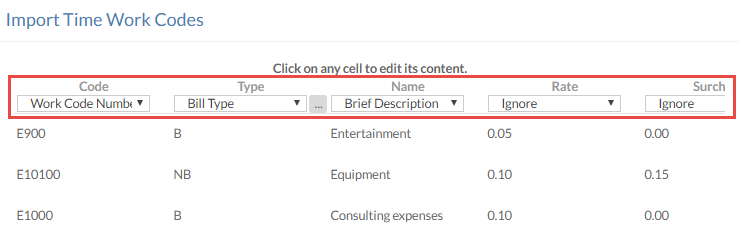
Map the property that matches each column. The Work Code Number is required to complete the import. If any existing codes use the same Work Code Number, they will be updated when the import is performed.
-
Select Save.
If you map the Bill Type, you'll be asked to identify the Billable and Non-billable codes in a separate dialog.
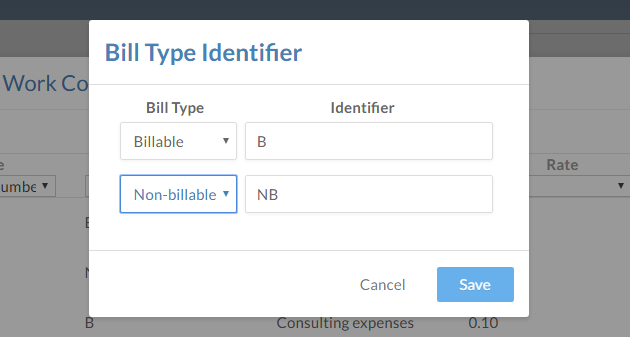
A dialog will confirm the number of codes imported or modified.
Set staff rates
Staff must be set with the appropriate rates before they can submit their time entries. You can assign both standard rates and work code rates to individual staff members. For example, assume that you want to assign different rates for general work and more specialized work such as legal consultation. In this case, you would assign a baseline standard rate and a higher rate associated with the work code for the specialized work.
To set staff rates:
-
Ensure that you have the Staff Admin role or equivalent rights.
-
From the Cloud menu, select Staff.
-
Select the user whose rate you want to edit. In the user's menu, select More Actions (
 ) | Rates.
 -
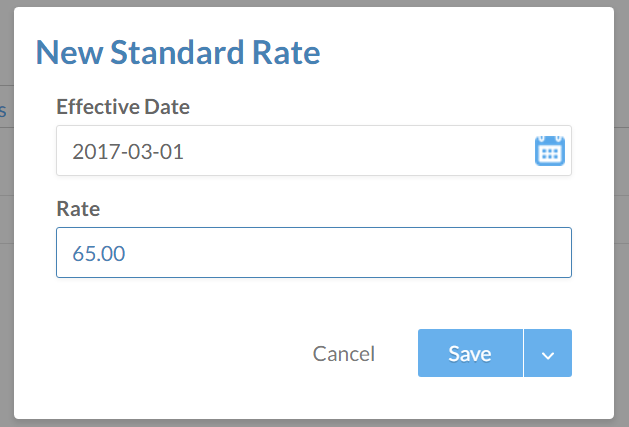
To add a standard rate, select Standard Rates | New, complete the fields, and select Save.
-
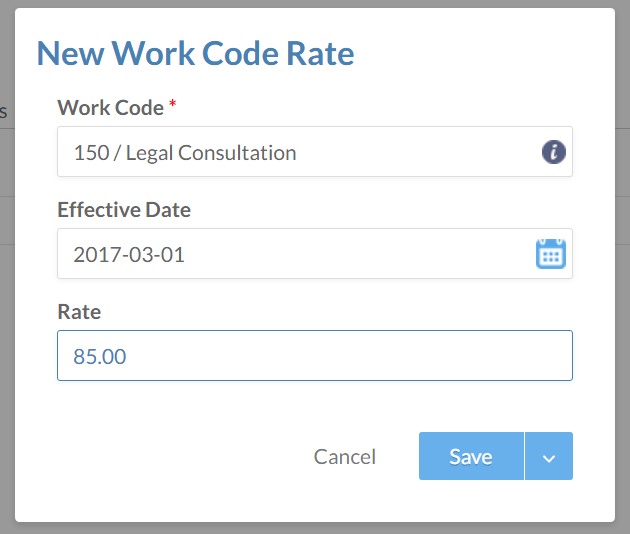
To add a work code-specific rate, select Work Code Rates | New, complete the fields, and select Save. You will need to search or select from your organization's existing work codes in the Work Code field.
The rates you added or updated can be found in each user's Staff Rate dialog.

