Add or remove data links in text sections in the financial statements
Data links ( ) allow you to have existing information in the engagement or in Cloud automatically retrieved and inserted in text fields.
The following data links are available:
| Engagement properties (from Cloud) | Engagement properties as defined in Cloud, such as:
|
| Trial balance (from the engagement) | Items in the trial balance such as, account name, grouping name, or values from the current or prior year. A Display opposite sign checkbox to display account balance in opposite (balance). If dimensions are enabled in your product, you can filter for accounts and groups by dimension. Note: If the engagement is consolidated, you can choose whether to use data from the parent entity or a subsidiary, as well as whether to use the consolidated or non-consolidated value for the account or group. You can also select to use the default value based on whether the document is set to use consolidated or non-consolidated data. |
| Firm properties (from Cloud) | Firm name Firm address |
| Responses (from the engagement) | Responses to procedures from checklists. Once you select a checklist document from the list, select the response you want to retrieve and insert in the text section. |
| Materiality (from the engagement) | Defined values in the Materiality document. |
| Dynamic text | Dynamic text is conditional text. It's a field where different text displays based on a condition or a set of conditions. |
| Forms Value | Insert the value of a specific form field. Once you select a form and a field, the value of the selected field is inserted in the text field. Note: This option is only available in the Data Link dialog if custom forms are available in your product, such as Tax forms. |
Note: You can only add dynamic text if you are customizing the firm template. To access the firm template, you must have the Settings Admin role or similar. See Manage the firm template for more information.
-
Go to where you want to add a formula in the text.
-
Select Add Data Link (
) from the toolbar. -
At the Dynamic Text tab, select the Add Condition drop-down list.
Different setup details display in the Data Link dialog based on the condition you choose:
| Condition type | Condition setup |
| Response | Document - select the source document for the response Procedure - select the procedure for which the response is provided Condition - select the value of the response Output - select the text to be displayed when the condition is met |
| Trial balance | Financial Group - select the trial balance account or account group Condition - select how the name of the Income Statement displays based on the value of Net Income in the trial balance
Output - select the text to be displayed when the condition is met |
| Consolidation | Condition - select the consolidation situation (Consolidated, Non-consolidated) Output - select the text to be displayed when the condition is met |
| Scaling/Rounding | Condition - select the rounding scale Output - select the text to be displayed when the condition is met |
| Reporting period | Condition - select the value of the reporting period (Monthly, Quarterly, Semi-Annual, Annual) Output - select the text to be displayed when the condition is met |
| Organization type | Condition - select a country Output - select the text to be displayed when the condition is met |
| Group of conditions | Select this option if you want to add a group of conditions, where the text output is based on how the conditions in the group are collectively evaluated Group Condition - select one of the following values: When all conditions below are met -> all conditions must be true for the Group Condition to be met When any condition below is met -> any condition must be true for the Group Condition to be met Output - select the text to be displayed when the Group Condition is met |
| Form Value | Condition - select a form and a field in the selected form Output - select the text to be displayed when the condition is met Note: This condition is only functional if custom forms are available in your product, such as Tax forms. |
-
Once you're done, select Save.
You can add more than one condition type to trigger additional text outputs. To add another condition, select Add Condition.
You can also optionally specify an alternate output for the text if no conditions are met.
If a condition (or conditions) is met, the corresponding output text you specified for that condition displays.
If no condition is met, the alternate text output (the one you specified for when none of the conditions are met) displays. Otherwise, #ValueEmpty# displays.
Tip: To remove a Data Link (), highlight it and select Delete or Backspace.
Add data links in guidance information
You can insert data links into guidance sections to dynamically display engagement-specific information, such as entity properties, trial balance values, checklist responses, or conditional text. This enables authors to provide context-sensitive guidance that updates automatically based on the engagement data.
To add a data link in a guidance section:
-
Ensure that you have the Settings Admin role or similar. For more information, see Built-in roles and Assign security roles.
-
From the Cloud menu (
 ), select Settings (
 ) | <your product name> | Manage Template.
 -
Open the product template. See Manage the firm template for more information.
-
Select the Documents page.
-
On the Documents page, navigate to the document with the financial statement area and the guidance section where you want to dynamically display engagement-specific information,
-
Select the guidance text field where you want to insert the data link.
-
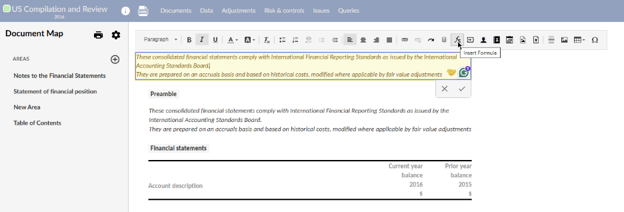
Click the Insert Formula (
 ) icon in the formatting toolbar.
-
In the Data Link dialog, choose the type of data link you want to insert:
-
Engagement Properties (for example, entity name, year-end date)
-
Trial Balance (for example, account balances, group totals)
-
Firm Properties (for example, firm name, address)
-
Responses (for example, checklist procedure responses)
-
Materiality (for example, overall or performance materiality)
-
Engagement Glossary (for example, insert a glossary term)
-
Dynamic Text (for example, conditional text based on engagement context)
-
Forms Value (for example, values from custom forms, if available)
-
Configure any conditions or fallback text as needed (for example, show different guidance for Review vs Compilation engagements).
-
Click Save to insert the data link.
Note: Data links in guidance sections follow the same visibility logic as the content they are attached to. For example, if a checklist procedure is only visible in certain engagement types, any guidance with data links attached to that procedure will also follow that visibility rule. Examples of data link usage in guidance:
-
Show different instructions for different engagement types.
-
Insert trial balance values or materiality thresholds directly into guidance.
-
Display glossary terms or authoritative references based on engagement context.
-
Reference responses from checklists to tailor guidance dynamically.