Set up staff

Content in this topic requires CasewareCloud Time.
After integrating the Time application with Caseware Cloud, you will want to set up your staff. Staff must be set up on Caseware Cloud before they can begin entering their time and expenses.
To add a user (staff or contact):
-
Ensure that you have the Staff Admin role or equivalent rights.
-
From the Cloud menu, select Staff or Contacts.
-
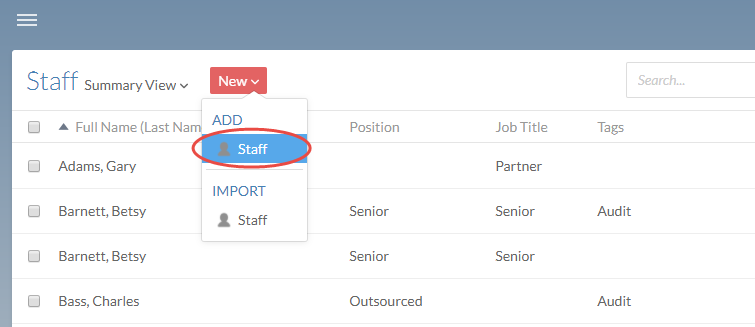
Select New and, under Add, select Staff or Contacts.
-
Enter the appropriate name and contact information.
Note: If you are adding a contact and you do not want to create an account for them, leave the Email field blank.
-
If you want to set the user's password, select the Password pane, select Set, and enter the new password. Otherwise, the user will set their password.
-
Select Save.
The staff member is added to Cloud. They can now log in through this account.
Enable staff to submit time and expense entries via Cloud
To submit time and expense entries using Cloud, staff will require access to the Time app and one of the following permissions:
- Process own entries will enable staff to submit their own entries
- Process all staff entries will enable staff to submit entries for all members of the organization.
You can grant access to the Time app and assign these permissions at the same time, either by editing a staff account directly, or by enabling the app and any chosen permissions for a group. If the Time app and any permissions associated with it are enabled for a group, all members of that group will given access to Time and the assigned permissions. Ensure you have the Staff Admin role to enable access for staff members or staff groups, or the Entities Admin role to enable access for a contact or contact group.
To enable app access for a user or group:
-
Ensure you have the Staff Admin role or equivalent privileges.
-
From the Cloud menu (
 ), select Groups or Staff.
 -
Select the user or group where you want to enable the app, then select Edit (
 ).
). -
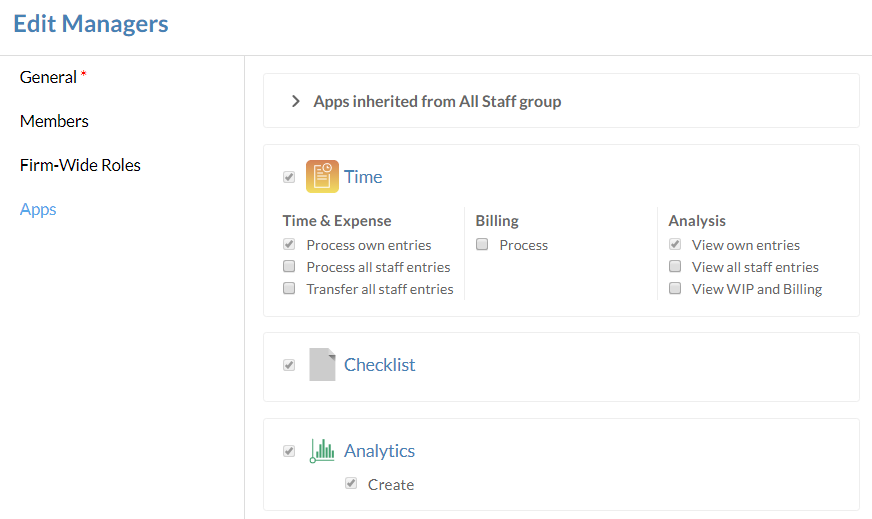
Select Apps, then choose the appropriate access type.
-
No access: Do not enable access to the app for the user or staff group. This is the default option and does not consume any licenses.
-
Read-only: Enable the user or staff group to 'View' (but not modify) engagements and files in the app without consuming any licenses. Only available for Cloud Engagement apps.
Notes:
-
You can also provide 'View' access to engagements by assigning a Viewer role to the entity; however, this will still consume a full product license.
-
Users or staff groups must still have at least 'View' permission to the entity in order to access any engagement.
-
-
Full access: Enable the app for the user or staff group. This option consumes a license for each user that receives app access.
-
-
If the user or group receives Full access to an app, assign the applicable app permissions.
-
Select Save.
The user or group can now submit time and expense entries.
Note: If the user or group was given access to the Time app through this process, ensure that they refresh Cloud in their browser to make the app visible in the Cloud menu.