Firm settings - Customization
Views Management
On the Views Management page, you can define column headings, sort orders and other configuration options related to views. Views are used on the Entities, People, Working Papers, and Files pages to customize how information is displayed. To learn more, see Create views for all users.
To reach the Views Management page, open the Cloud menu ( ) and select Settings | Customization | Views Management.
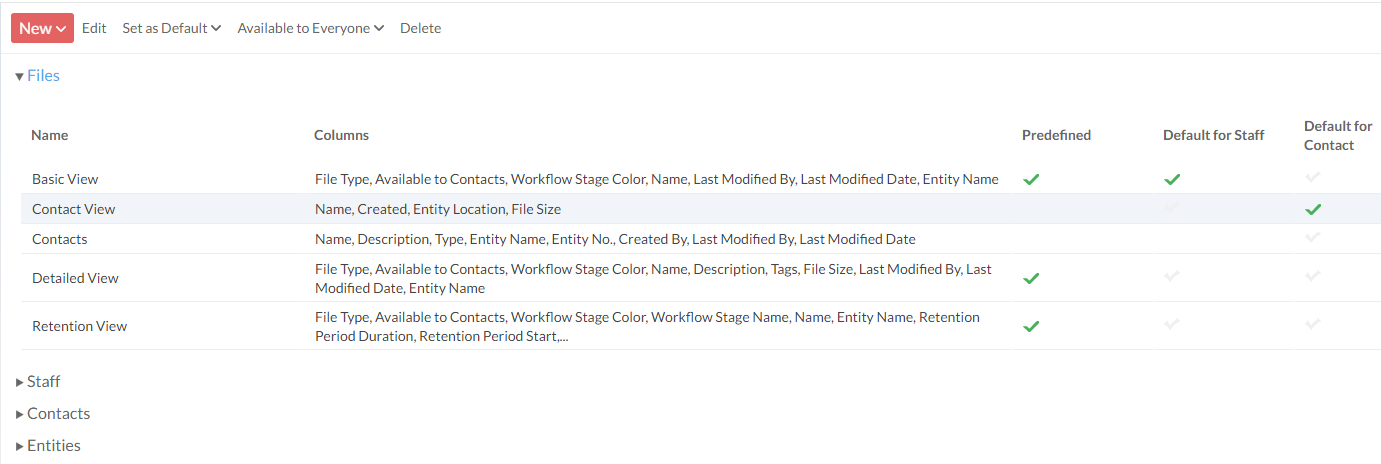
Select a view to display the Edit, Default, Availability, and Delete options. Built-in views cannot be edited or deleted.
Select New to create a new view.
New View page
When creating a new view, the following options are available:

| Section Name | Description |
|---|---|
| Files View |
|
| Columns |
Remove( |
| Filters | Add a custom filter to the view. The filters available vary depending on the view type. |
Terminology
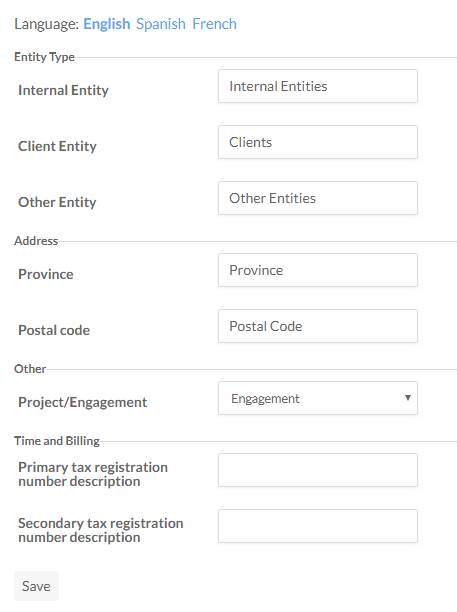
On the Terminology page, you can customize the terminology used in the Caseware Cloud interface.
To reach the Terminology page, open the Cloud menu () and select Settings | Customization | Terminology.
| Name | Description |
|---|---|
| Language | Select a language to populate the terminology fields with default values for that language. |
| Entity Type |
|
| Address |
|
| Other |
|
| Taxes |
These fields are only available if you have purchased a CasewareCloud Time license. |
Positions
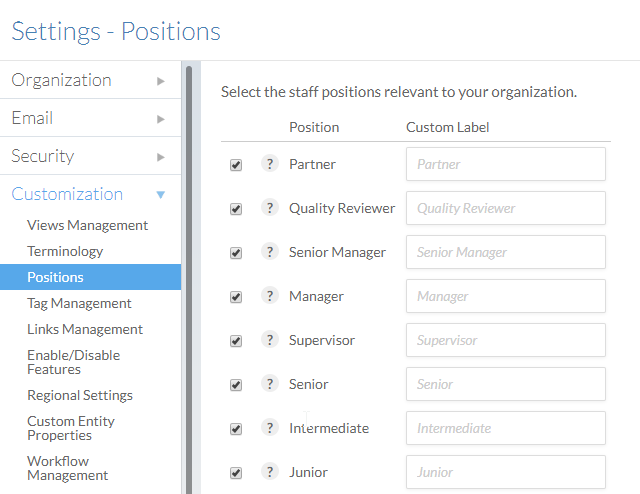
On the Positions page, you can customize the default staff positions available to your organization. Default staff positions can be omitted or renamed to suit your organization's requirements.
To reach the Positions page, open the Cloud menu () and select Settings | Customization | Positions.
Tag Management
From the Tag Management page, you can view, create, edit and delete tags. To learn more, see Creating tags.
To reach the Tag Management page, open the Cloud menu () and select Settings | Customization | Tag Management.
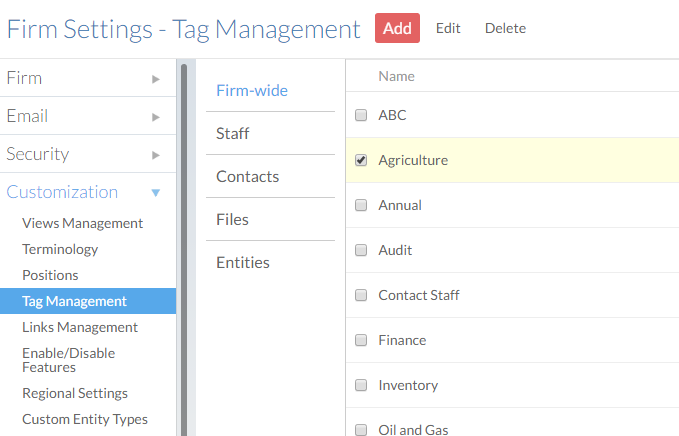
To manage the available tags, choose an appropriate category (System-wide, Staff, Contacts, Files or Entities), then either Add a tag or select a tag's checkbox to Edit or Delete it.
Links Management
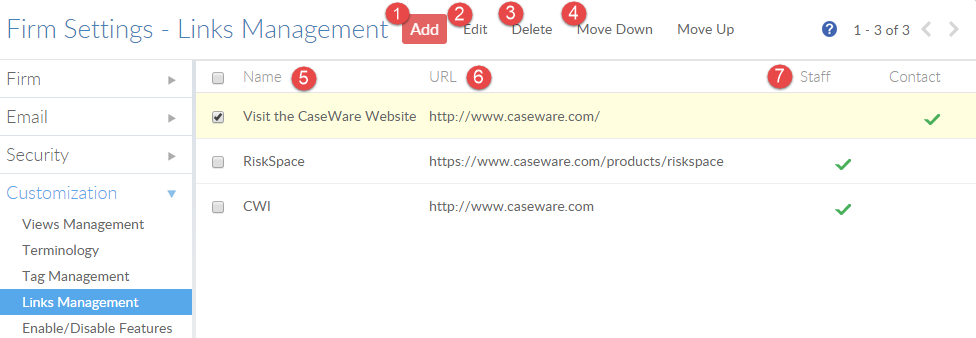
From the Links Management page, you can manage links that appear in the Cloud menu. Links can be any browser-based resource that you would like your users to have quick access to. To learn more, see Add external links.
To reach the Links page, open the Cloud menu () and select Settings | Customization | Links.
| Number | Name | Description |
|---|---|---|
 | Add | Opens the Add Link dialog. |
 | Edit | Edit the selected link. |
 | Delete | Delete the selected link. |
 | Move Down / Move Up | Move the selected link up or down the list. |
 | Name | The link name. |
 | URL | The link URL. Clicking the link from within Cloud opens the specified URL in a new browser tab. |
 | Staff/Contact check marks | A check mark indicates this link can be seen by staff, contacts, or both. |
Enable/Disable Features
From the Enable/Disable Features page, you can configure Cloud's Chat feature and enable or disable integrations with Cloud apps.
To reach the Enable/Disable Features page, open the Cloud menu () and select Settings | Customization | Enable/Disable Features.
| Name | Description |
|---|---|
| Chat | Enables users in your organization to chat with each other in-browser. After you enable the chat feature, select your preferred option for retaining messages. |
| Other | Enable or disable products that appear in the Cloud menu, such as Caseware ReviewComp. If you disable a product, any related engagement files will be inaccessible until the product is enabled again. |
Regional Settings
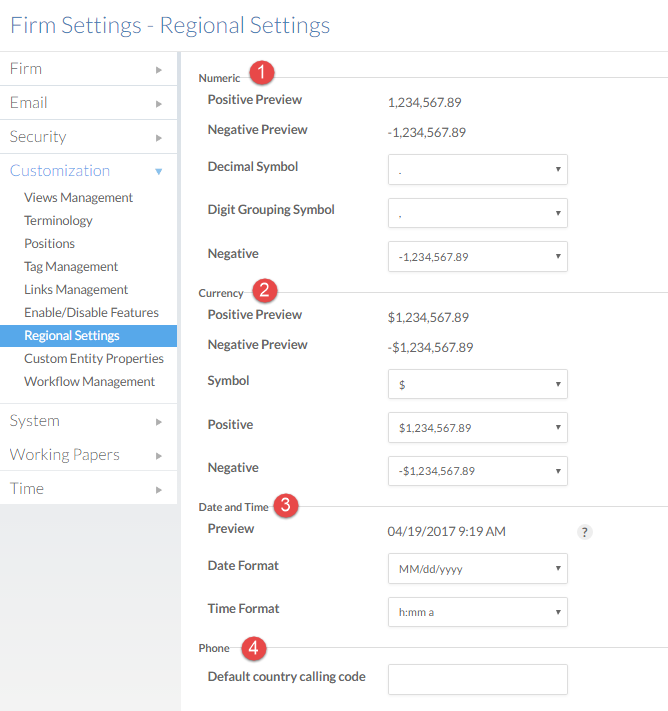
From the Regional Settings page, you can customize the appearance of numeric values, currencies, dates and times.
To reach the Regional Settings page, open the Cloud menu () and select Settings | Customization | Regional Settings.
| Number | Name | Description |
|---|---|---|
| | Numeric | Sets the appearance of numeric values.
Users can override these display settings in their personal settings. |
| | Currency | Sets the appearance of the date and time format.
|
| | Date and Time | Sets the appearance of the date and time format.
Users can override these display settings in their personal settings. |
| | Phone - Default country calling code | For calls initiated from Cloud using an integrated VoIP service, the default country calling code is added to the phone number if a country code is not specified. The code must be preceded by a +. For example:
By clicking on the Business number for Rupert Greer, the VoIP app dials +1-416-916-4500. Users can enable VoIP integration in their personal settings. |
Custom Entity Properties
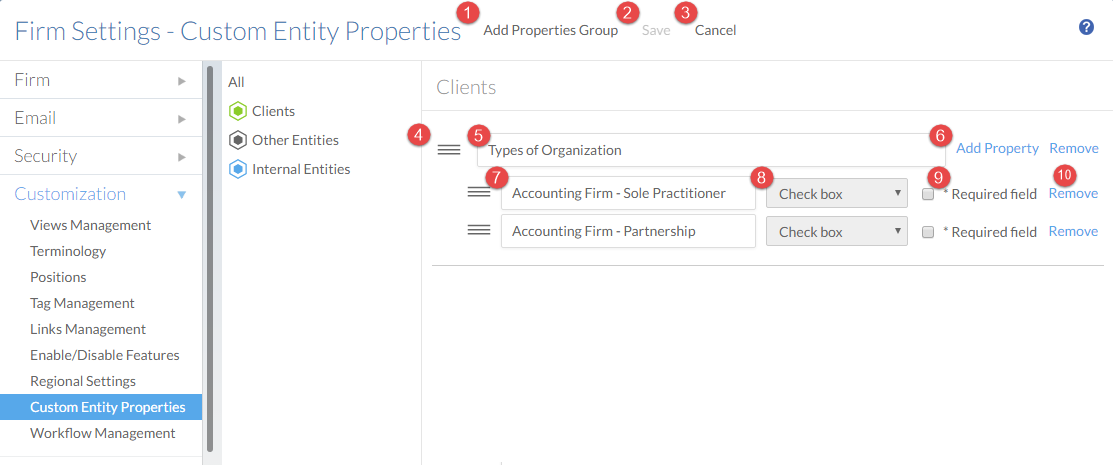
From the Custom Entity Properties page, you can add additional properties to describe entities.
To reach the Custom Entity Properties page, open the Cloud menu () and select Settings | Customization | Custom Entity Properties.
| Number | Screen Element | Description |
|---|---|---|
| | Add Properties Group | Adds a new custom entity properties group. |
| | Save | Save all changes. |
| | Cancel | Cancel all changes. |
| | Sort | Sort the custom entity property or properties group up or down. This affects the order of the property and properties group on the Entity wizard and Entities profile panel. |
| | Properties Group | Displays the name of the custom entity properties group. |
| | Add Property | Adds a custom entity property to the properties group. |
| | Display Name | Displays the name of the custom entity property. |
 | Type | Select the type of value for the custom entity property from the following:
|
 | Required field | Select to make this field required. |
 | Remove | Deletes the property or properties group. |
Workflow Management
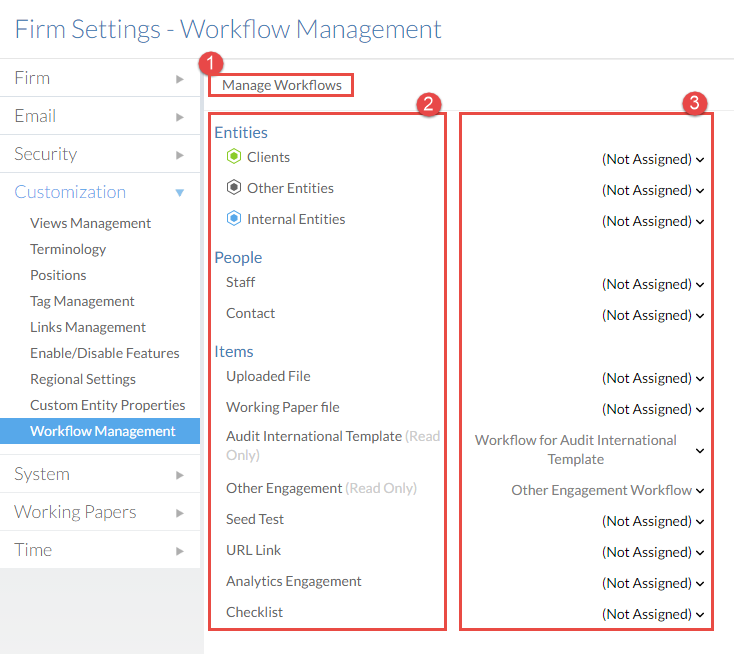
From the Workflow Management page, you can assign a workflow to a type of content. To learn more, see Creating workflows.
To reach the Workflow Management page, open the Cloud menu () and select Settings | Customization | Workflow Management.
| Number | Name | Description |
|---|---|---|
| | Manage Workflows | Select Manage Workflows to create, edit, and delete workflows. |
| | Content types | This section lists all the available content types for your organization that can be assigned a workflow. |
| | Assign workflows | Select a drop-down menu to assign a workflow to a content type. |