Implement fund reporting
You can implement fund reporting in your financial statements when not-for-profit audit engagements are performed for Not-for-profit organization types. To implement fund reporting, you must first add a set of dimensions, assign the financial groups, then modify your dynamic tables in the financial statements.
In OnPoint Audit, we have created default dimension categories for Donor restrictions and Not-for-Profit funds with their respective dimensions that you can use. These dimension categories have been assigned to the Operating Expenses financial groups.
If you do not use the default dimension categories, you can un-assign the financial groups and create your own set of dimensions.
Add a set of dimensions
Dimensions are group properties that you can configure for groupings to provide further categorization for accounts. To start, select the Information icon (![]() ) at the top menu, then Settings. The Engagement Settings dialog opens, where you can view and customize settings.
) at the top menu, then Settings. The Engagement Settings dialog opens, where you can view and customize settings.
To add a set of dimensions:
-
Go to Features | Dimensions.
-
Select + Category, then add a name for the new dimension category.
-
Select Add Dimension (
 ) to add a dimension, then add a name for the new dimension.
You can add up to three dimension levels.
You can now assign the dimension categories to financial groups.
To assign financial groups:
-
Go to the category in the Engagement Settings dialog. Select More actions (
 ) | Assign Groups.
 -
Select all the applicable financial groups.
You can expand and collapse financial groups to view subgroups and use the search bar to find the appropriate groups.
To learn more, see Add dimensions.
Assign accounts
After you add a set of dimensions and assign financial groups, you can assign accounts from your imported client data.
Note: If the account balances from your imported data are not separated by funds, an adjusting journal entry is required to allocate those balances across your dimensions.
To assign accounts:
-
On the Data page, go to the Assign Accounts tab.
-
Assign your accounts. For example, in the screenshot below, you have the option to assign the Warehouse Rent account to any of the existing dimensions, such as Rent - Program services, Rent - Fundraising or Rent - General and administrative.

To learn more, see Assign accounts to groups in the Data page.
Modify dynamic tables in the financial statements
After adding a set of dimensions, you can implement fund reporting in your financial statements by modifying your dynamic tables.
To modify a dynamic table:
-
In the 7-600 Financial statements, navigate to the table where you want the fund reporting to appear.
-
Select More actions (
), then Edit Dynamic Table.The table opens in edit mode.
-
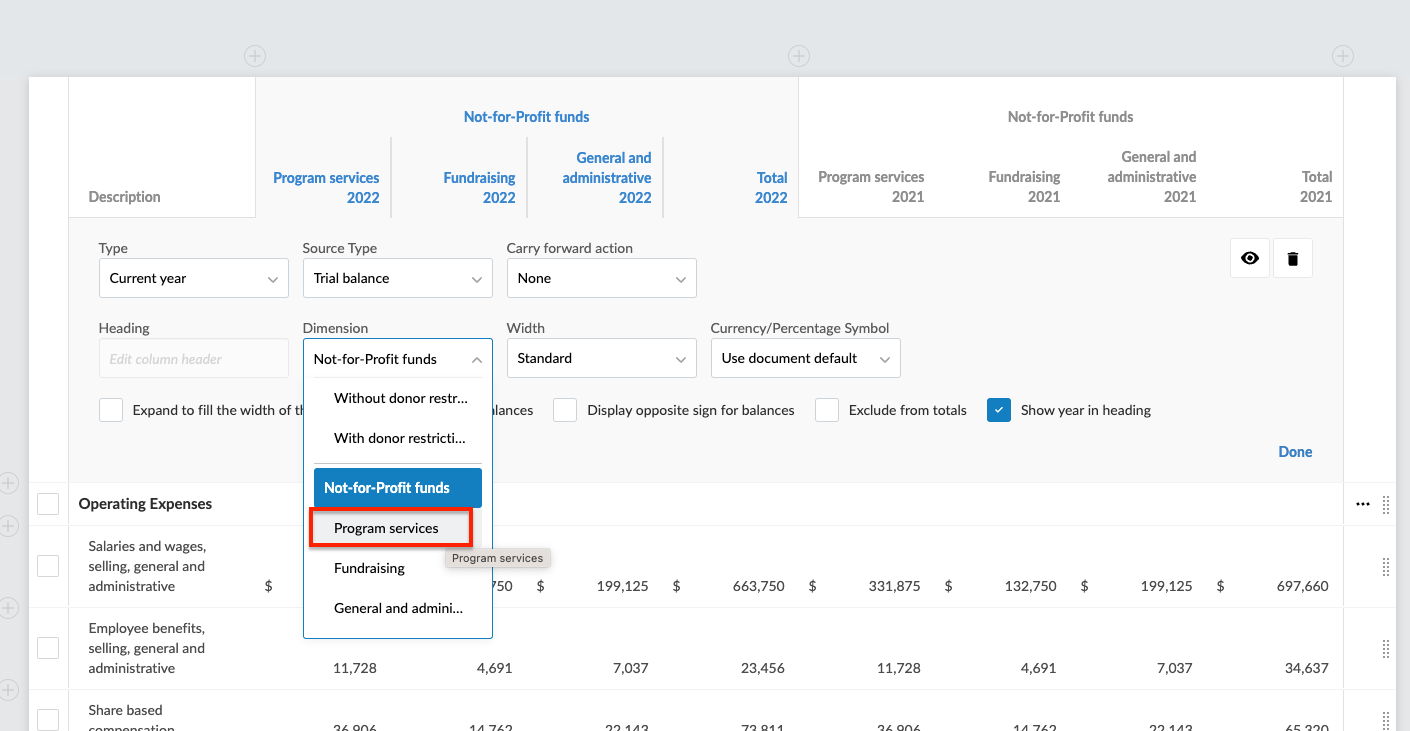
Select the Current year balance column.
-
Select the dimension category from the Dimension drop-down.
The applicable dimension columns and the Column Group Heading are automatically added.
-
Once your changes are complete, select DONE.
To learn more, see Edit table columns in the financial statements and Group columns in dynamic tables.