Een factuur opstellen

Inhoud in dit onderwerp vereist CasewareCloud Time.
Je kunt facturen rechtstreeks in Cloud maken met de Facturatie-app.
Met Cloud kun je drie soorten facturen maken:
| Definitief | Nadat je een opdracht hebt voltooid, zie je op een Eindfactuur het totaal verschuldigde bedrag. Als u tussentijdse facturen hebt uitgegeven, kunt u deze opnemen als onderdeel van uw factuur, evenals het openstaande bedrag. |
| Interim | Tijdens een opdracht toont een tussentijdse factuur een deel van of alle kosten die tot dan toe zijn gemaakt. |
| Vaste vergoeding | Als je aan het begin van een opdracht een vast bedrag afspreekt, gebruik dan een Fixed Fee-factuur om een klant het opgegeven bedrag in rekening te brengen. Je hoeft geen tijd- of kostenboekingen te maken voor een factuur met een vaste vergoeding. Als je bijvoorbeeld $120 in rekening brengt voor een persoonlijke belastingaangifte, kun je voor dat bedrag een factuur voor vaste kosten maken zonder tijd of onkosten toe te voegen. |
Een factuur opstellen
Als facturen voor je factuur nog niet compleet of goedgekeurd zijn, kun je in de tussentijd een conceptfactuur maken.
Een factuur opstellen:
-
Zorg ervoor dat je de rol Eigenaar hebt op de relevante klantentiteit en de Proces-toestemming .
-
Selecteer Activiteitenin het menu Cloud.
-
Selecteer Nieuw.

-
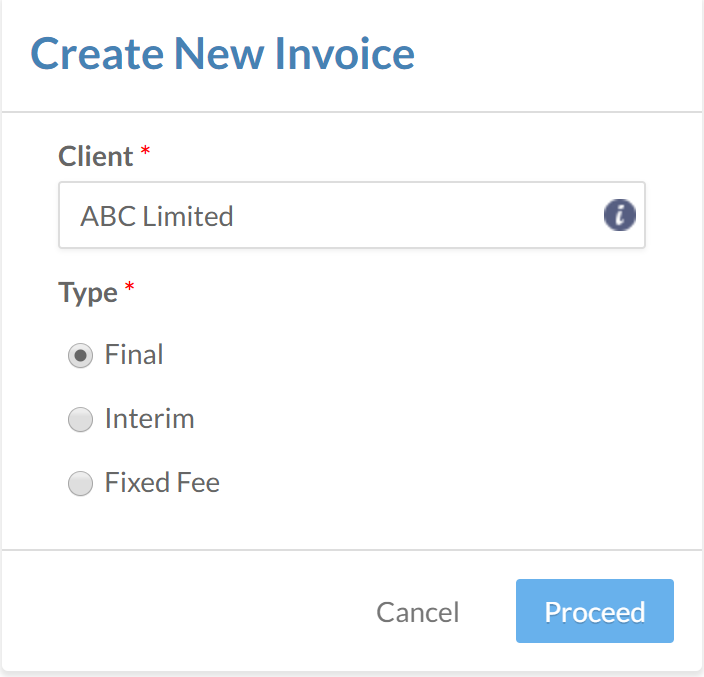
Enter a client in the Client field.
-
Choose an invoice type: Tussentijdse, definitieve of vaste vergoeding. Selecteer vervolgens Ga verder.
-
Voer de gevraagde informatie in.
-
Selecteer Opslaan om een concept te maken.
Je hebt een conceptfactuur gemaakt. De factuur wordt weergegeven op het tabblad Facturen in de Factureringsapp . Als er op een later tijdstip nog meer tijd- of onkostenboekingen worden toegevoegd, moeten deze handmatig aan de definitieve en tussentijdse facturen worden toegevoegd. Als je klaar bent om je factuur naar een klant te sturen, kun je deze afronden en versturen. Voor meer informatie, zie: Een factuur naar een klant sturen.
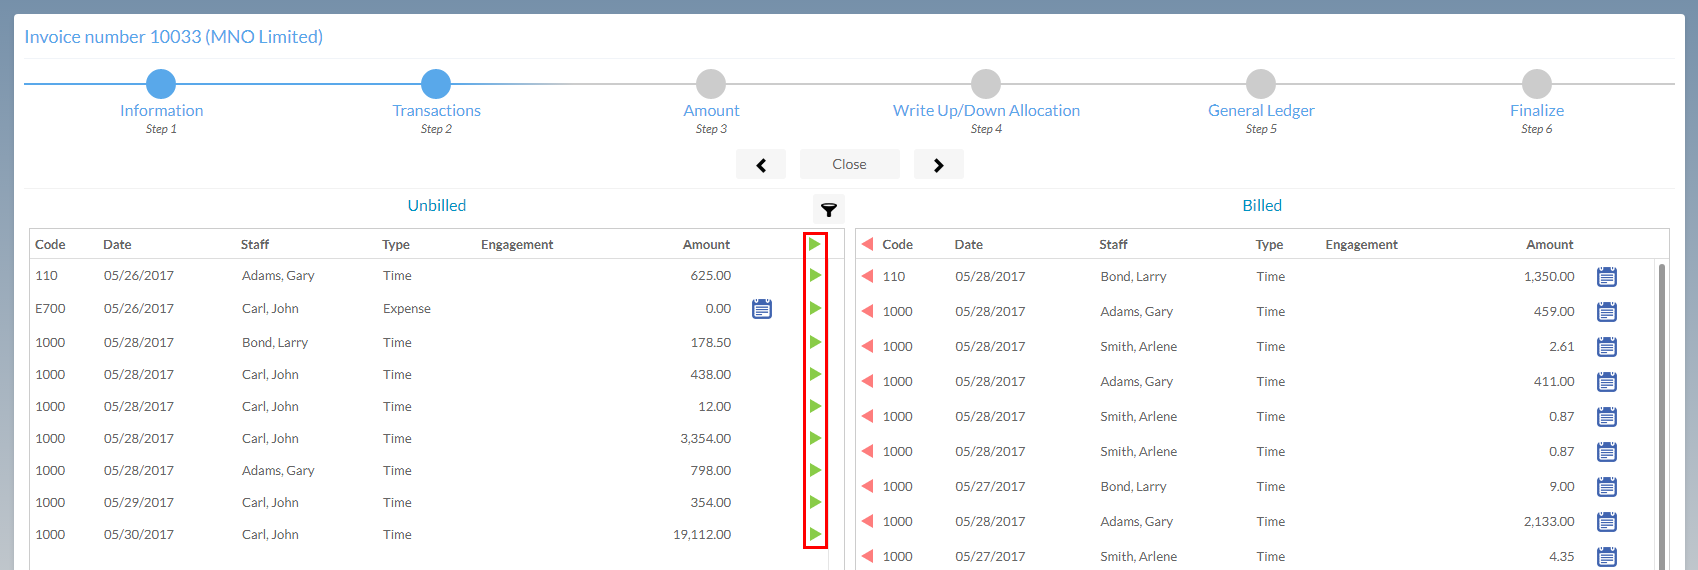
Je kunt ook factuurtotalen voor tussentijdse en eindfacturen wijzigen door tijd- en onkostenboekingen op te schrijven, af te schrijven of af te schrijven. Voor meer informatie, zie: Een factuurtotaal wijzigen.
Een factuur specificeren
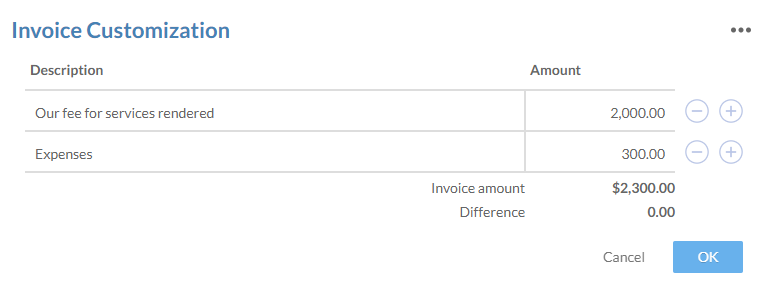
Cloud geeft factuurtotalen standaard weer als één regel. In het dialoogvenster Factuur aanpassen kun je extra regelitems toevoegen om je factuur aan te passen. Elk regelitem heeft een veld Bedrag en een veld Omschrijving die je kunt bewerken. In het veld Beschrijving kun je een werkcode, factuurcode of aangepaste tekst toevoegen.
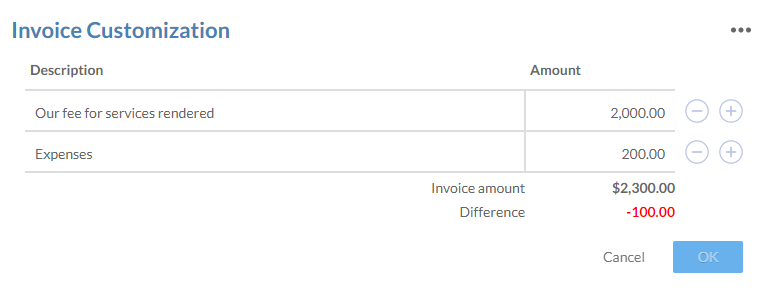
Stel bijvoorbeeld dat je een klant voor $2300,00 factureert en dat je het in rekening gebrachte bedrag voor onkosten apart wilt weergeven van het in rekening gebrachte bedrag voor verleende diensten. Door een regel toe te voegen aan je factuur, kun je elk bedrag afzonderlijk weergeven.
Een factuur specificeren:
-
Zorg ervoor dat je de rol Eigenaar hebt op de relevante klantentiteit en de Proces-toestemming .
-
Selecteer Factureringin het menu Cloud en vervolgens het tabblad Facturen .

-
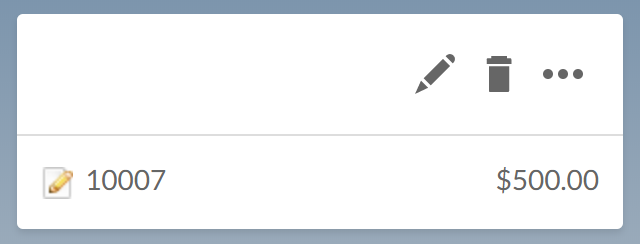
Kies een bestaande factuur en selecteer Bewerken (
 ).
).
-
Selecteer Afronden.

-
Selecteer het pictogram Aanpassing factuur (
 ).
).
-
Selecteer het pictogram Toevoegen (
 ) om een regel toe te voegen en vul vervolgens de velden Omschrijving en Bedrag in. Het totaal van alle regels moet overeenkomen met het factuurtotaal voordat je verder kunt gaan.
-
Selecteer OKen vervolgens Opslaan.
Je hebt je factuur gespecificeerd. Als je klaar bent om het naar een klant te sturen, kun je het afronden en versturen. Voor meer informatie, zie: Een factuur naar een klant sturen.
Een factuur automatisch specificeren
Je kunt facturen automatisch specificeren op basis van hun tijd en onkosten. Cloud genereert regelitems met de werkcodes voor deze invoer. Invoeren met identieke werkcodes worden samengevoegd tot één regelitem.
Stel bijvoorbeeld dat je twee urenboekingen van $100 hebt toegevoegd voor de boekhouding en twee kostenboekingen van $150 aan een nieuwe factuur. Standaard zou je nieuwe factuur deze boekingen weergeven als één regel met een totaalbedrag van $500. Als je Factuur specificeren op werkcode selecteert in het dialoogvenster Factuur aanpassen , worden er in plaats daarvan twee regelitems gegenereerd, één voor elke werkcode.

Een factuur automatisch specificeren:
-
Zorg ervoor dat je de rol Eigenaar hebt op de relevante klantentiteit en de Proces-toestemming .
-
Selecteer Activiteitenin het menu Cloud.
-
Selecteer het tabblad Facturen en kies vervolgens een conceptfactuur.
-
Select the Edit icon (
 ), then select Finalize.
-
Selecteer het pictogram Aanpassing factuur (
 ).
).
-
Selecteer de optie Meer acties(
 ) | Factuur specificeren op werkcode.
-
Selecteer OKen vervolgens Opslaan.
Je hebt je factuur automatisch gespecificeerd. Als je klaar bent om het naar een klant te sturen, kun je het afronden en versturen. Voor meer informatie, zie: Een factuur naar een klant sturen.
Een factuurtotaal wijzigen
U kunt factuurtotalen voor eind- en tussentijdse facturen in CasewareCloud Billing aanpassen door tijd- en onkostenboekingen op te schrijven, af te schrijven of af te schrijven.
Tijd- en onkostenboekingen opschrijven of noteren
Met Facturering kun je factuurtotalen wijzigen door tijd- en onkostenboekingen op te schrijven of af te schrijven. Als het factuurbedrag bijvoorbeeld hoger is dan het bedrag dat aan een klant is geoffreerd, kun je boekingen noteren zodat het totaal overeenkomt met het geoffreerde bedrag.
Tijd- en onkostenvermeldingen opschrijven of noteren op een factuurontwerp:
-
Zorg ervoor dat je de rol Eigenaar hebt op de relevante klantentiteit en de Proces-toestemming .
-
Selecteer Factureringin het menu Cloud en vervolgens het tabblad Facturen .

-
Kies een bestaande factuur en selecteer Bewerken (
 ).
).
-
Wijzig in de stap Bedrag het totaal in het veld Bedrag naar wens. Het op- of afwaarderingsbedrag wordt weergegeven.

-
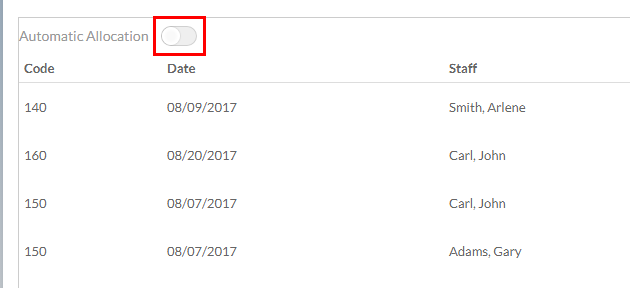
In de stap Toewijzing afschrijving/afwaardering wordt het totaal van de afschrijving/afwaardering automatisch verdeeld over alle medewerkers. Als u handmatig wilt toewijzen, selecteert u de optie Automatisch toewijzen en wijzigt u de velden Omhoog/Omlaag naar wens.
-
Voltooi de stappen Grootboek en Afronden .
Je hebt een factuurtotaal gewijzigd door tijd- en onkostenboekingen op te schrijven of af te schrijven. Het nieuwe op- of afboektotaal wordt weergegeven in de kolom Op-/Neerschrijven op het tabblad Facturen .
Tijd- en onkostenboekingen afschrijven
Als je geen betaling kunt ontvangen voor tijd- of onkostenboekingen, kun je deze boekingen afschrijven met Facturering.
Tijd- en onkostenfacturen afschrijven op een factuurontwerp:
-
Zorg ervoor dat je de rol Eigenaar hebt op de relevante klantentiteit en de Proces-toestemming .
-
Selecteer Factureringin het menu Cloud en vervolgens het tabblad Facturen .

-
Kies een bestaande factuur en selecteer Bewerken (
 ).
).
-
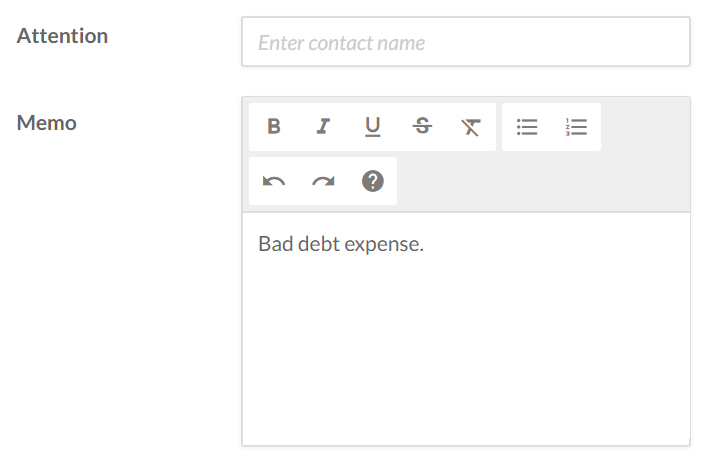
(Optioneel) Voeg een Memo toe in de stap Informatie om aan te geven waarom deze boekingen worden afgeschreven.
-
Verander in de stap Bedrag het totaal in het veld Bedrag in nul.

Je hebt alle tijd- en kostenboekingen voor de huidige factuur afgeschreven. U kunt Opslaan selecteren in de stap Afronden als verdere controle nodig is, of Afronden om de wijziging van het WIP-totaal te voltooien. De kolom Bedrag op het tabblad Facturen toont 0,00 voor elke factuur die is afgeschreven.
