Add a financial statement area
Areas help organize your financial statement content by grouping similar or related information.
To add an area to the financial statement:
-
Go to the Document Map, then select Add (
 ).
). -
Choose New Area.
The new area is appended to the document map and displays on the page with a default title New Area. You can select the default title to change it. Note that the area name in the Table of Contents will not automatically be updated. To learn more, see Rename content areas in financial statements.
Note: If there are no notes in the financial statement, the option Note Area is also available. Choose Note Area to include a notes section in the document and start adding notes.
-
Start adding content to the new area by selecting it to display the Add icon (
 ).
).
To add content to the new area, select Add (![]() ), then choose one of the following content types:
), then choose one of the following content types:
-
Text Section
-
Dynamic Table
-
Analysis
-
Page Break
When you add a content type, the content type appears in the area with a default title. For example, dynamic tables have Dynamic Table as the default title. You can edit this title to customize it and make it easier to navigate the financial statements.
You can add more than one content type in an area. You can also drag and drop the new area to change its location in the document, see Rearrange areas in the financial statements.
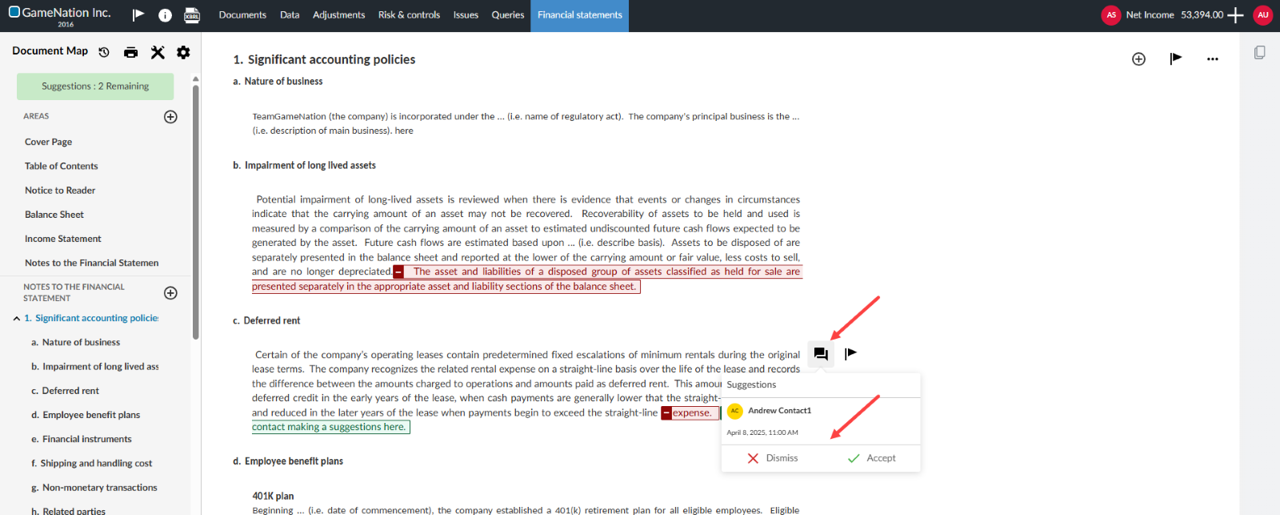
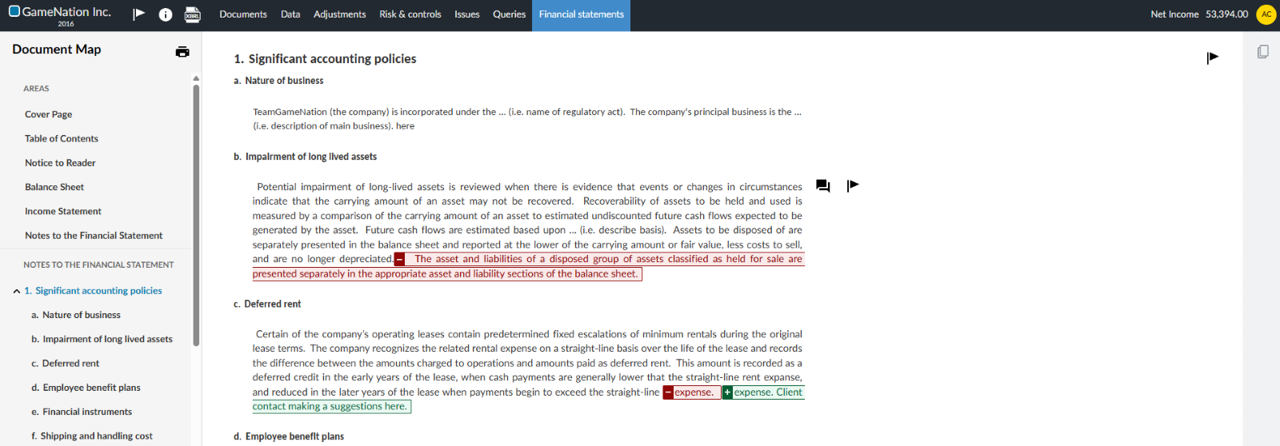
Client contact review – suggested edits
Your client contacts can now add suggested edits to text areas within documents. A suggestion button is now available to client contacts in the text section.
You will have the option to accept or dismiss suggestions from a Discussions icon [![]() ] that will be visible beside the text marked with a suggestion. In addition, a suggestion bar appears on the document map when the user has at least one suggestion to review and/or accept. With the bar, the user can view and manage suggestions that have not been addressed.
] that will be visible beside the text marked with a suggestion. In addition, a suggestion bar appears on the document map when the user has at least one suggestion to review and/or accept. With the bar, the user can view and manage suggestions that have not been addressed.
This feature is available on all engagements for client contacts who have the Contact-Viewer permission for an engagement.
Note: Only the staff user can accept or dismiss suggestions
Client contact view
Staff view