Edit table rows in the financial statements
You can remove any existing rows in a dynamic table or rearrange them. You can also add rows to include more information or to add white space between rows to improve readability.
Note: The default font size for content in dynamic tables is 12 and cannot be modified.
Add table rows
To add a row in a dynamic table:
-
Select the table.
-
Select More actions (
 ), then choose Edit Dynamic Table.
The table opens in edit mode.
-
Go to where you want to add a row.
-
Select Add (
 ) at the left border of the table.
 -
Select one of the following row types:
Trial balance data: to select the row data from the trial balance data. You can insert an account or group. If the group has subgroups, they are inserted into the table as well. A Total row is also inserted to hold the sum of the accounts or subgroups within the group. If dimensions are available in your product, you can filter the accounts and groups by dimension.
Input row: to add an empty row, where you can enter custom text and values.
Commentary row: adds a commentary row. By default it inserts a reference to existing notes in the financial statements. You can change the default by deleting the note reference and enter a comment for the row.
Spacing row: to add white space into your dynamic table. You can add white space to make your content easier to read.
Page break: to add a page break between table rows.
Custom group: to insert a text field so you can enter a title or a brief description for your group. To learn more, see Create custom groups in tables.
-
Select SAVE or SAVE & CLOSE.
You can also add input rows directly on the dynamic table without having to go to edit mode, if this option is enabled in your product.
To add an input row directly on the table:
-
Go to where you want to add an input row.
-
Select +Row.
-
Add information in the new row as desired.
Note: The +Row option is only available if it's enabled in your product.
You can directly delete an input row by selecting the (![]() ) at the end of the row.
) at the end of the row.
Move table rows
To move a row:
-
Select the table.
-
Select More actions (
 ), then choose Edit Dynamic Table.
The table opens in edit mode.
-
Locate the row that you want to move and select the Move icon (
 ).
). -
Drag the row then drop it in the desired location.
A grid displays in the table to mark the borders of each row. Valid places to move your row have dark blue grid lines while invalid places have gray grid lines. Use the grid for guidance as you drag and drop.
Delete table rows
To delete a row:
-
Select the table.
-
Select More actions (
 ), then choose Edit Dynamic Table.
The table opens in edit mode.
-
Select the check box at the right border of the row you want to delete.
-
Select Delete (
 ) .
) .
Hide table rows
Note: You can only hide rows whose data source are trial balance groups, not accounts. The Hide / Show icons ( /
/ ) are only visible for trial balance group rows.
-
Select the table.
-
Select More actions (
 ), then choose Edit Dynamic Table.
The table opens in edit mode.
-
Select the check box at the right border of the trial balance row you want to delete.
-
Select Hide (
 ) .
) .To make the row visible again, select Show (
 ).
).
Display flipped accounts
You can also change the default sign of a row to have it display in an opposite sign. For example, in the Income Statement and want to display revenue and gross profit as positive numbers (although the default sign for these accounts is negative).
To display row balances with the opposite sign:
-
Go to the table where you want to change the default sign for certain rows.
-
Select More actions (
 ), then choose Edit Dynamic Table.
 -
Go to the row that you want to display with the opposite sign.
-
Select Flip Sign (
 ).
). -
Select SAVE or SAVE & CLOSE.
The table opens in edit mode.
The Flip Sign Indicator (![]() ) displays in the row to indicate that the default sign for this row has been flipped.
) displays in the row to indicate that the default sign for this row has been flipped.
Tip: To revert the row balance sign to the default, select the row and select Flip Sign (![]() ) again.
) again.
Change underline and overline options
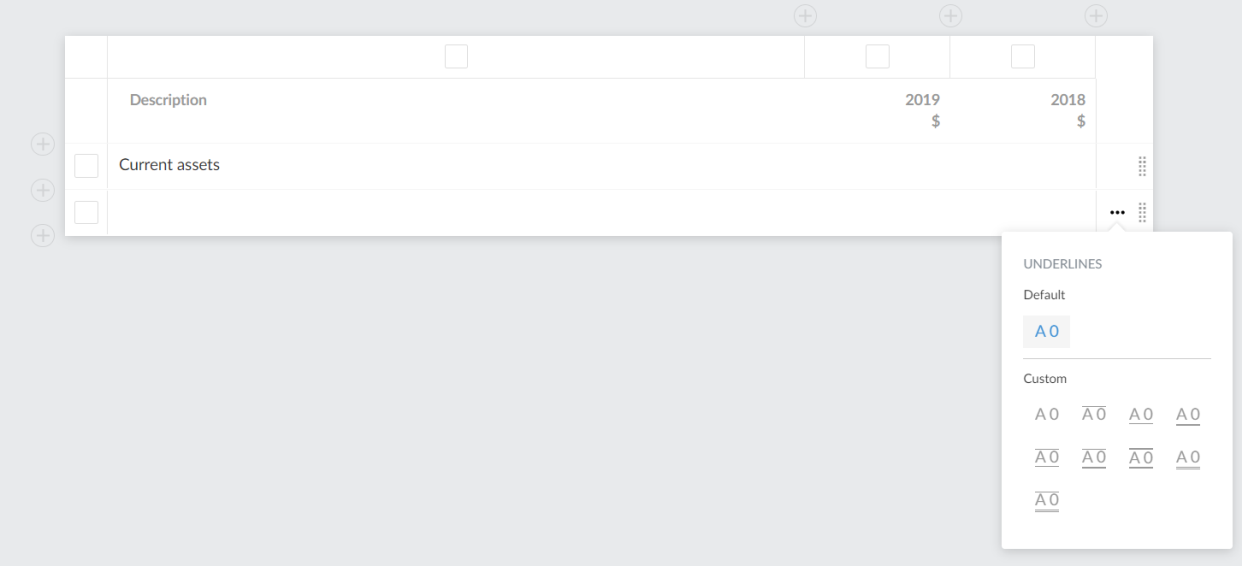
To support specific market requirements for financial statements presentation, underline and overline options can be configured in dynamic tables input rows (including custom calculation rows).

To apply an underline or overline:
-
Select the (
 ) icon on the right of the input row.
A menu with underline options is displayed.
-
Select the formatting option you would like to have applied to that row.
