Create a private entity
When you add a new entity to Cloud, any staff members who have the system-wide Viewer, Editor, or Owner roles will be able to see it. If you would like to restrict access to certain entities, you can create a Limited entity.
A limited entity is only visible to Cloud admins and to the owner of the entity. That owner can also grant access to other users on a case-by-case basis.
Creating a private entity
You can create an entity in Cloud that is only visible to you, to Cloud admins, and to users you choose.
To create a private entity:
-
Ensure that you have the Entities Admin role or equivalent privileges.
-
From the Cloud menu, select Entities.
-
Select New, then select an entity type.
-
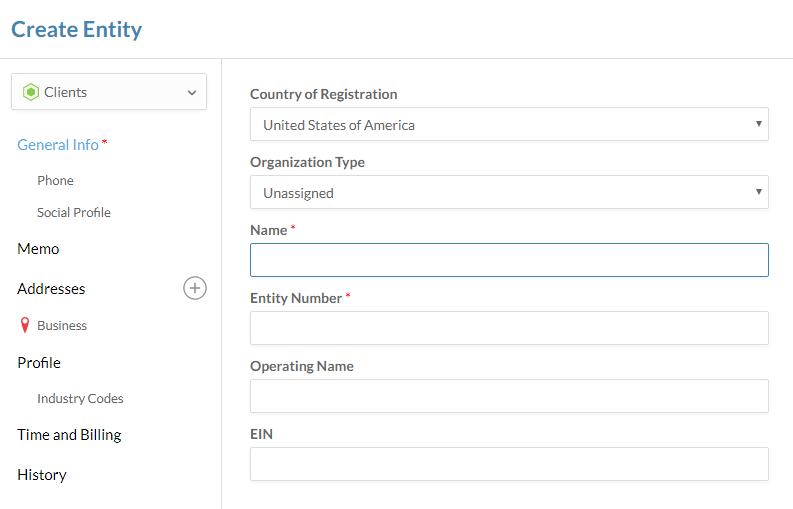
In the Create Entity dialog, enter the general information about your entity. The Name field is mandatory. If the entity is a client entity, the Number field is also mandatory. Other available fields and organization types will vary based on the selected Country of Registration. For more information, see Entity creation.
-
Select a section on the left to display related fields on the right. Enter any applicable information about the entity.
-
Select the toggle at the bottom left side of the dialog to make the entity Limited.

-
Select Save.
Your private entity is created and displayed on the Entities page.
By making the entity limited, you have made the entity invisible to most users in your organization. By default, only users with the system-wide Admin role can see it.
When you are creating an entity, you can include the following information:
| Section name | Available fields |
|---|---|
| General Info | Country of registration, organization type, operating name, business number, phone numbers, and social media profiles. |
| Memo | A memo field to enter a short description or other general information about the entity. |
| Addresses | Address information for the entity. A business address is included by default, and you can add more addresses by selecting the Create icon( |
| Profile | Status (active or inactive), year end month, dates of incorporation and dissolution, exchange name, trading symbol, reporting framework. |
| Time and Billing | Tax registration numbers or exemption numbers. |
| History | Client acceptance date, referral information. |
 ).
).Sharing a private entity
If you are the owner of a private entity, you can grant other Cloud users access to the entity.
To share a private entity:
-
Ensure that you have the Entities Admin role or equivalent privileges.
-
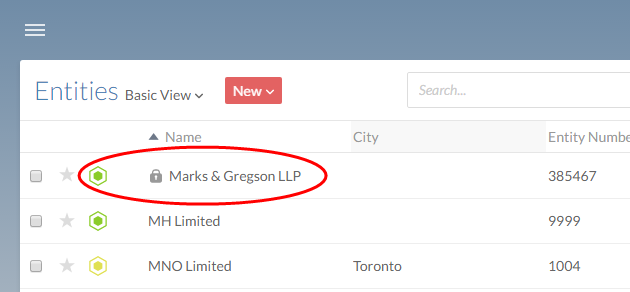
From the Cloud menu, select Entities.
-
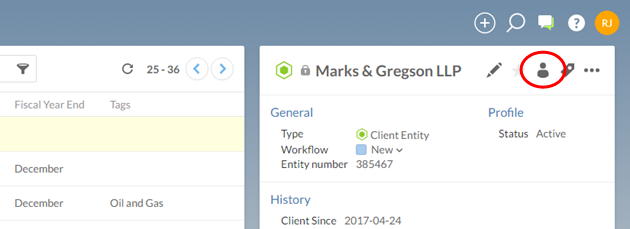
Select a private entity. In the detail pane on the right, select Share (
 ).
).
-
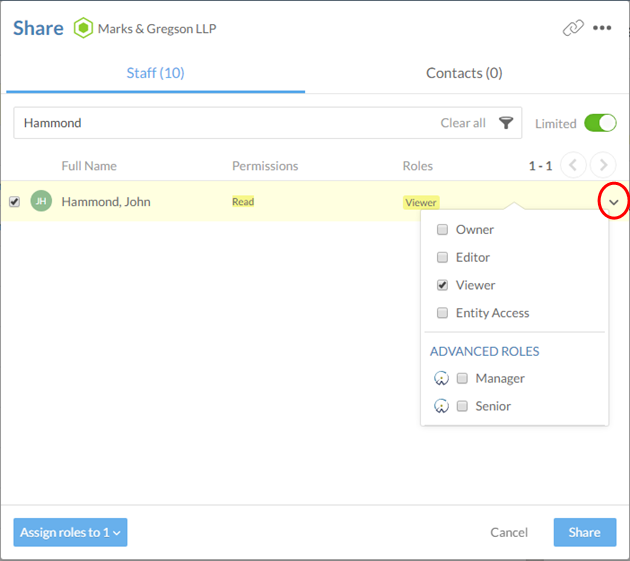
In the Share dialog, select a user, then select the roles arrow on the right side of the row. Choose one or more roles to grant to the user. You can grant roles to multiple users.
-
Select Share.
You have shared a private entity. Any staff members or contacts who were granted access can see the entity. They are also able to view and edit all content under the entity based on the roles assigned to them.