Firmeneinstellungen - Sherlock Starter
![]()
Content in this topic requires Caseware Sherlock.
Processing Messages
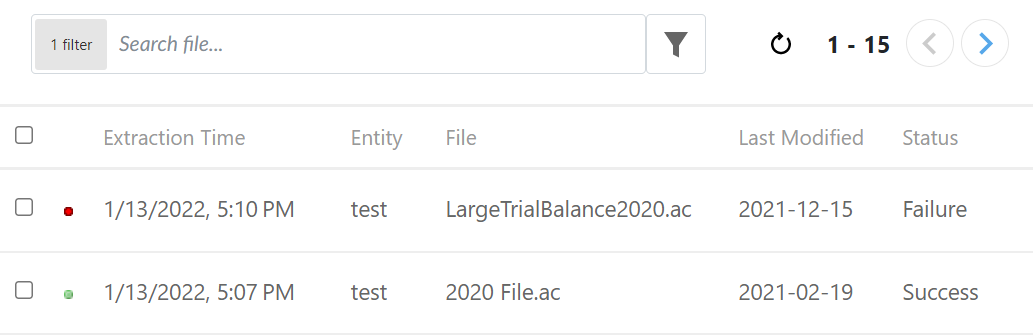
Die Übersicht Processing Messages zeigt Informationen über die zahlreichen Datenextraktionsverfahren, die jeden Tag durchgeführt werden an.
Übersicht Processing Messages anzeigen:
-
Stellen Sie sicher, dass Sie über die Rolle Einstellungen-Administrator bzw. gleichwertige Berechtigungen verfügen.
-
Öffnen Sie das Cloud Hauptmenü (
 ) und wählen Sie Einstellungen.
 -
Wählen Sie Sherlock Starter | Processing Messages.
-
Die Übersicht Processing Messages lädt beim ersten Öffnen eine Liste von historischen Datenextraktionsverfahren.
-
(Optional) Verwenden Sie das Symbol Aktualisieren (
 ), um die Übersicht Datenextraktionsverfahren erneut zu laden.
 -
(Optional) Verwenden Sie Suchleiste oder Filter (
 ), um die Übersicht auf diejenigen einzugrenzen, die den angegebenen Eigenschaften entsprechen.
Eigenschaft Beschreibung Symbole Status (  ,
, ,
, )
)Zeigt auf einen Blick an, ob die Extraktion erfolgreich ( ), in Bearbeitung () oder ein Fehler() ist. Extraktionszeit Datum und Uhrzeit der durchgeführten Extraktion Entität Der Name der Entität, in der sich die Datei befindet. Datei Der Name der Engagementdatei. Zuletzt geändert Das Datum der letzten Änderung an der Engagementdatei. Status Zeigt an, ob die Extraktion ein Erfolg oder Misserfolg war.
-
-
Wählen Sie ein Datenextraktionsverfahren aus der Liste, um weitere Details anzuzeigen, einschließlich der vollständigen Fehlermeldung für fehlgeschlagene Extraktionen.

Gold Standard Mapping
If your firm has custom Audit templates, you can use Gold Standard Mapping to map the risks, controls and reportable items in your templates to match the Caseware "gold standard". As a result of this mapping process, Sherlock can retrieve the risks, controls and reportable items from engagement files that are based on the firm template.
To configure Gold Standard Mapping:
-
Ensure that you have the Settings Admin role or equivalent privileges.
-
Öffnen Sie das Cloud Hauptmenü (
) und wählen Sie Einstellungen. -
Select Sherlock Starter | Gold Standard Mapping.
-
Select the Add Mapping Rule (
 ) icon below the applicable mapping type to create a new mapping rule, or the Edit (
 ) icon next to an existing rule.
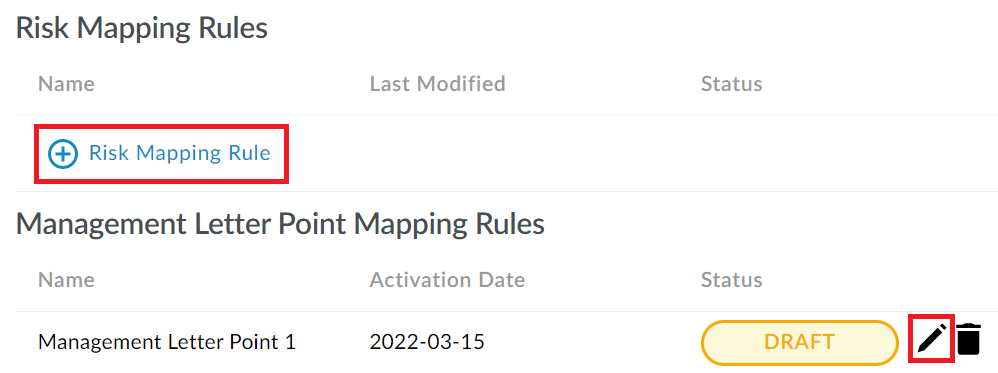
Note: You cannot edit mapping rules with the ACTIVE status.
-
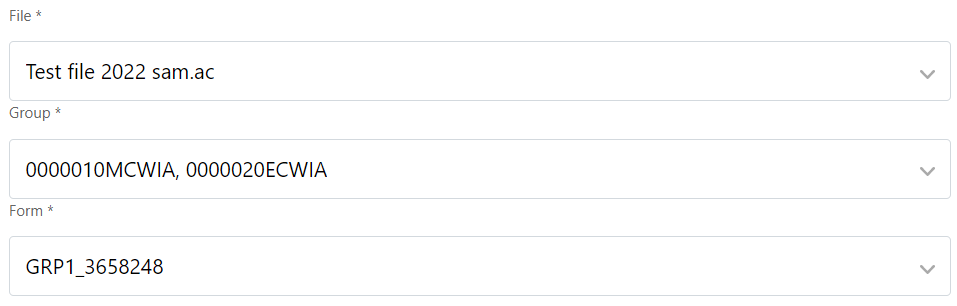
On the Select Source page, select a Working Papers file from the 20 most recent files. CaseView database information loads from the selected file. Select up to 3 applicable groups and a form.
Wählen Sie Weiter.
-
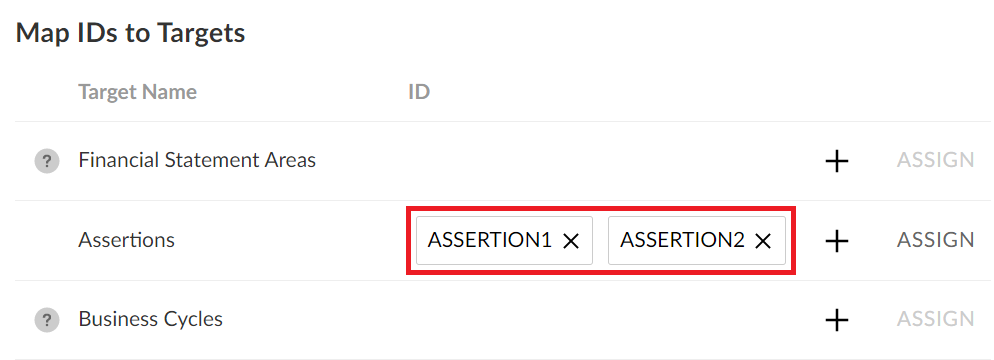
On the Map IDs to Targets page, you can establish relationships by mapping IDs to targets. Select the Add ID (
 ) icon to the right of a target, then on the Add IDs page, select the applicable IDs to map to the target.
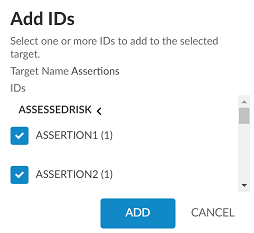
The number next to each ID indicates how many times it has been mapped to a target. Select Add to map the IDs.
-
(Optional) Select Assign next to a specific target to assign a value transformation rule. On the Assign Value to Transform page next to the applicable ID, select an existing rule from the drop-down menu, select the Edit (
) icon to edit an existing rule, or select the Add Transformation Rule () icon to create a new rule. Zum Beispiel: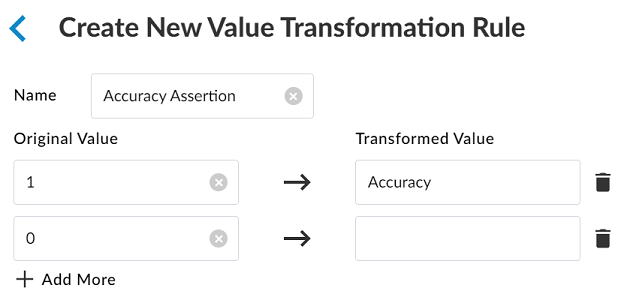
When complete, select Next.
-
-
The Summary page displays an overview of the mapping rule. If the mapping rule is complete, select Finish.
-
The mapping rule is saved as a draft. Select the Edit (
) icon to continue editing the rule, or select ACTIVATE above the mapping type to enable the rule.Hinweise:
-
If there are two rules in the DRAFT status for a particular mapping type, selecting ACTIVATE will enable both rules.
-
Once active, you can no longer edit or delete a mapping rule.
-
Each Control, Risk or Management Letter Point can have up to 2 mapping rules.
-