Manage client relationships
During the engagement work, you can work directly with clients. For example, to request information or start a discussion with one or more client contact.
Create activities for a contact
Once your client contacts have been added to Cloud and your contact group for the engagement is set up, you may want to do some preliminary collaboration with the client.
You can create a discussion and invite your contacts to respond. This verifies that your client group is working as intended and that your client contacts are able to access Cloud and respond to you.
To create a discussion for contacts:
-
Ensure that you have the Entities Admin role or equivalent rights.
-
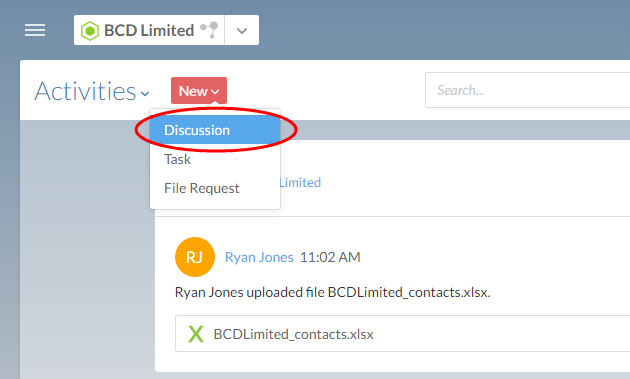
From the Cloud menu (
 ), select Activities.
 -
Select New, then choose Discussion.
-
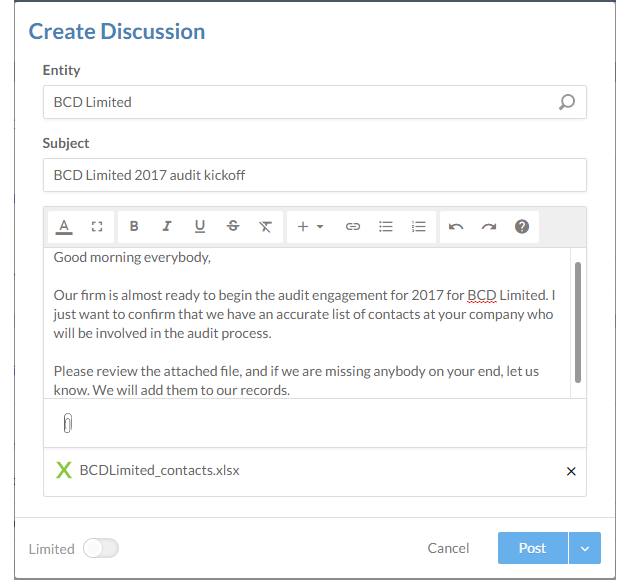
In the Create Discussion dialog, enter a subject and the content of your message. To attach a file, select the paperclip icon.
-
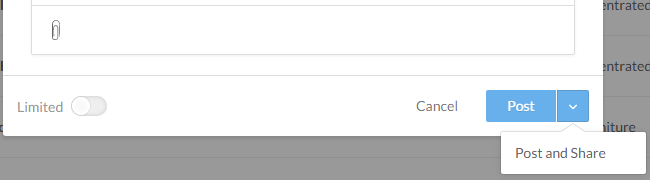
Select the drop-down arrow at the bottom right and select Post and Share.
-
In the Share dialog, select the Contacts tab. Toggle the Allow Contacts option.
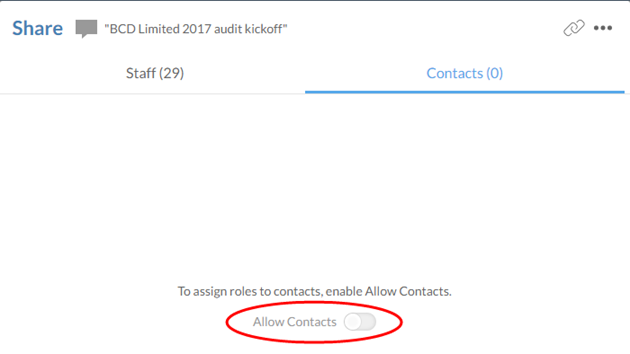
-
Select the contact group for this engagement, then select Assign roles to 1 and choose Contact - Viewer. Select Share.
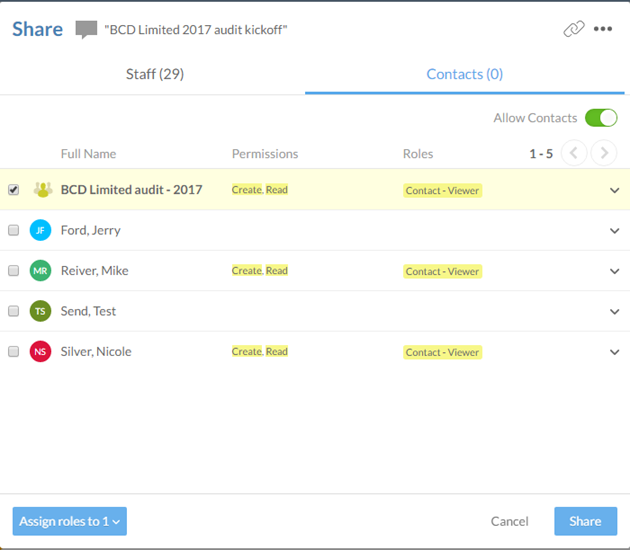
You have created a discussion and shared it with all of the members of your contact group. They can see this discussion when they log in to Cloud, and can respond to it by leaving comments.
Request client data or documents
To request data or documents from a contact, you can create and track file requests. Use file requests when you need a new file or an update to an existing file. For example, you can create a file request for a tax document, or if a contact needs to add a signature to an existing PDF.
Request a file
Create a file request when a contact needs to upload a file to Cloud.
To request a file:
-
Ensure that you have the Viewer role and that your contact has the Entity Collaborator role.
-
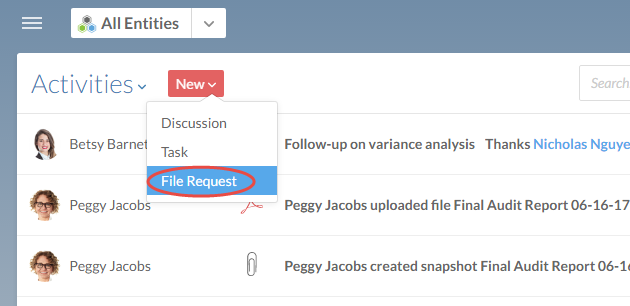
From the Cloud menu (
), select Activities. -
Select New | File Request.
-
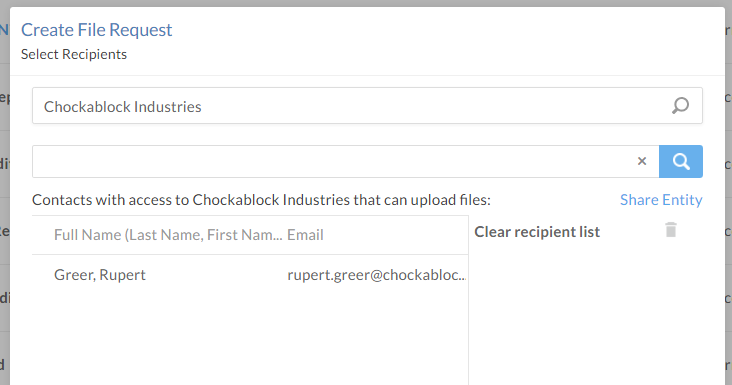
Enter the appropriate Entity. A list of contacts with entity access is displayed.
-
Select contacts to add them to the recipient list, then select Next.
-
Complete the Subject field and add a description.
Note: Rich text is not supported in file request notifications. Any line breaks or other formatting, such as bolding and italics, that you apply to the description text will not display in the email.
-
If your administrator has enabled detailed notifications: Select Next and complete the Additional Message field if required. Your message will be included in the body of the notification email sent to your contacts. To learn more about detailed notifications, see Firm settings - Email.
Note: If you enter text in both the description field and the Additional Message field, the content of both fields will display as a single paragraph. We recommend that you enter content in only one of these fields.
-
Select Complete.
You have created and assigned a file request.
Request an update to an existing file
If a client needs to provide input on an existing file, you can add an attachment to a file request. You can attach a new file from your device, or add an existing file from Cloud.
To request an update to an existing file:
-
Ensure that you have the Viewer role and your contact has the Entity Collaborator role.
-
From the Cloud menu (
), select Activities. -
Select New | File Request.
-
Enter the appropriate entity. A list of contacts with entity access is displayed.
-
Select contacts to add them to the recipient list, then select Next.
-
Complete the Subject field and add a description.
-
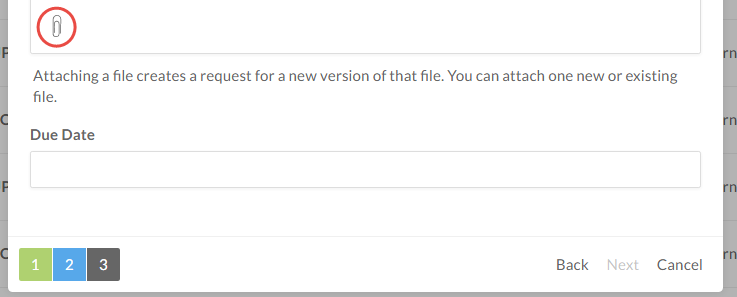
Select Attach File and choose Existing to attach a file already in Cloud, or choose Files | Upload to attach a file from your device.
-
If your administrator has enabled detailed notifications: Select Next and complete the Additional Message field if required. Your message will be included in the body of the notification email sent to your contacts. To learn more about detailed notifications, see Firm settings - Email.
-
-
Select Complete.
You have requested an update to an existing file.