Assign accounts to groups in the Data page
On the Data page, the Assign Accounts icon can sometimes show a red badge ( ![]() ) once you import the trial balance. This means that one or more accounts haven't been successfully mapped to groups. The same happens once you manually add one or more accounts. Note that the red badge shows the number of unassigned accounts. For example, if there is one unassigned account, the badge shows 1 (
) once you import the trial balance. This means that one or more accounts haven't been successfully mapped to groups. The same happens once you manually add one or more accounts. Note that the red badge shows the number of unassigned accounts. For example, if there is one unassigned account, the badge shows 1 (![]() ).
).
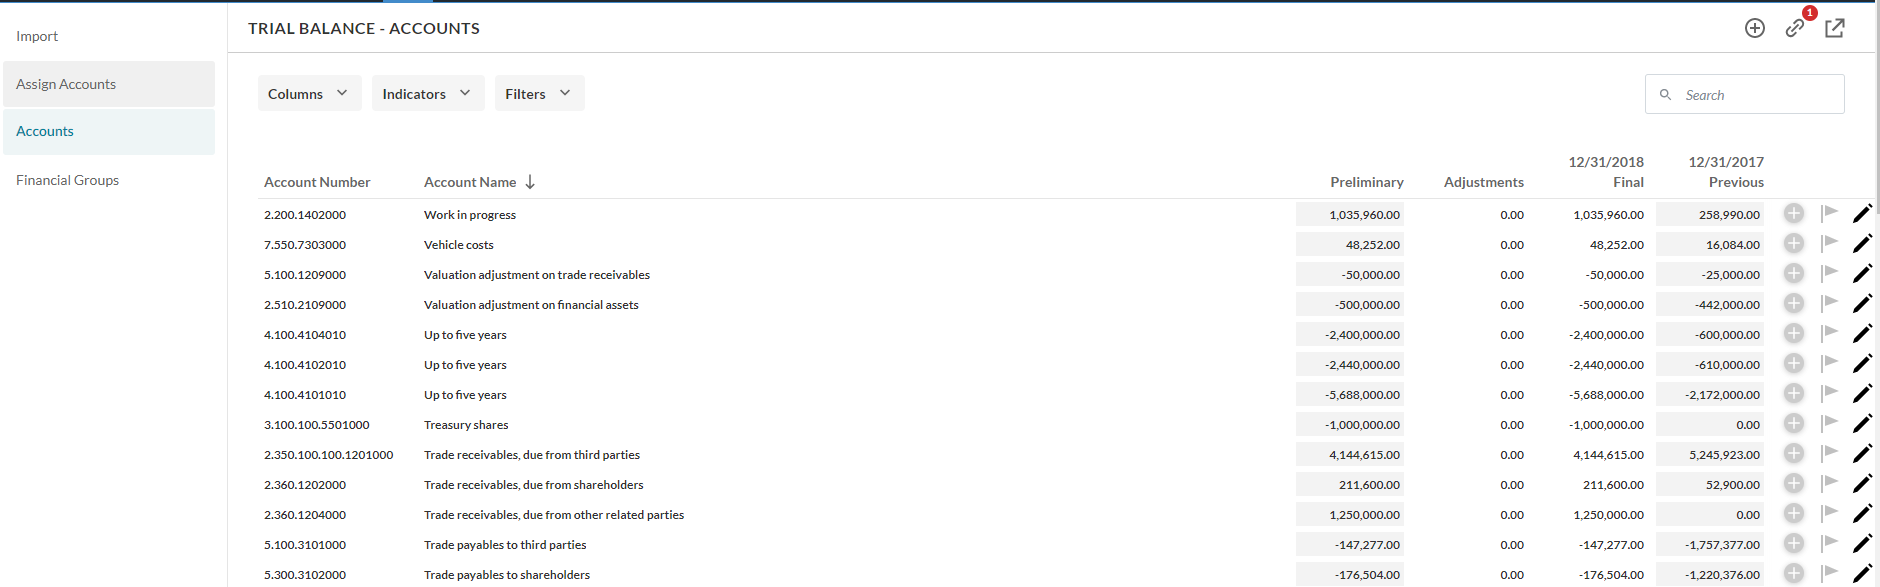
You must manually map unassigned accounts to appropriate groups so that your financial data populates correctly throughout the engagement.
Assign accounts to groups
You can manually map unassigned accounts to groups from the Assign Accounts page.
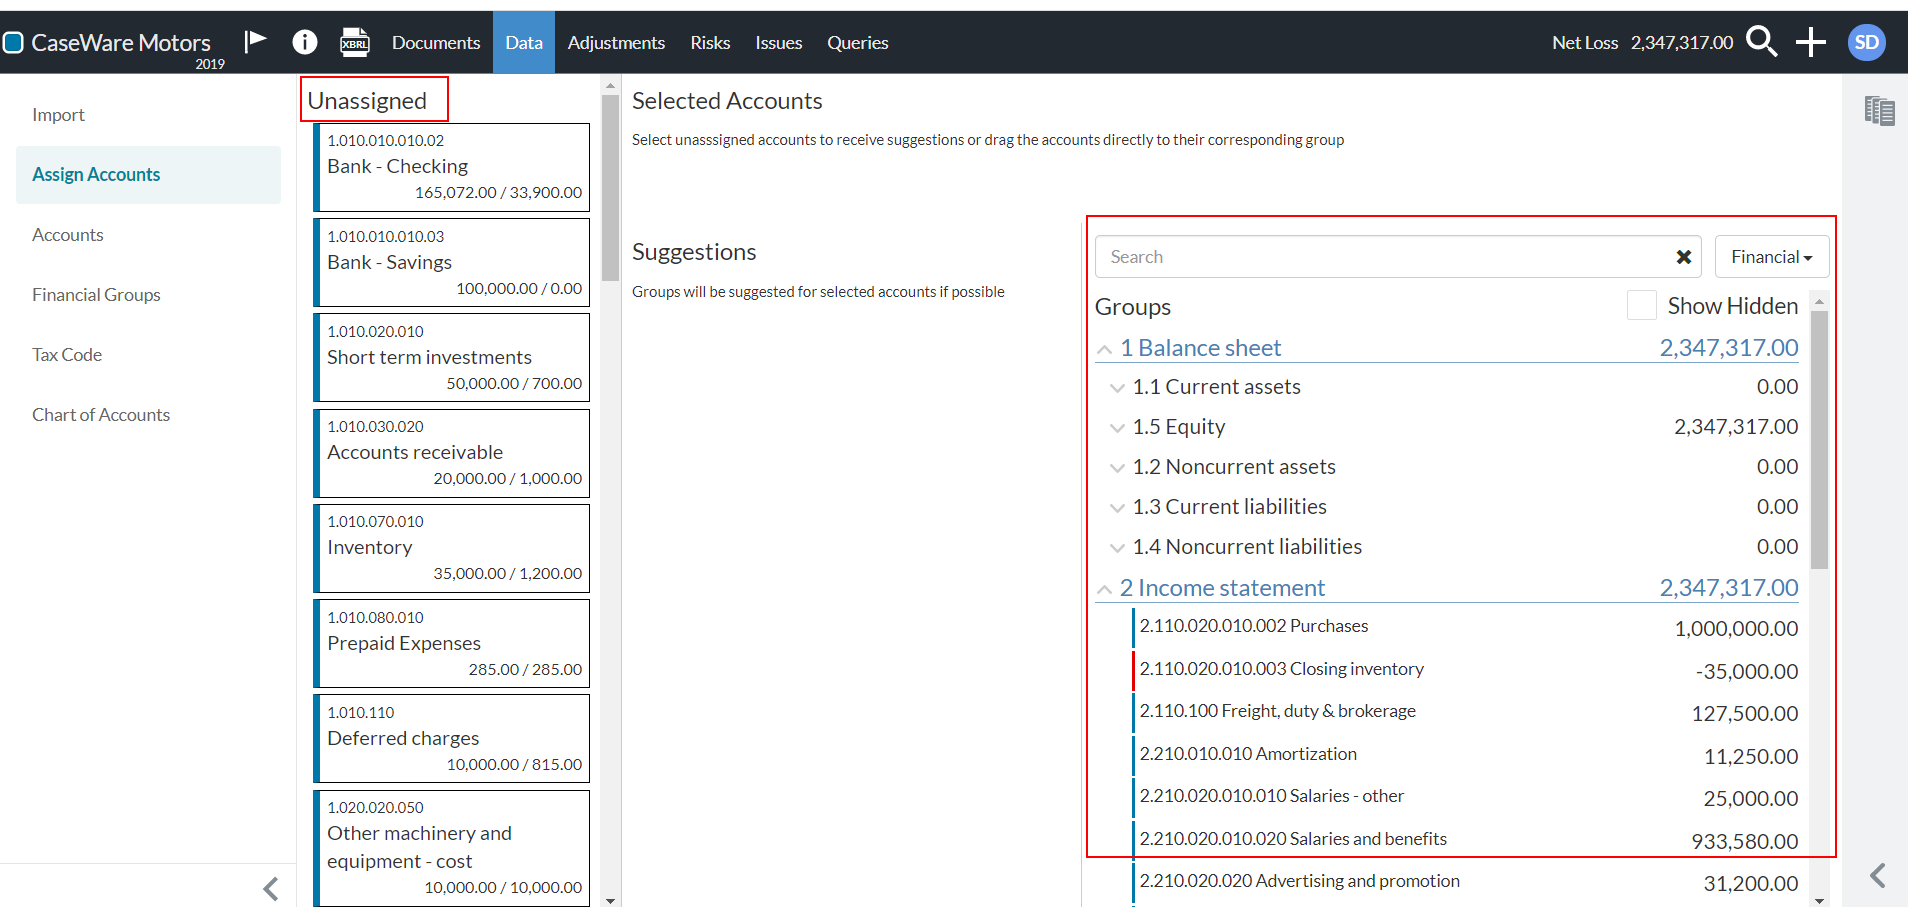
To assign an account to a group:
-
Select Assign Accounts icon (
 ) from the top right corner of the Data page.
You can also select the Assign Accounts tab from the left side panel.
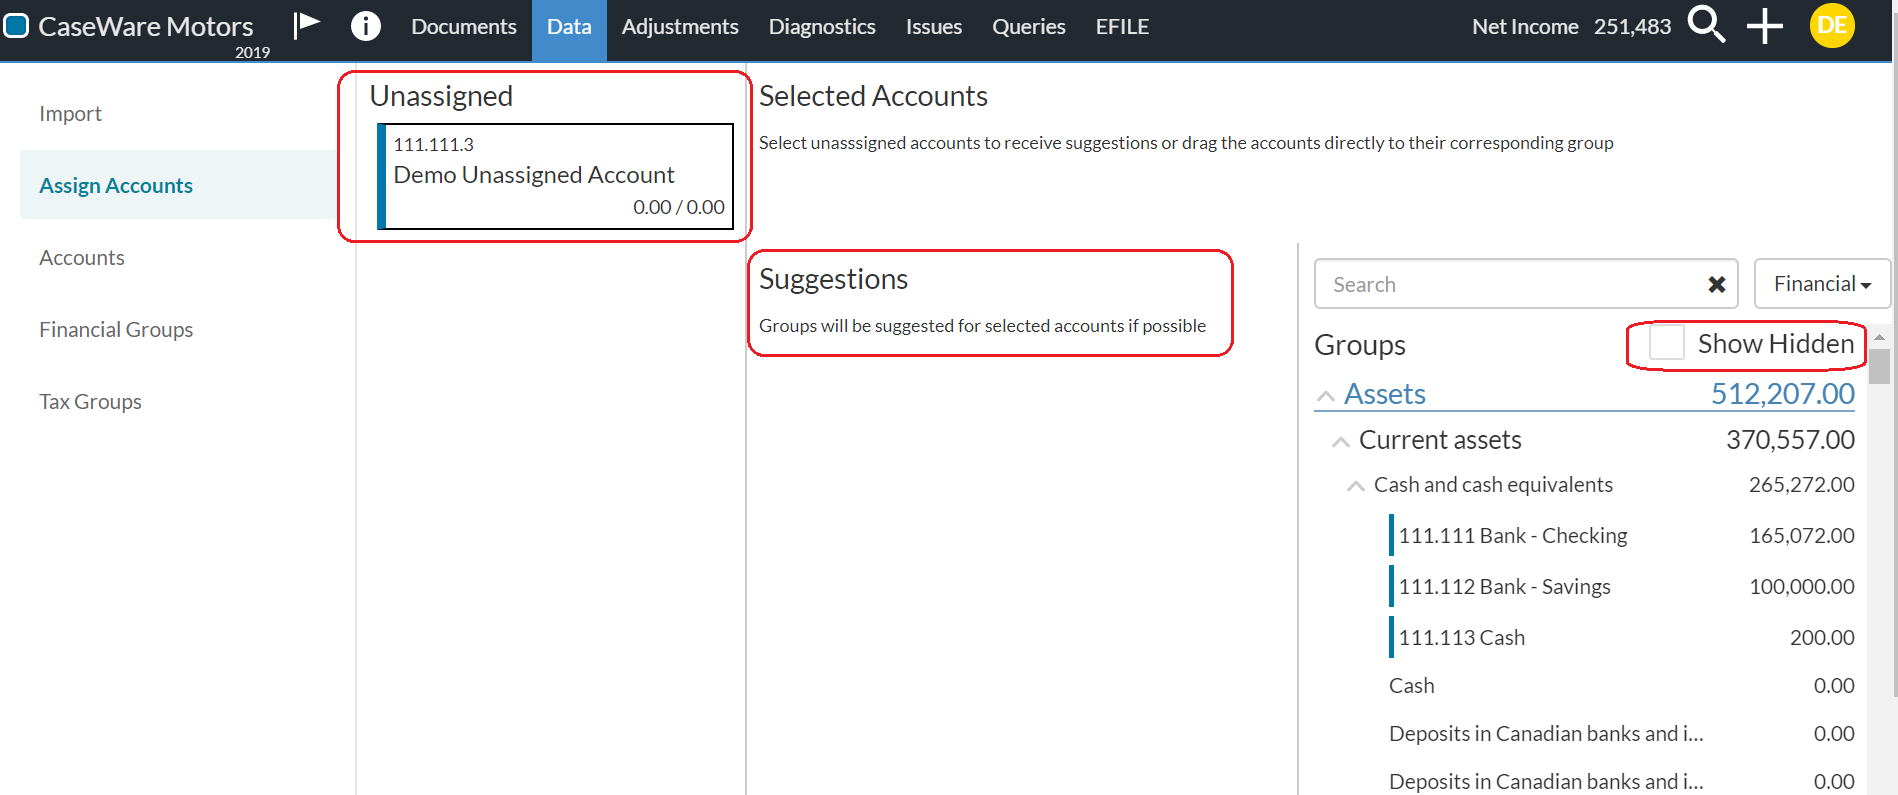
In the Assign Accounts tab, the unassigned account displays at the Unassigned section. You can select the Show Hidden check box to view groups that have been hidden in the engagement due to irrelevance. For example, if your client's industry is technology, then all trial balance groups related to farming are automatically hidden in the engagement as they are irrelevant.
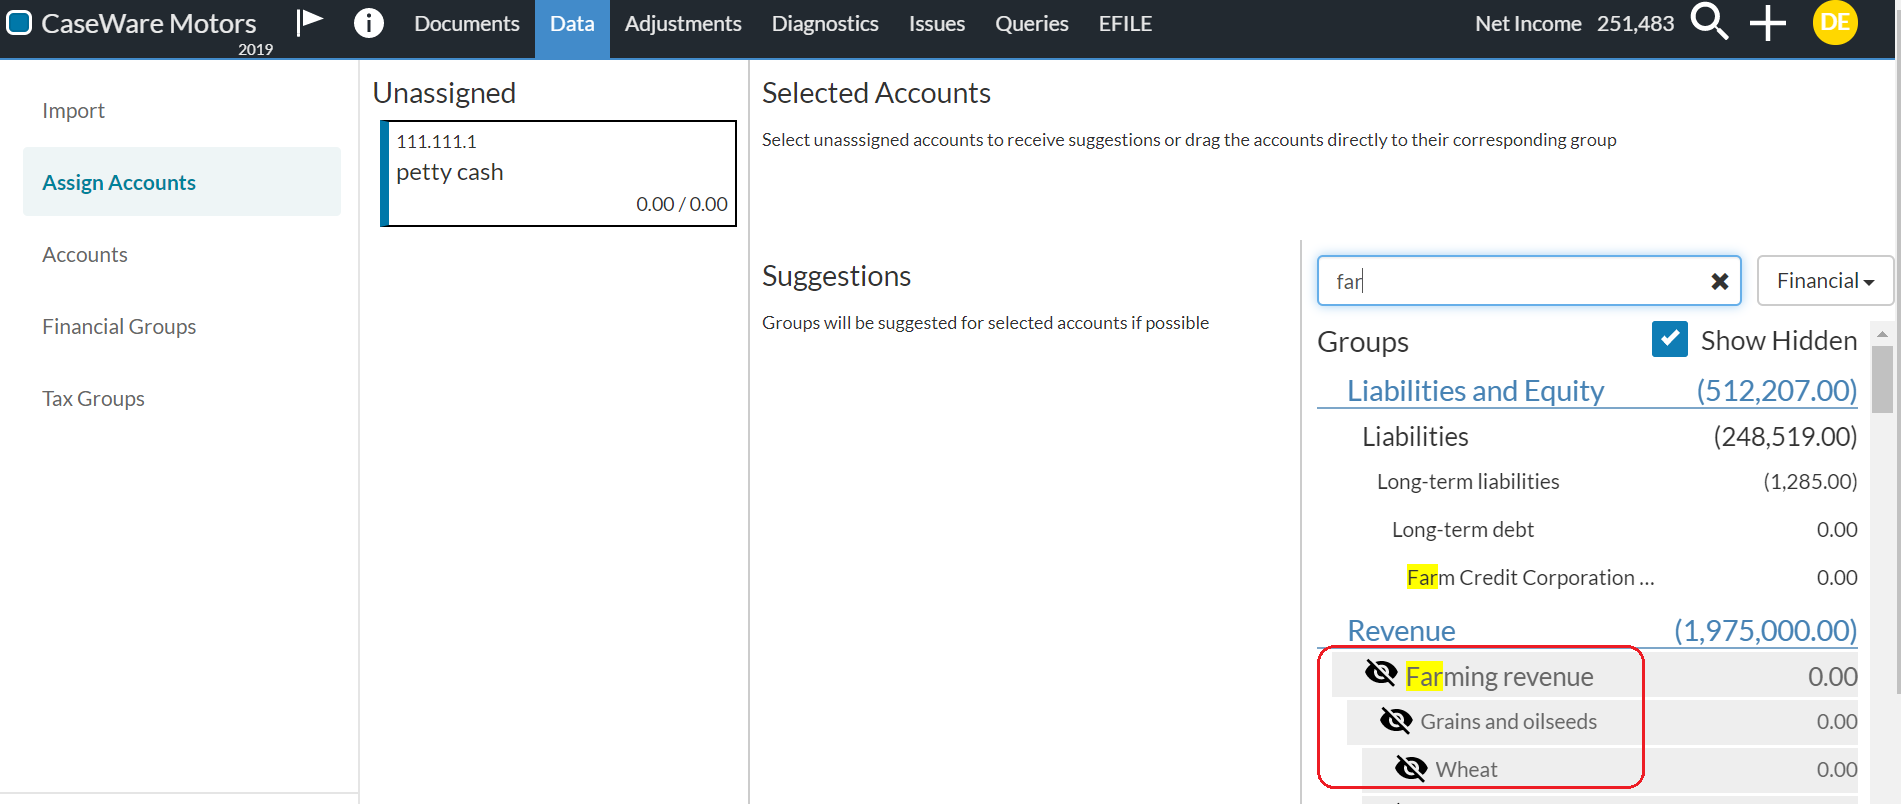
If you select Show Hidden, the invisible icon (![]() ) displays next to the hidden groups so you can spot them in the list.
) displays next to the hidden groups so you can spot them in the list.
-
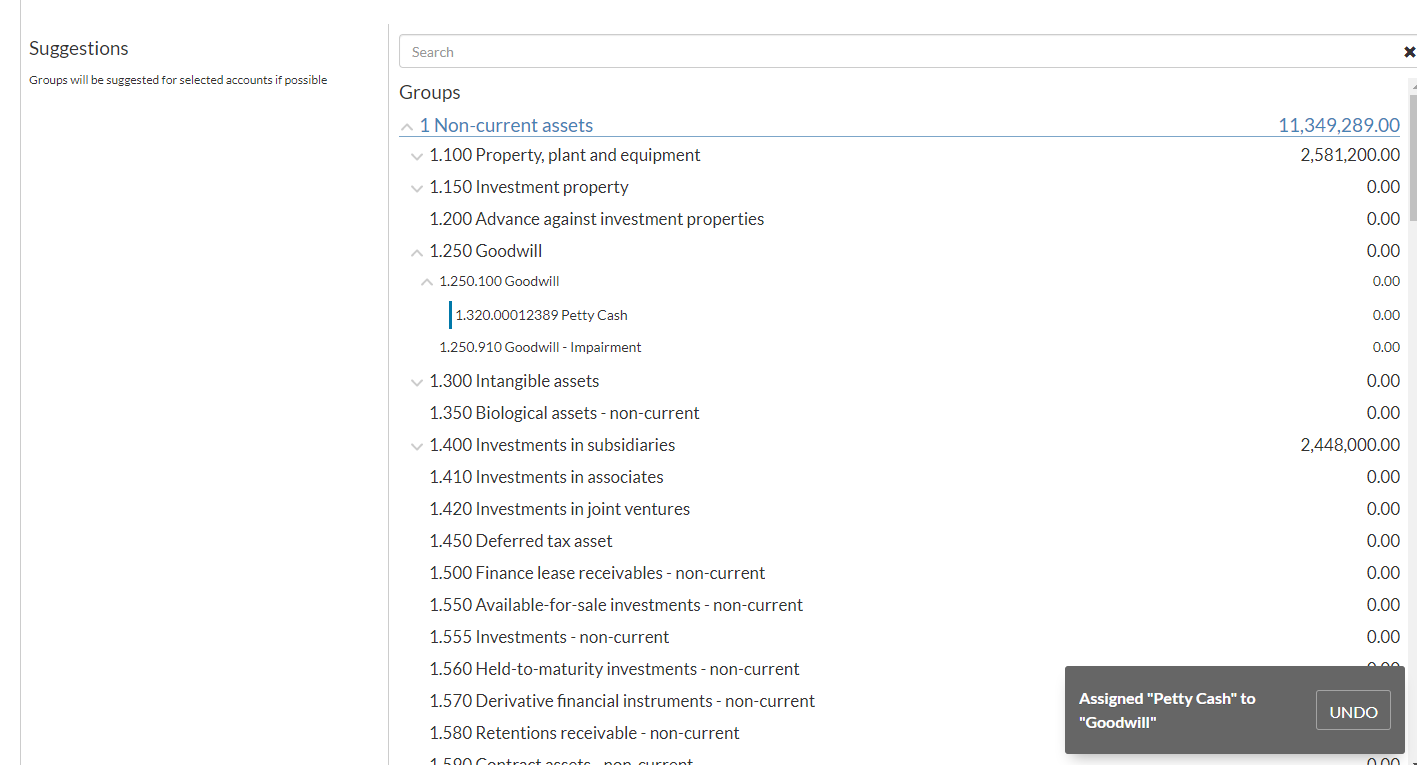
Select a group to assign the selected account to that group.
You can also drag the account from the Unassigned section and drop it in a group to map it. You can also search groups using the search field. Note that you need to enter at least 3 characters in the search field for matching results to display.

Note: You can only assign accounts to a lower level group if there are no accounts assigned to its parent group. For example, let’s say you have two account groups, Revenue income and Lease income, that are both assigned to the Income parent group. If you assign an account to the Income group, you cannot assign any accounts to the Revenue income or Lease income groups. If you want to assign accounts to a lower level group, you must first manually unassign the accounts assigned to the parent group. To learn more, see Unassign accounts from groups.
Once you select a group, a message displays at the bottom to confirm the account assignment. You can undo the account assignment by selecting Undo button in the confirmation message.
Note: You can assign the account to a hidden group. In this case, the hidden group, its parent group and subgroups automatically become visible in the engagement.
Unassign accounts from groups
You can manually unassign accounts from groups in the Assign Accounts tab.
To unassign an account from a group:
-
In the Assign Accounts tab, navigate to the group you want to unassign accounts from.
-
Select and drag the accounts assigned to the parent group to the Unassigned section.