Manage the firm template
A new engagement is created based on a template. Templates are created and managed by authors.
Firm authors are staff members with the Settings Admin role or similar which allows them to customize the default product content to meet specific firm needs. For example, add the firm logo. To learn more about roles, see Built-in roles and Assign security roles.
Firm customizations include adding content and modifying or suppressing the default content.
Concepts and workflow
Before you begin, review the concepts and workflow of template management.
-
Product template - the template that contains the default content for your product.
-
Draft - the template you're currently customizing for your firm (the work in progress template).
-
Archived template - an archived template is automatically created when a draft is published. To maintain a record of all previously used templates, archived templates cannot be deleted.
-
Firm template - the most recently published template (the template that's currently used by your firm to create engagements).
The following figure shows the general workflow for managing the firm template.
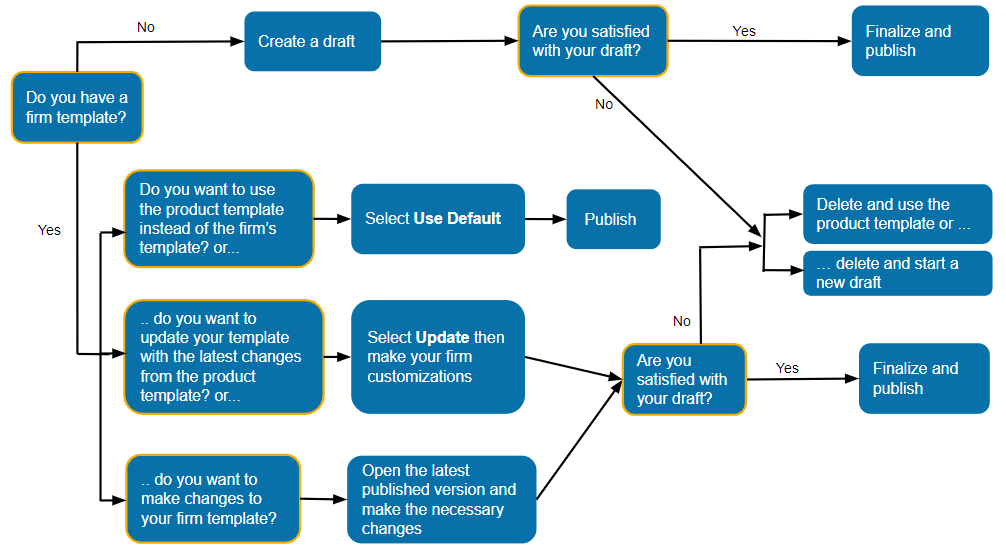
If you don't have a firm template, you need to create a draft, make your firm customizations, then review and publish.
If you already have a firm template, you can:
-
revert to the product template instead of the firm template, or
-
update your template with the latest changes from the product template.
If you're not satisfied with the draft you're working on, you can delete the draft and either:
Practice set
-
To start firm authoring, select Cloud menu (
 ) | Settings.
 -
Under Caseware ReviewComp OnPoint PCR, select Manage Template Manage Template Primary.
The first time you open this page, you will see a Create Draft button.
Notice that the bar on top of the screen is blue, indicating that your are in firm authoring mode. However, as you recall from our user training, the bar is black in an engagement file.
Profile settings and custom terminology
Before we dive into firm authoring, we have to populate a few areas from the Cloud menu, such as your profile and the custom terminology pertaining to the US market.
Practice set
-
Select Cloud menu (
) | Settings. -
Under Organization, select Profile.
-
Fill in the Profile, for example with your firm information, then select Save.
-
From Customization | Terminology, enter the province in the Province field, the postal code in the Postal Code field, and select Save.
Create a draft
If you don't have a firm template or a draft, then your starting point is to create a draft.
To create a draft:
-
Ensure that you have the Settings Admin role or similar. For more information, see Built-in roles and Assign security roles.
-
From the Cloud menu (
), select Settings ( ) | <your product name> | Manage Template.
 -
Select Create Draft.
A draft template opens in a new tab. Make sure that this tab is not blocked by your pop-up blocker.
You can close your draft at any time and continue working on it later. Once you close the draft, the options available to you on the Manage Template page are Open Draft, Delete Draft and Publish Draft.
To continue working on an existing draft, select Open Draft. Select Publish Draft to apply the changes to new engagements.
If you're not satisfied with your draft, select Delete Draft to delete it and start a new one.
Use the product template
If you don't want to customize a template for your firm, you can set your firm template to use the product template. The product template contains the default content for your product.
Tip: To view information about your current product version, select Information (![]() ) | About.
) | About.
The advantage of using the product template is that you don't need to manually update the firm template whenever there are new product updates. To learn more, see Update the firm template.
To use the product template:
-
Ensure that you have the Settings Admin role or similar. For more information, see Built-in roles and Assign security roles.
-
From the Cloud menu (
), select Settings () | <your product name> | Manage Template. -
Select Use Default.
The current template is archived and your firm now uses the product template. The option now available to you on the Manage Template page is Create Draft.
If you want to customize the product template to meet specific firm requirements, select Create Draft.
Publish a draft
After you customize your draft template, you can review and publish it. When you publish a draft, it becomes the current firm template and applies to new engagements.
To publish a draft:
-
Ensure that you have the Settings Admin role or similar. For more information, see Built-in roles and Assign security roles.
-
From the Cloud menu (
), select Settings () | <your product name> | Manage Template. -
Select Publish Template.
The published template is automatically added to the archived templates list. The template version and publish date display in the list.
Note: Once a template is published, it cannot be deleted. You can however revert to an older version.
The options available to you on the Manage Template page are Use Default and Create Draft.
Select Use Default if you want to use the product template instead of having a custom firm template.
Select Create Draft if you want to start a new draft then, select Open Draft to start customizing it.
Edit the firm template
You can make changes to the firm template if needed.
To edit the firm template:
-
Ensure that you have the Settings Admin role or similar. For more information, see Built-in roles and Assign security roles.
-
From the Cloud menu (
), select Settings () | <your product name> | Manage Template. -
Select Create Draft.
If you already have an existing draft, you will not see this option.
-
Select Open Draft.
The template opens in draft mode. You can now make changes as needed.
-
Once you're done, return to the Cloud menu (
) and select Settings () | <your product name> | Manage Template. -
Select Publish Template to have the changes applied to newly added engagements.
Update the firm template
Once you receive notification of updates to the product template, you need to manually update your firm template with the latest changes from the product template.
Note: The Update button is only available in the page if there are new updates to the product template that you have not applied to your template yet. Otherwise, it does not display in the page.
To update the firm template:
-
Ensure that you have the Settings Admin role or similar. For more information, see Built-in roles and Assign security roles.
-
From the Cloud menu (
), select Settings () | <your product name> | Manage Template. -
Select Update.
The available options on the Manage Template page are Open Draft, Delete Draft and Publish Draft.
Once you're done, select Publish Draft to apply the changes to new engagements.
Create a draft using a previous template version
You can create a draft using a previous version of your template.
To create a draft using a previous template version:
-
Ensure that you have the Settings Admin role or similar. For more information, see Built-in roles and Assign security roles.
-
From the Cloud menu (
), select Settings () | <your product name> | Manage Template. -
Go to the archived templates list.
-
Open an archived template to create a draft based on that template.
The new draft opens.
-
Make changes as necessary.
-
From the Cloud menu (
) , select Settings () | <your product name> | Manage Template. -
Select Publish Template to have the changes applied to new engagements.
The published template is added to the archive and a record of it displays in the archived templates list.
Revert to a previous template version
You can revert to a previous version of your template.
To revert to a previous template version:
-
Ensure that you have the Settings Admin role or similar. For more information, see Built-in roles and Assign security roles.
-
From the Cloud menu (
), select Settings () | <your product name> | Manage Template. -
Go to the archived templates list.
-
Open an archived template to create a draft based on that template.
-
From the Cloud menu (
), select Settings () | <your product name> | Manage Template. -
Select Publish Template.
The published template is added to the archive and a record of it displays in the archived templates list.
Notice that the record of the old template still displays in the archived templates list. This is because, in this step you have not re-published the old template, you have published the draft that was created based on that old template.
The new draft opens.
Note: If you revert to a version that's older than the most recent product template, the Update button becomes available on the page once you publish it.
As a template author, it is important for you to know the exact version of your product, since this could affect the type of content your users have in their product. If as a firm, you are facing issues, there is a possibility that the issue has been fixed in the latest release. In fact, when you contact our support team, the first thing they suggest might be to update your release via the update button as we previously discussed. By using the latest release version, you also reduce your work as a firm template author since the new content may have also resolved any content deficiencies which may have existed in the product.
In the draft template, select Information (![]() ) , then About to view information about your version of
) , then About to view information about your version of
Instructor Note: The following tasks are intended to clarify the firm authoring workflow. You may or may not choose to demonstrate these tasks to students.
You can delete a draft if you decide to use the product template instead or if you're not satisfied with your current draft.
To delete a draft:
-
Ensure that you have the Settings Admin role or similar. For more information, see Built-in roles and Assign security roles.
-
From the Cloud menu (
), select Settings () | <your product name> | Manage Template. -
Select Delete Draft.
The options available to you on the Manage Template page are Create Draft and Use Default.
If you want to start a new draft, select Create Draft.
If you want to use the product template instead, select Use Default.
Customize display options, formats and settings
In the Product Settings window, you can change the default product settings for display options and formats. You can also enable and disable features to better suit the needs of your firm.
To open the Product Settings, select the Information icon (![]() ) at the top menu, then choose Settings.
) at the top menu, then choose Settings.
Add a currency
You can add a currency to your product to support additional currencies:
-
Go to Format | Currency, then select Add currency.
-
Enter the currency name in the text field to filter the list of currencies.
-
Select the desired currency to add it to your product.
You can also filter the list using the three-letter currency code from ISO 4217.
You can also remove a currency from your product by selecting (![]() ).
).
Customize the date format
Go to Format | Dates and choose formats for long, short and medium dates by selecting them from the drop-down lists. The formats you specify apply to dates in checklists, queries, trial balance, date field placeholders, engagement properties and formulas in text areas.
Customize the number settings
At Format | Numbers, you can customize the following settings:
| Setting | Description |
| Negative number format | How negative numbers display in your product:
|
| Decimal symbol | Whether to use a period (.) or a comma (,) as the decimal symbol. |
| Decimals | How many decimal points your balances display. |
| Digit grouping symbol | Whether to use a period (.) or a comma (,) as your digit grouping symbol. |
| Digit grouping | How many digits are grouped together between digit grouping symbols. |
Customize fonts and headings
You can change the format of the Fonts and Headings for deliverables in your engagements such as letters, financial statements and worksheets to match the firm's style preferences and identity. This is done from your active template. For more information on how to access and manage your template, refer to: Manage the firm template.
To start, select the Information icon ( ) at the top menu, then choose Settings. Select Format | Fonts and Headings from the Product Settings dialog that opens.
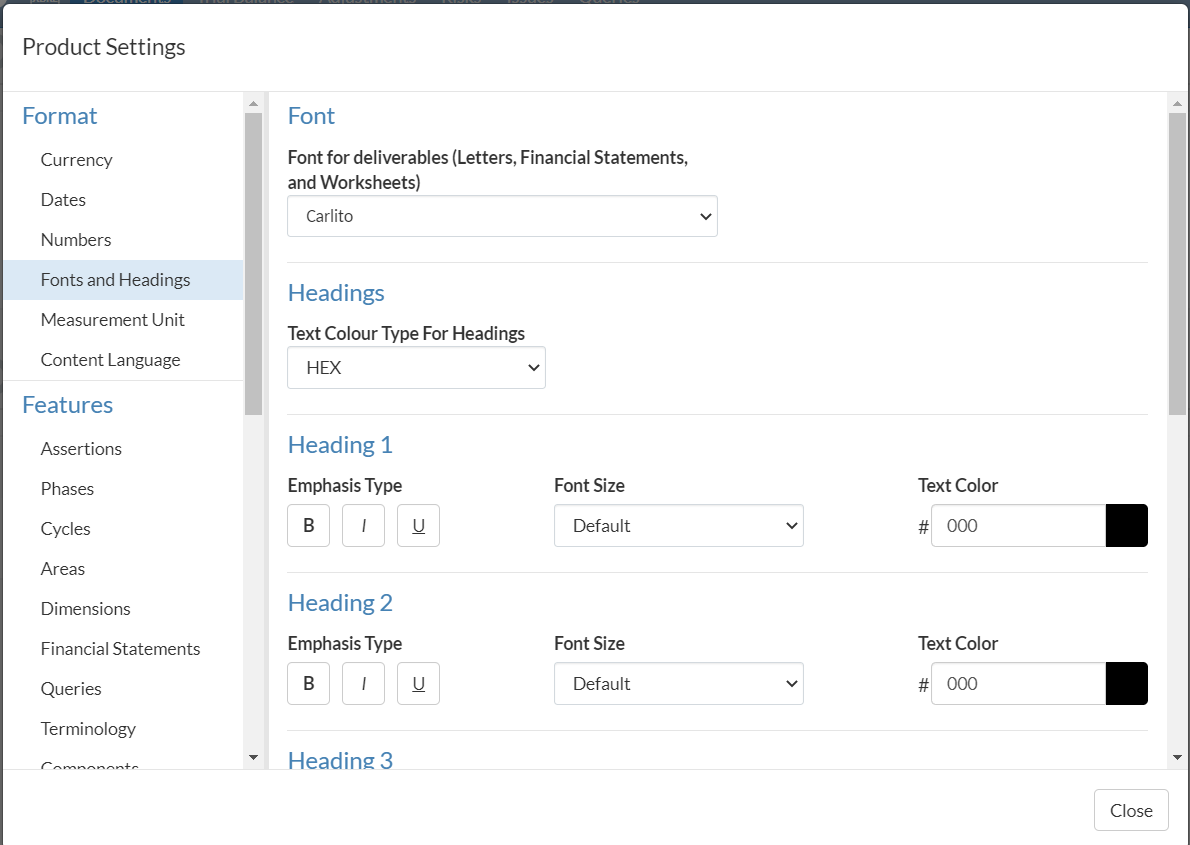
Font
Select the font for the text in your deliverables from the dropdown.
Headings
You can format headings and paragraphs.
To set the desired formatting options for headings and paragraphs:
-
Select the desired color code from the drop-down. Two options are available:
-
Hex
-
RGB
-
-
For paragraphs and each heading (Heading 1 to Heading 6):
-
Select the desired emphasis type (bold, italics or underlined text)
-
Set the desired font size
-
Set the desired text color.
The default font size for each heading is as follows:
-
Heading 1 - 27pt
-
Heading 2 - 22.5pt
-
Heading 3 - 18pt
-
Heading 4 - 13.5pt
-
Heading 5 - 10.5pt
-
Heading 6 - 9pt
-
-
Set the desired text color.
-
Customize the unit of measurement
Choose the preferred unit of measurement that you want to use across your product from the list of units at Format | Measurement Unit.
The measurement unit you select here apply globally to your Cloud app whenever a measurement unit is used, such as print settings.
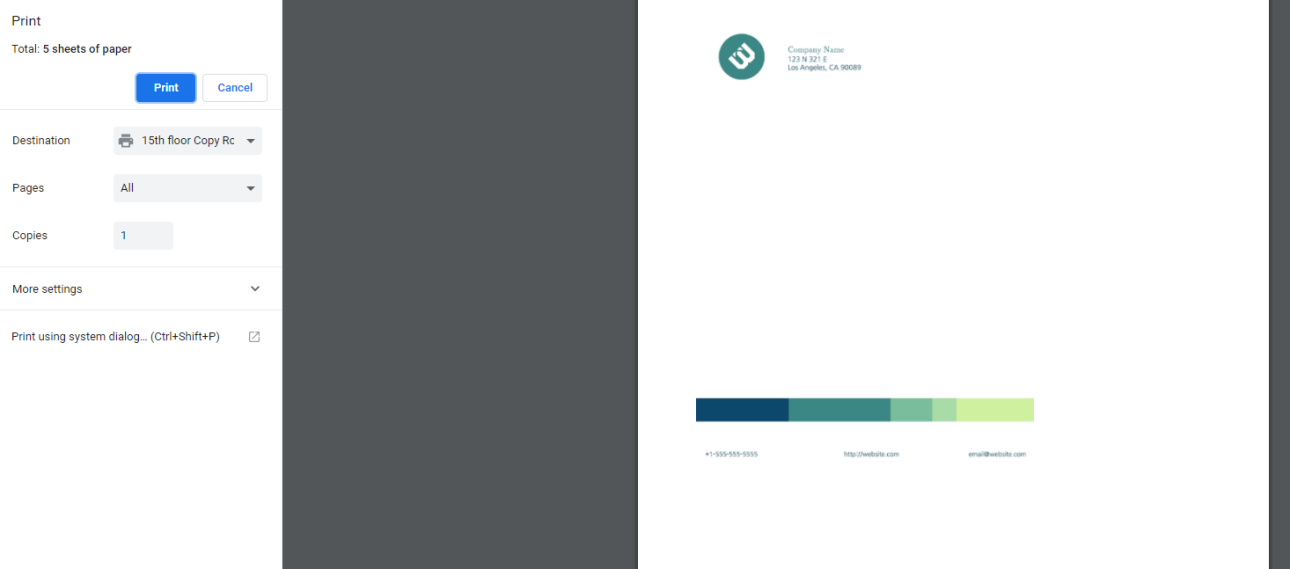
Add the firm letterhead to the financial statements
It is common practice for firms to print their financial statements on a company letter-head since this is the final product which they provide to a client in many engagements.
Firm authors can add a logo or a letterhead in the firm template. Once they add the logo, it automatically replaces the logo placeholders in the deliverables. Once they add the letterhead, it automatically displays in the PDF copy (print copy) of the deliverables.
Practice set
Let's add a letterhead.
If you open the 6-20 Financial statements3-150 Financial Statements and Report document and select Print ( ) at the Document Map, you'll find the letterhead in the PDF print copy.
-
Go to the Cloud menu (
), select Settings () | <your product name> | Letterhead/Logo. -
At Letterhead, drag and drop the file or select the file upload box to browse and add your firm letterhead.
-
At Logo, drag and drop the file or select the file upload box to browse and add your firm logo.
Note that in order to ensure letterheads display correctly in printed documents, the letterhead you add in the firm template must be the correct size.
To determine the appropriate size for your letterhead in pixels, multiply the desired size in inches by 96. For example, if you are printing your documents on letter size paper, with a width of 8.5 inches, you can multiply 8.5 by 96 to determine the width the letterhead must be to fill the full width of the page. In this case, the letterhead would need to be 816 pixels wide.
You can select REMOVE to remove the added logo or letterhead and upload another one.
Note: Make sure the Letterhead option in the document print settings is enabled.
In this example, we've set the letterhead to appear on the first page only in the document print options.
Instructor Note: You may or may not choose to demonstrate the following procedure.
To set up print options:
-
Go to the Document Map, then select Settings (
 ) | Document Print Settings.
You can only access this option for the content that you add in the financial statements - not the predefined content. To learn more, see Add content areas in the financial statements.
Note: For the predefined content in the document, you can only access the print settings if you are customizing the firm template. To access the firm template, you must have the Settings Admin role or similar. See Manage the firm template for more information.
-
If you want to have different settings for notes, go to the Document Map and select Settings (
) | Notes Print SettingsIf you want to have different settings for an area, go to the desired area in the document and select More actions (
 ) | Edit Print Settings.
If you want to have different settings for a specific page, go to the page break for that page and select More actions (
) | Print Settings. -
Specify the preferred settings for Letterhead, Page Size and Margins.
Note that letterheads in financial statements are not affected by page margins and are not displayed inline with the text. You must manually adjust the page margins to ensure the document content does not overlap with the letterhead.
To determine the appropriate size for the page margins in inches, divide the pixel size of your letterhead by 96. For example, if your letterhead is 100px tall, you can divide 100 by 96 to determine the size of your top margin. In this case, the margin should be at least 1.04 inches to ensure the letterhead does not overlap with your document content.
If your letterhead is only displayed on the first page of your document, you can add a page break to set different margins for the other pages.
-
Under Dynamic Tables, select the Display column headings on subsequent pages option if you want dynamic tables to repeat the column headings on subsequent pages.
-
Under Keep Together, select the Keep notes headings with paragraphs and keep paragraphs together option if you want to ensure that note headings are not printed on separate pages from the note content and that paragraphs are not split across multiple pages.
Note that paragraphs that are longer than a page will still be split.
-
Select Apply watermark to apply a watermark in the document.
You can enter the watermark content in the associated text field.
-
Select Landscape to change the page orientation.
The default is Portrait.
-
Clear the Include in page numbering check box if you want page numbering to start after the Table of Contents page.
-
Under Page Numbering, select Start page at and enter a page number in the text field if you want to start page numbering at a custom page number.
By default, page numbering starts at 1 for the financial statements and an individual area’s page numbers are continued from the previous area. You can restart the page numbering multiple times throughout the financial statements by modifying the print settings for individual areas.
-
In the Notes Print Settings:
-
Select Hide sub-level headings with only one note if you want to automatically hide sub-level headings for notes when there are no subsequent notes in the group.
For example, if note 1 includes a subnote 1.a and there is no 1.b, 1.c notes, etc., then the note heading of subnote 1.a does not display in the PDF output. Only the content of that note displays.
-
Select Enable continued header text if you want to enter a custom suffix for headers for notes that span multiple pages.
For example, if you enter the suffix “continued”, a note with the header “Significant accounting policies” will display as “Significant accounting policies continued” on subsequent pages.
-
Edit a checklist
Now, let's edit various content in the firm template. In the next chapters, we will look at editing a checklist, a query and the financial statements.
Note: We recommend that you turn on the detailed view by default since it displays document signoffs in the Documents page.
Practice set 1 - View hidden items
On the Documents page, select More actions (![]() ) | Hidden items.
) | Hidden items.
Once you enable hidden items, you will notice that a large number of documents display on the page. This is because this product is built off a visibility logic concept, where only relevant documents and content are available (visible).
Visibility settings provide built-in automation so that only the relevant documents or content are available in your engagement file. This is achieved by setting up visibility conditions for various engagement items. The application evaluates the conditions and if the conditions are met, some items are visible (available) in the engagement file. Otherwise, they're hidden (not available).
However, firm authors can view every document which comes by default using the Hidden items option. An important thing to note here is that you cannot delete the default documents which come with the product. When a new release is out, the default product documents and content are automatically updated.
All the default documents have toggles to allow you to suppress a document so it's not available in the product if needed. A use case for this would be a firm that doesn't want to use our built-in query system. They would simply disable the query documents in the product.
Instructor Note: Demonstrate the following:
To suppress a document:
-
Open the firm template.
-
Go to the Documents page.
-
Select the document that you want to suppress.
-
Select Suppress (
 ).
).
See Manage the firm template for more information.
Select document ![]() ). Make sure to also select More actions(
). Make sure to also select More actions(![]() ) | Hidden Items at the top of the checklist.
) | Hidden Items at the top of the checklist.
You will notice the toggle here as well where you can turn off individual procedures so they're not visible in the checklist but you cannot edit or delete them.
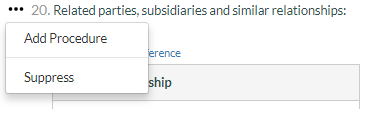
In the document, you will notice that you can add procedures in two ways. One way is to create a procedure directly within a group; another is to create your own group and then create a procedure. ![]() ) to see the add procedure option.
) to see the add procedure option.
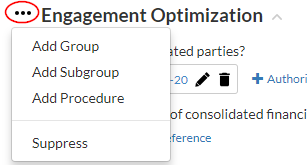
Practice set 2 - Add a procedure
-
 ) | Add Procedure) |Add Procedure
Tip: Hidden Items must be enabled to see this procedure.
-
Select New Procedure.
The title splits into two boxes.
-
In the Summary box, type in
Difference in Financial Framework.
Difference in Accounting Framework.
-
In the New Procedure box, type in
Do any of the related parties or subsidiaries listed above require different financial framework from the one identified above under Applicable financial reporting framework?
Do any of the related parties or subsidiaries listed above require different accounting framework from the one identified above under Accounting framework?
Now that we've created a procedure, we can customize the response options for that procedure
Practice set 3 - Add a response
-
Beside the Difference in Accounting Framework Difference in Financial Framework procedure, select More actions (
) | Settings. -
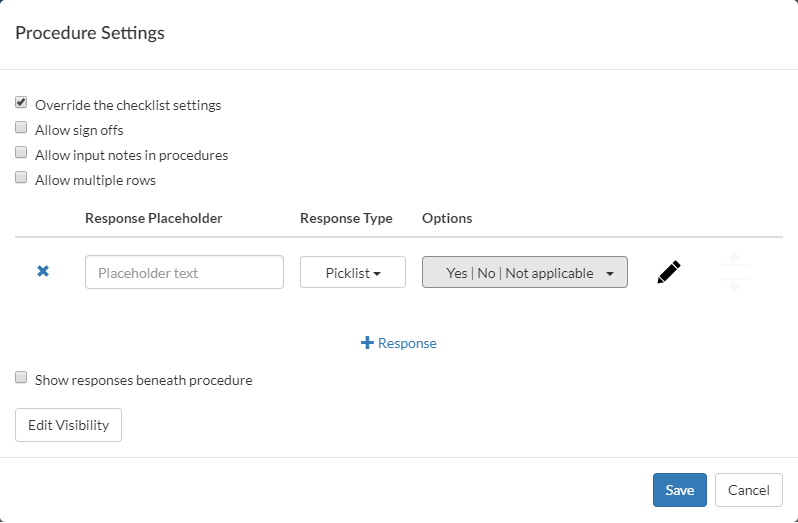
In the Procedure Settings dialog, select the Override the checklist settings checkbox.
A number of options display.
| Setting | Description |
| Allow sign offs | Select this option to add a signoff ( |
| Allow input notes in procedures | Select this option to add a text box below the response where users can enter notes. You can add a note placeholder in the displayed field. |
| Allow multiple rows | Select this option to allow users to provide more than one response for the procedure. This option enables the +Row button in the procedure. Note: If your procedure has more than one response, selecting this setting will automatically display your responses in a table beneath the procedure. The response placeholder labels are displayed in the header row. |
 ) to the procedure.
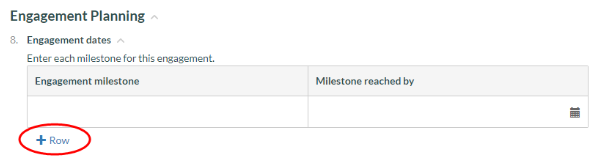
-
Select from the following options:
At this point, we are going to focus on creating a response set. Let's look at some of the response types available to users.
| Response type | Description |
| Manual | An input text field where users can enter a custom response. |
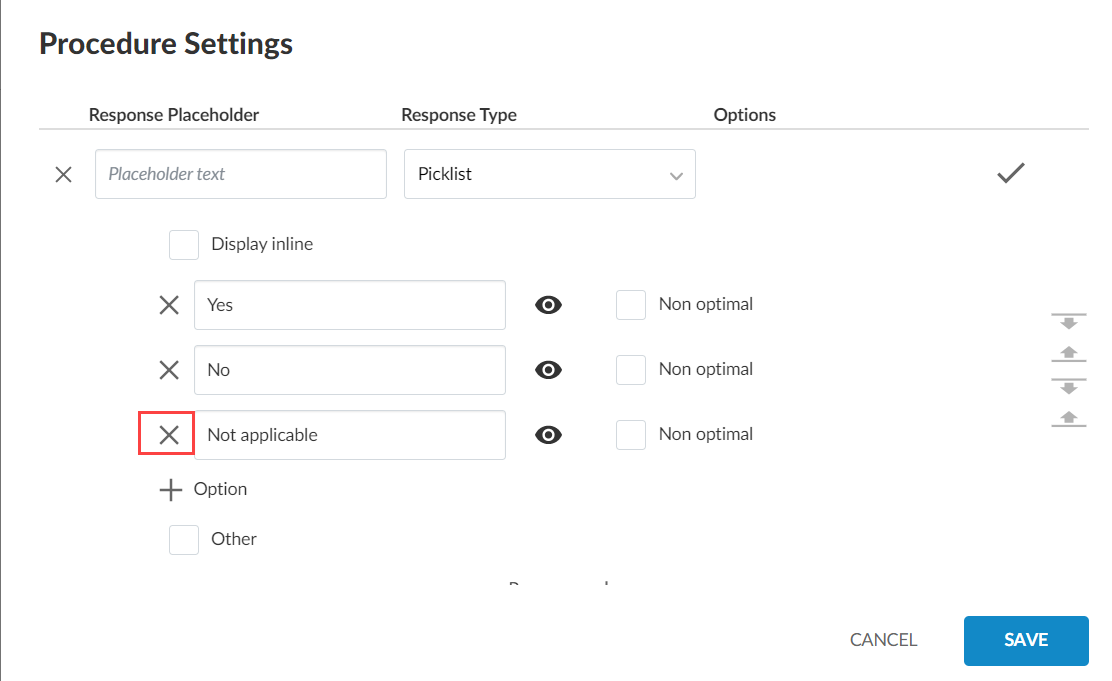
| Picklist | A drop-down list where users can select one response from a list of responses. You can customize the list of responses to meet your needs. The default responses are Yes, No, and Not applicable. |
| Multi-Picklist | A drop-down box where users can select multiple responses from a list of responses. The default responses include Yes, No, and Not applicable. |
| Date | A date picker field with an inline calendar icon where users can select a date. |
| Entity Information | A field that displays information about the client entity. Entity information is linked directly to the client's profile on CasewareCloud. |
| Contact Information | A field that displays information about one of the client contacts. Contact information is linked directly to the client's user profile on CasewareCloud. |
-
Under Response Placeholder, leave the Placeholder text as is.
-
For Response Type, we're going to select the default Picklist option.
-
Select the Edit icon beside the Options drop-down to remove the Not applicable Option.
-
Select Save.
Create a procedure for visibility settings
Earlier in the training, we learned that
What are visibility settings?
Visibility settings provide built-in automation so that only the relevant documents or content are available in your engagement file. This is achieved by setting up visibility conditions for various engagement items.
The application evaluates the conditions and if the conditions are met, some items are visible (available) in the engagement file. Otherwise, they're hidden (not available).
Here are some use-cases:
-
Hide documents that are not relevant to the user until they have defined the scope of the engagement.
-
Make a text area in a document visible only if the user provides a specific response to a procedure. This is useful when you want to customize content of letters, memos, and other documents based on information collected from the trial balance or from various forms and checklists.
To set up visibility, you need to specify:
-
the condition type and its parameters
-
the visibility logic
Parameters point to where the system fetches information (values) to evaluate the condition. Each condition type has a different set of parameters.
Define the visibility action (whether the item hides or shows) when conditions are met. Also, if you've added more than one condition, you need to specify whether all the conditions or at least one condition must be true for the visibility action to apply.
Practice set
In the previous practice set, we created a question about
-
Beside the Difference in Financial Framework Difference in Accounting Frameworkprocedure, select More actions (
) | Add Procedure. -
Name the new procedure
If you answered Yes to "Difference in Accounting Framework", please provide the accounting framework details below.
If you answered Yes in question "Difference in Financial Framework". please provide financial framework details below.

-
Select More actions (
) | Settings beside the -
In the Procedure Settings dialog, select the Override the checklist settings checkbox.
-
Select + Response to add a second response row.
-
In the first Placeholder text field under Response Placeholder,
-
In the second Placeholder text field under Response Placeholder, enter
-
Select Save.
Set visibility to procedures
The purpose of visibility settings once again is to tie the visibility of an item to the response condition of another item.
The following table describes the available visibility conditions:
| Condition | Parameters | Example |
| RMM (Risk of Material Misstatement) | Select an assertion type, a group from the trial balance and one of the following conditions:
If the new risk module is enabled in your product, a difference set of parameters are available for this condition:
Note that the values in the RMM scales list depend on your product setup. | If Completeness for Cash has No RMM, then show this item. Or, if the new risk module is enabled in your product: If Accuracy for Inventory has RMM less than Medium, then hide this item.
|
| Financial Grouping | Select a group from the trial balance, specify the year (current or prior) and one of the following balance values:
| If the balance for the Short term investment account for the Current year is material, then show this item |
| Response | Select a source document, a procedure in the document and a response for the procedure | In the 200 Optimizer document, if the response to What is the type of engagement as defined under SSARS21? procedure is Compilation, then hide this item |
| Consolidation | Specify whether the engagement is Consolidated or Non-consolidated | If the engagement is Consolidated, then show this item |
| Scaling/Rounding | Select a rounding scale from the drop-down. | If the rounding is in Millions, then display this item. |
| Reporting period | Select the reporting period:
| If the reporting period is Annual, the show this item |
| Date | Select the nature of the date:
Select the period type options for fiscal year and interim periods within a fiscal year:
Select the mathematical operations used to compare and evaluate (<,>, <=,>=) Select the date | This item shows if effective date for the year start date is after November 30-2019. |
| Organization type | Select country and select organization type | If the entity type is Canadian Private Corporation, then show this item |
| Language | Select a content language from the drop-down. | If the content language is French, then show this item. Note that the content language means the language currently selected in the Engagement Properties popup up. |
| Group | Add the conditions in this group Note: All the above condition types are available for you to set up. | This item shows if the engagement type is Review and the entity type is Canadian Private Corporation or if the year star date is after October-21-2019 |
| Form Value | You can include one or more forms in the condition setup. Select the form name, a field in the selected form and a value for the selected field. The value options for a selected field depend on the field type. For example, numeric fields have logical operators and numerical values, while date fields have a calendar icon for date selection. Note: This condition is only available if you have custom forms in your product. For example, Tax forms. | If the field T2S8 in S8 - Capital cost allowance (CCA) form is > 10 or the field T3S8 in S8 - Capital cost allowance (CCA) form is > 10, then show this item. |
Practice set
-
Next to the
) | Settings. -
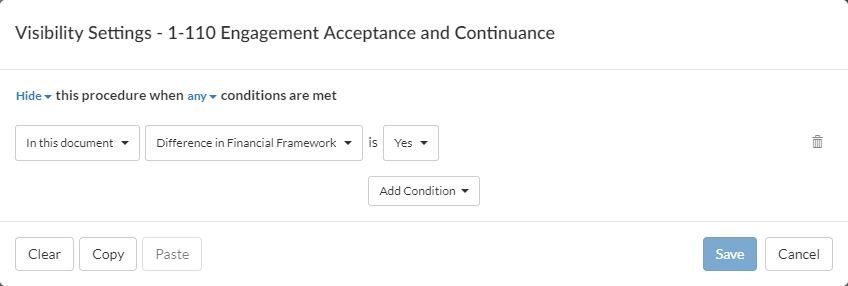
Select Edit Visibility.
-
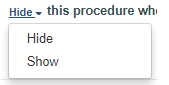
Change the option from Hide to Show.
-
Select Add Condition | Response condition.
-
Under In this document, select document 1-110.
-
Leave In this document as is.
-
Under this other procedure, select
-
Under answered, select Yes.
-
Select Save.
Now, if you exit the edit mode in the document, you can see that the visibility icon displays next Financial Framework Details. This icon means that this procedure has visibility settings that are not met. If you were to answer Yes in Difference in Financial Framework, the strike on the eye icon disappears, denoting that the procedure has visibility settings that are met.
Now, if you exit the edit mode in the document, you can see that the visibility icon displays next Accounting Framework Details. This icon means that this procedure has visibility settings that are not met. If you were to answer Yes in Difference in Accounting Framework, the strike on the eye icon disappears, denoting that the procedure has visibility settings that are met.
You can't add or change visibility settings for the default documents or content that comes with your product. However, you can suppress it so it doesn't show in the engagement.
To suppress content in a checklist, query, letter or memo:
-
Open the firm template.
-
Open the document where you want to suppress content.
-
text fields, Table of Contents and page breaks in letters and memos.
-
procedures, groups and subgroups in checklists.
-
queries and groups in query documents.
-
Select Edit (
 ).
). -
Select Suppress (
) next to the item you want to suppress.
See Manage the firm template for more information.
Content can be:
Edit a query
Creating a query is a simple process where you select the plus sign and add a query. There are queries built into the product at various stages. As a firm author, you may want to simply add more queries to an existing query document instead of creating a new query for the extra question. This way, your clients are not overwhelmed by multiple queries and can answer all the relevant information from the existing query system.
In this practice set, we will learn how to create a new query in an existing document and how to link a client response in a query document to an existing checklist procedure so that when your user answers a query, a response automatically shows up on a procedure within your file.
You will notice that there are duplicate documents with one of them having a slightly different name with the letter "t" added to the name. Documents which do not have the letter "t" will automatically be added to a file when a new file is created. Documents which do have the letter "t" serve a library functionality. In the event that a user accidentally deletes the existing document, they have the option to re-add that document using the available template version. An example of this is the query documents. For firm authors, we recommend you make duplicate changes in both versions.
Practice set
Note: Leave all queries unanswered. Any items answered in the firm template automatically display as answered when a new engagement file is created from the template.
-
Open the 1-200t Engagement Letter (Query to Client) document and toggle the edit view on.
-
Open the Client queries - Engagement letters, documents and records document.
-
Make sure the hidden items are available in the document. Select More actions (
) | View all items. -
Select + Group and name the New groupClient Information.
-
Select Add (
 ) next to Question Sets in the left menu and name the new group
 -
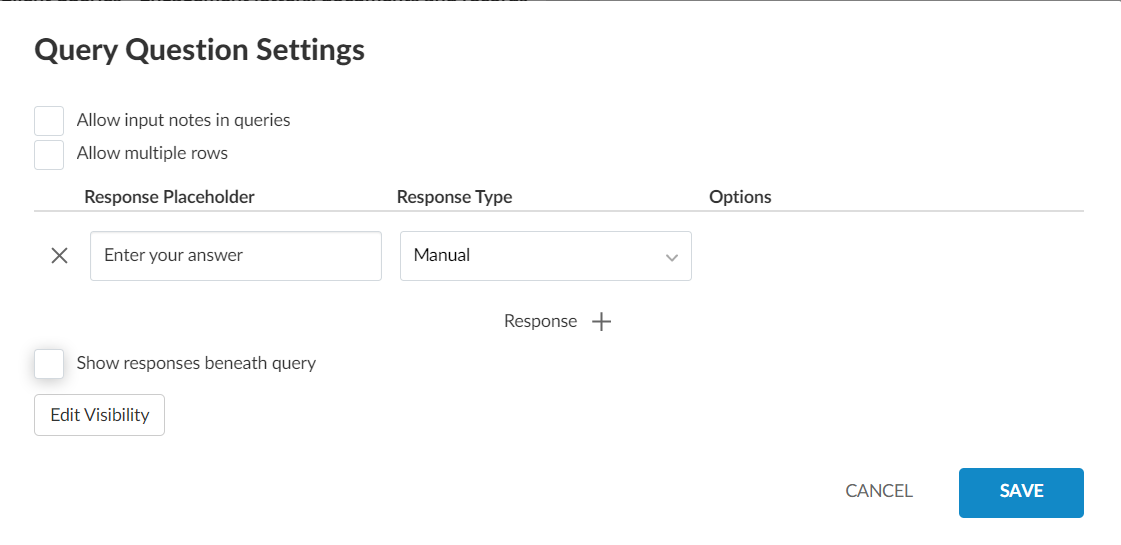
Select Add (
 ) | Text to insert a query question where the expected contact response is text.
 -
Select + Query.
-
In the query Summary, type

-
Beside the new query
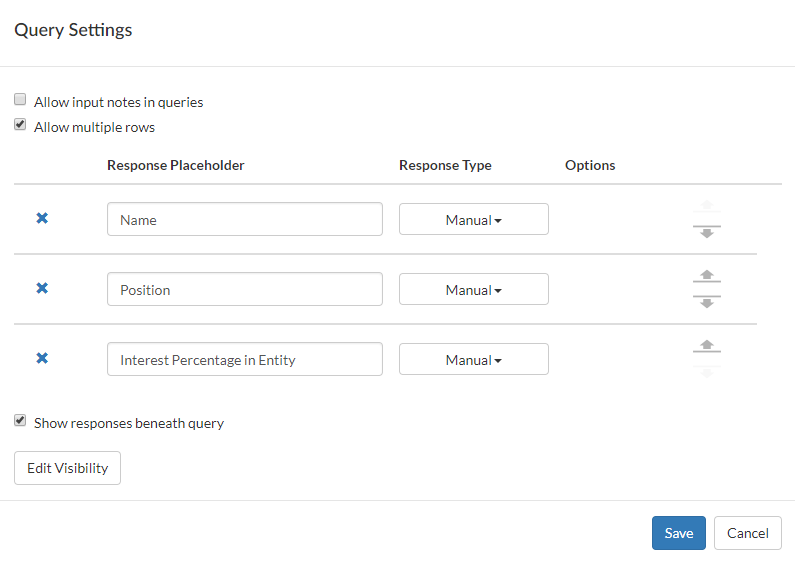
) | Settings. -
Select Allow multiple rows and Show responses beneath procedures.
-
Complete the fields as shown below:

-
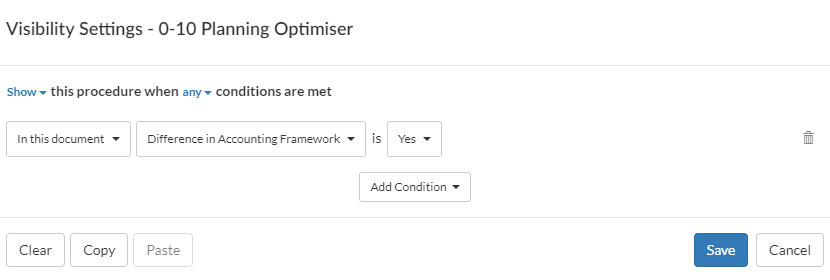
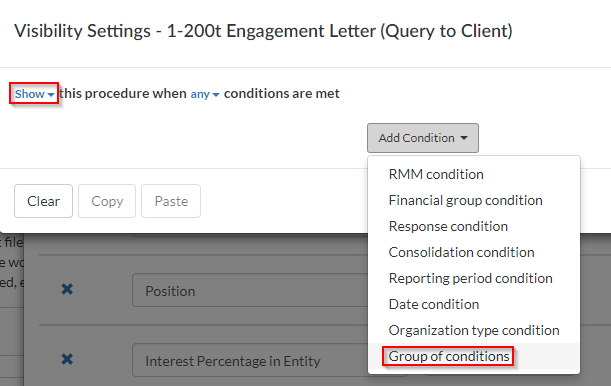
Select Edit Visibility.
-
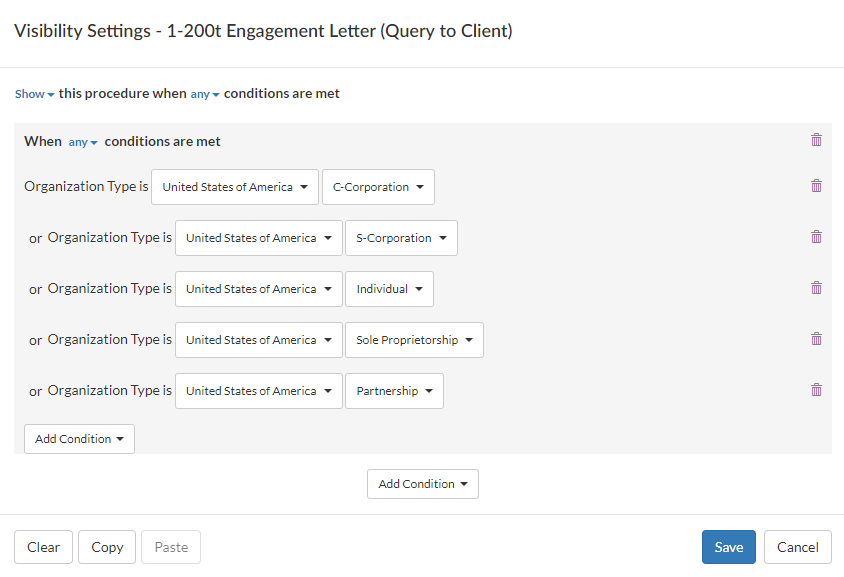
Select Show and the Group of conditions condition type:
-
Set the Visibility Settings as follows:
-
Select Save, and then Save again.
Now, we need to link our procedure to an existing checklist so that the client response shows up in the procedure of our choice once answered by the client.
To link the query
-
Next to the query
) | Link to Checklist.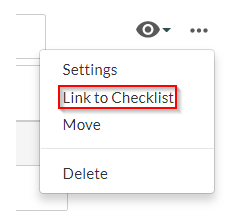
-
Select document 1-110 Engagement Acceptance and Continuance 0-10 Planning Optimizer.
-
Under Procedure, select Principal owners Is this cooperative a corporation?.
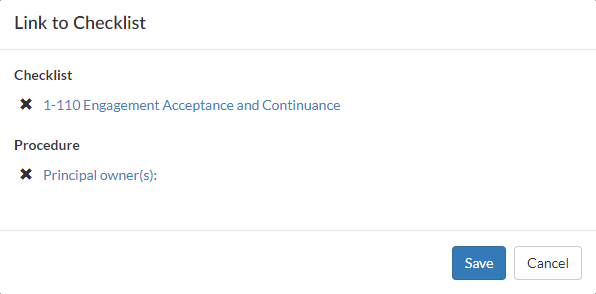

-
Select Save.
-
From beside the Client Information query, select More actions (
) | Move. -
Select
 beside the top spot to move the Client Information group there.
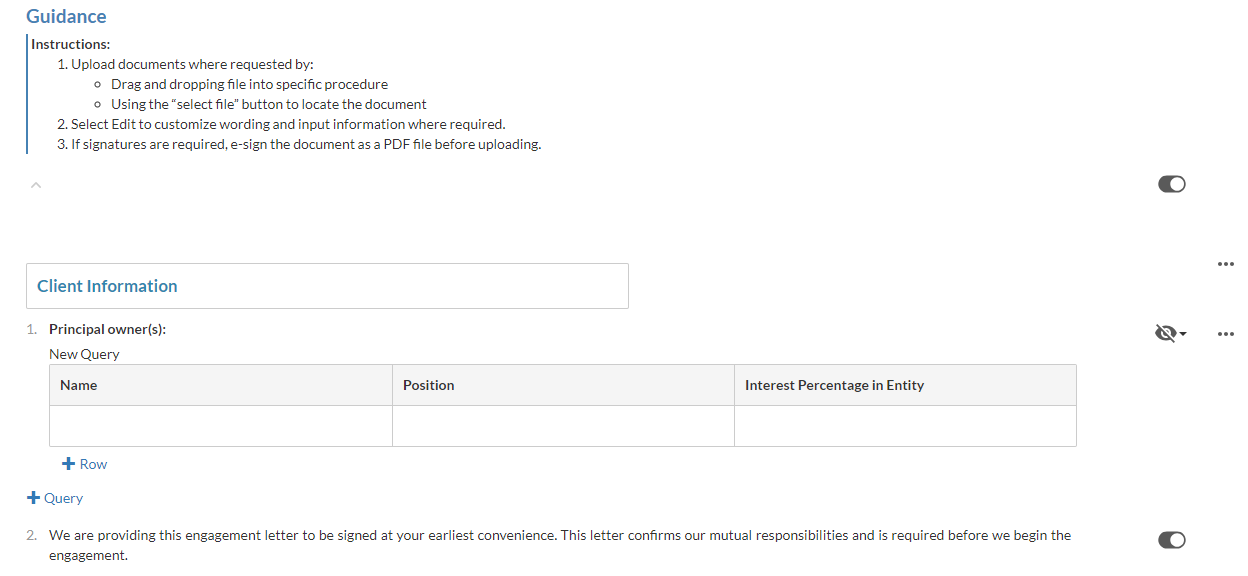
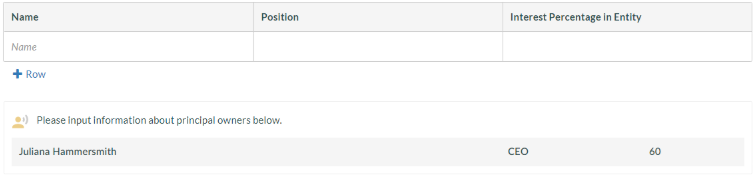
Now when your user receives a query, they will be able to fill out the
The following figure shows the result of a query in document 1-110 which the staff member simply can copy and paste into procedure 15.
Customize print settings in financial statements areas
Areas help organize your financial statement content by grouping similar or related information. You may need to change the default print settings for the balance sheet and income statement areas. Since firm authors are not able to change the default content that comes with the product, we will be looking at copying dynamic tables.
Practice set
-
Open document 3-150 Financial Statements and Report 6-20 Financial Statements.
-
Select Balance Sheet from the Document Map.
-
Go to the table, then select More actions (
) | Copy Dynamic Table.
-
Select
-
Select Add (
 ) | Paste Copied Dynamic Table where you want to insert the pasted table.
It's important to note here that you can keep copying and pasting as many dynamic tables as you need in the financial statements.
-
At the top of the page, select More actions (
) | Edit Print Settings.Firm authors have the ability to add custom Headers/Footers as well as page formatting for their financial statements. Firm authors may choose to have their financials display in landscape format.
- Set the area to print in landscape layout.
The rest of the printed report will print in portrait layout.
Create a text section in the financial statements
There are cases where the accountant may want to add supplementary information to an engagement for a specific industry or client where it is not required by the standards but adds value to the overall financial reporting.
Practice set
-
Open document
-
Select Add (
) | New Area.The new area is appended to the document map and displays on the page with a default title New Area. You can select the default title to change it.
-
In the new area, select Add (
 ) | Text Section.
 -
Select the text field and center its alignment (
 ).
). -
Select Insert Text Placeholder.
The Text Placeholder dialog displays.
-
Enter Insert Client Operating Name at Label and select Save.
-
On the next line, type Supplementary Information.
-
On the next line, type Consolidated Schedules of General and Admin Expense.
Create a dynamic table in the financial statements
As we saw earlier, users have the ability to copy dynamic tables. In this practice set, we will create our own dynamic table. Dynamic tables are used for the majority of the content which shows up in the financial statements including but not limited to balance sheet, income statement, and statement of retained earnings.
Practice set
-
Select Add (
) | New Area.The new area is appended to the document map and displays on the page with a default title New Area. You can select the default title to change it.
-
In the new area, select Add (
) | Dynamic Table.An empty table displays in the page.
-
Select the table, then select More actions (
) | Edit Dynamic Table.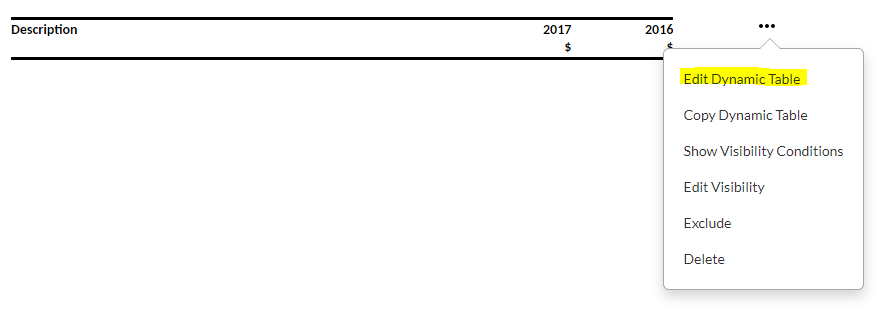
Table opens in edit mode.
-
Select Add row (
), then choose Trial balance data.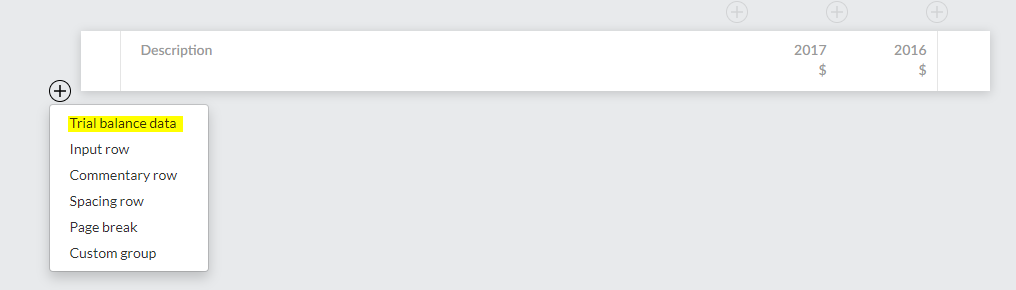
-
Start typing Selling …Selling expenses appears as you type. Select it to populate the row.
-
Select Add column (
 ), then choose Percent variance for the Type.
 -
Select the text field at Heading to open the Data Link dialog.
-
Enter Percent Variance at Output to change the default column header.
-
Select Save to close the column settings.
-
Select Add column (
), then choose Input for the Type.
-
Select the text field at Heading to open the Data Link dialog. Enter Comments at Output to change the default column header, then select Save.
-
Choose Text for the Format, and choose Medium for the Width.
-
Select Done to close the column settings.
Create a page break in the financial statements
Similar to Caseware desktop products, page breaks in
Practice set
-
Select Add (
) | New Area.The new area is appended to the document map and displays on the page with a default title New Area. You can select the default title to change it.
-
In the new area, select Add (
) | Page Break. -
Select the page break, then select More actions (
) | Edit Visibility. -
In the Visibility Settings, choose to show this page based on a Financial group condition where Net income has a Current year balance.

-
Select Save.