Add visibility settings in financial statements
You can set visibility conditions for the Table of Contents, a financial statement area, the notes area, a dynamic table, a text section, a note, a page break and the statement of Cash Flows.
Note:If you want to add visibility settings for the financial statements in the firm template, you must have the Settings Admin role or similar to access the firm template. See Manage the firm template for more information.
Add visibility settings to an item in the financial statements
Open the document to get started on setting visibility logic.
To set visibility for an item or an area:
-
Select the area or the item that you want to set visibility for.
-
Select More actions (
 ) | Edit Visibility
 -
Select Hide or Show from the blue drop-down list to specify the visibility action.
-
Select all or any to determine whether all conditions must be met or one condition must be met for the visibility action (from Step 3) to apply.
-
Select Add Condition.
-
Choose a condition type from the list, then specify the condition parameters.
-
Once you're done, select Save.
An area can be the Table of Contents, a financial statement area and the NOTES TO THE FINANCIAL STATEMENT area.
An item can be a dynamic table, a text section, a note, a page break and the statement of Cash Flows.
The Visibility Settings dialog displays.
Add visibility settings to a list in the financial statements
Open the document to get started on setting visibility logic.
To set visibility for a list in a text section:
-
Select Bullet List (
 ) or Ordered List (
 ) to insert a list in the text section.
 -
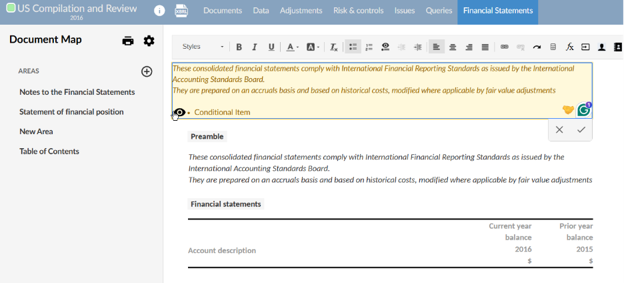
Select Insert Conditional Item (
 ) to add the visibility option to the list.
 -
Select the Visibility icon (
 ) to display the Visibility Settings dialog.
 -
Select Hide or Show from the blue drop-down list to specify the visibility action.
-
Select all or any to determine whether all conditions must be met or one condition must be met for the visibility action (from Step 4) to apply.
-
Select Add Condition.
-
Choose a condition type from the list, then specify the condition parameters.
-
Once you're done, select Save.
The Visibility icon (![]() ) displays next to the list item.
) displays next to the list item.
You can select Clear to clear all conditions and start over.
You can copy the visibility settings for any item you create to another item. You can also copy the visibility settings for text sections and dynamic tables that are part of the default content that comes with your product. Note that only firm authors can copy visibility settings.
Select Copy to copy the visibility settings into clipboard, then open the Edit Visibility dialog for the other item and select Paste to paste the copied settings.
Add visibility settings to lists in financial statement guidance
You can add lists in guidance sections and then add visibility conditions to control when they appear.
To set visibility for a list in a guidance section:
-
Ensure that you have the Settings Admin role or similar. For more information, see Built-in roles and Assign security roles.
-
From the Cloud menu (
 ), select Settings (
 ) | <your product name> | Manage Template.
 -
Open the product template. See Manage the firm template for more information.
-
Select the Documents page.
-
Navigate to the document with the financial statement area and the guidance section where you want to add visibility settings.
-
Select the guidance text field where you want to insert a list.
-
Select Edit (
 ).
). -
Select Bullet List (
 ) or Ordered List (
 ) to insert a list in the text section. Replace the Conditional Item placeholder text.
 -
Select Insert Conditional Item (
 ) to add the visibility option to the list. Replace the Conditional Item placeholder text.
The Visibility icon (
 ) displays next to the list item.
-
Select the Visibility icon (
) to display the Visibility Settings dialog. -
Select Hide or Show from the blue dropdown to specify the visibility action.
-
Select all or any to determine whether all conditions must be met or one condition must be met for the visibility action to apply.
-
Select Add Condition.
-
Choose a condition type from the list, then specify the condition parameters. To learn more, refer to Visibility conditions and examples.
-
Once you've done, select Save.
You can select Clear to clear all conditions and start over.