Stichprobenauswahl
Sampling selection is the process of creating a subset of the total transactions available to analyze the data and draw conclusions. If sample selection is enabled in your product, the Sample Selection option is available in the Transactions tab in the Data page. Your client's transactions become the population from which you can generate a sample.
There are four sample selection methods that you can choose from:
-
Random - Transactions are selected randomly.
-
Systematic - Transactions are selected from a random starting point but with a fixed, periodic interval. The interval is determined by the total population size divided by the sample size.
-
Monetary Unit - Transactions are selected from a random starting point but based on an amount interval. The interval is determined by the absolute amount of the population divided by the sample size.
-
Manual - Transactions are selected manually.
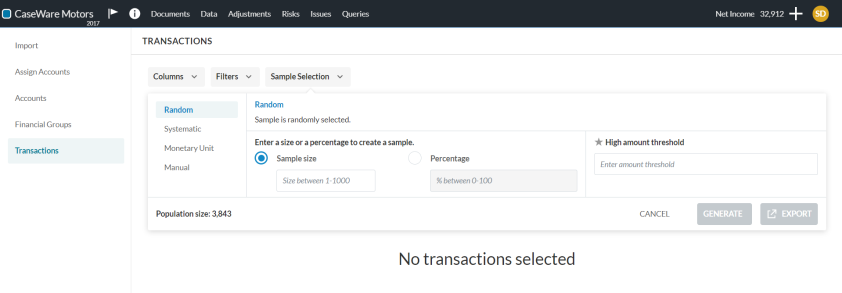
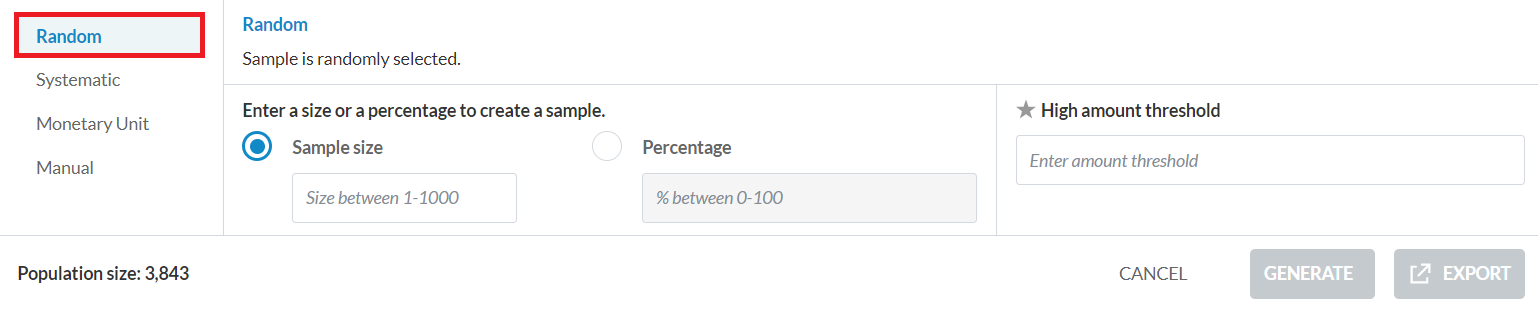
Generate a sample using the Random method
The Random method generates a sample based on random selection of transactions.
To generate a sample using the Random method:
-
On the Transactions tab in the Data page, select Sample Selection.
-
Select the Random method.
-
Enter the desired Sample size or Percentage.
You can enter a value up to 1000 or 100%.
-
Optionally, enter a High amount threshold if you want to include certain high amounts in the sample selection result.
For example, if you enter a high amount threshold $500, then transactions that are greater than or equal to (>=) $500 (to a maximum of 1000 transactions) are excluded from the population being sampled and added to the sample selection result.
-
Select GENERATE.
Note: If you have entered a High amount threshold, the star icon (
 ) displays next to the rows that have been included in the sample due to the threshold.
Generate a sample using the Systematic method
The Systematic method generates a sample based on:
-
A fixed periodic interval determined by dividing the number of total transactions in the population by the number of transactions in the sample size
-
A random starting point that is a row between one and the interval value
For example, if there are 500 transactions in the population and the sample size is 50, the interval is 500/50 = 10 and the starting point is a random row between rows one and ten. If the first row selected is row 2, then the next row will be 12, then row 22 and so on until the end of the population.
To generate a sample using the Systematic method:
-
On the Transactions tab in the Data page, select Sample Selection.
-
Select the Systematic method.

-
Enter the desired Sample size.
You can enter a value up to 1000. The fixed periodic interval is calculated by dividing the population size by the sample size.
-
Optionally, enter a High amount threshold if you want to include certain high amounts in the sample selection result.
For example, if you enter a high amount threshold $500, then transactions that are greater than or equal to (>=) $500 (to a maximum of 1000 transactions) are excluded from the population and added to the sample selection result.
-
Select GENERATE.
Hinweis: If you have entered a High amount threshold, the star icon (
) displays next to the rows that have been included in the sample due to the threshold.
Generate a sample using the Monetary Unit method
The Monetary Unit method generates a sample based on:
-
An amount interval determined by dividing the absolute amount of the population by the sample size
-
A random starting amount that is a value between $1 and the interval amount
-
A starting point that is the first row in the population with a cumulative absolute balance greater than or equal to the starting amount.
-
Subsequent selected rows are ones with cumulative absolute balances greater than or equal to the interval amount plus the amount for the previously selected row
In this method, each individual dollar in the population is considered a sampling unit, so transactions with a higher value have a proportionally higher value of being selected. Transactions may be included multiple times in the selection if the transaction amounts are greater than the interval amount.
For example, if you have a population with a total absolute amount of $300,000 and you enter a sample size of 100, then the amount interval is 300000/100 = $3000. The starting amount is a random amount between $1 and $3000. The starting point is the first row in the population with a cumulative absolute balance greater than or equal to the starting amount. Let's say the starting amount selected is $2125 and row 1 has a balance of $500 and row 2 has a cumulative absolute balance of $2625. The first row selected in this case is row 2. The next selected row is the row with a cumulative absolute balance greater than or equal to $5125 ($2125 + $3000) and so on until the end of the population.
Remember that transactions may be included multiple times in the selection. Let's say the second selected row has a cumulative absolute balance of $10,250. The next selected row after that is the row with a cumulative absolute balance greater than or equal to $8125 ($5125 + $3000). Since the current selected row meets the selection criteria, the transaction is included in the selection again. That is, the row with the cumulative absolute balance of $10,250 is selected for the intervals of $5125 and $8125.
The Interval Occurrence column indicates how many times a transaction has been selected.

To generate a sample using the Monetary Unit method:
-
On the Transactions tab in the Data page, select Sample Selection.
-
Select the Monetary Unit method.

-
Enter the desired Sample size.
You can enter a value up to 1000. The amount is calculated by dividing the absolute amount of the population by the sample size.
-
Optionally, enter a High amount threshold if you want to include certain high amounts in the sample selection result.
For example, if you enter a high amount threshold $500, then transactions that are greater than or equal to (>=) $500 (to a maximum of 1000 transactions) are excluded from the population and added to the sample selection result.
-
Select GENERATE.
Note: If you have entered a High amount threshold, the star icon (
) displays next to the rows that have been included in the sample due to the threshold.
Generate a sample using the Manual method
The Manual method generates a sample based on manual selection of transactions.
To generate a sample using the Manual method:
-
On the Transactions tab in the Data page, select Sample Selection.
-
Select the Manual method.

-
In the list of transactions, select the check box for each transaction you want to include in the sample.
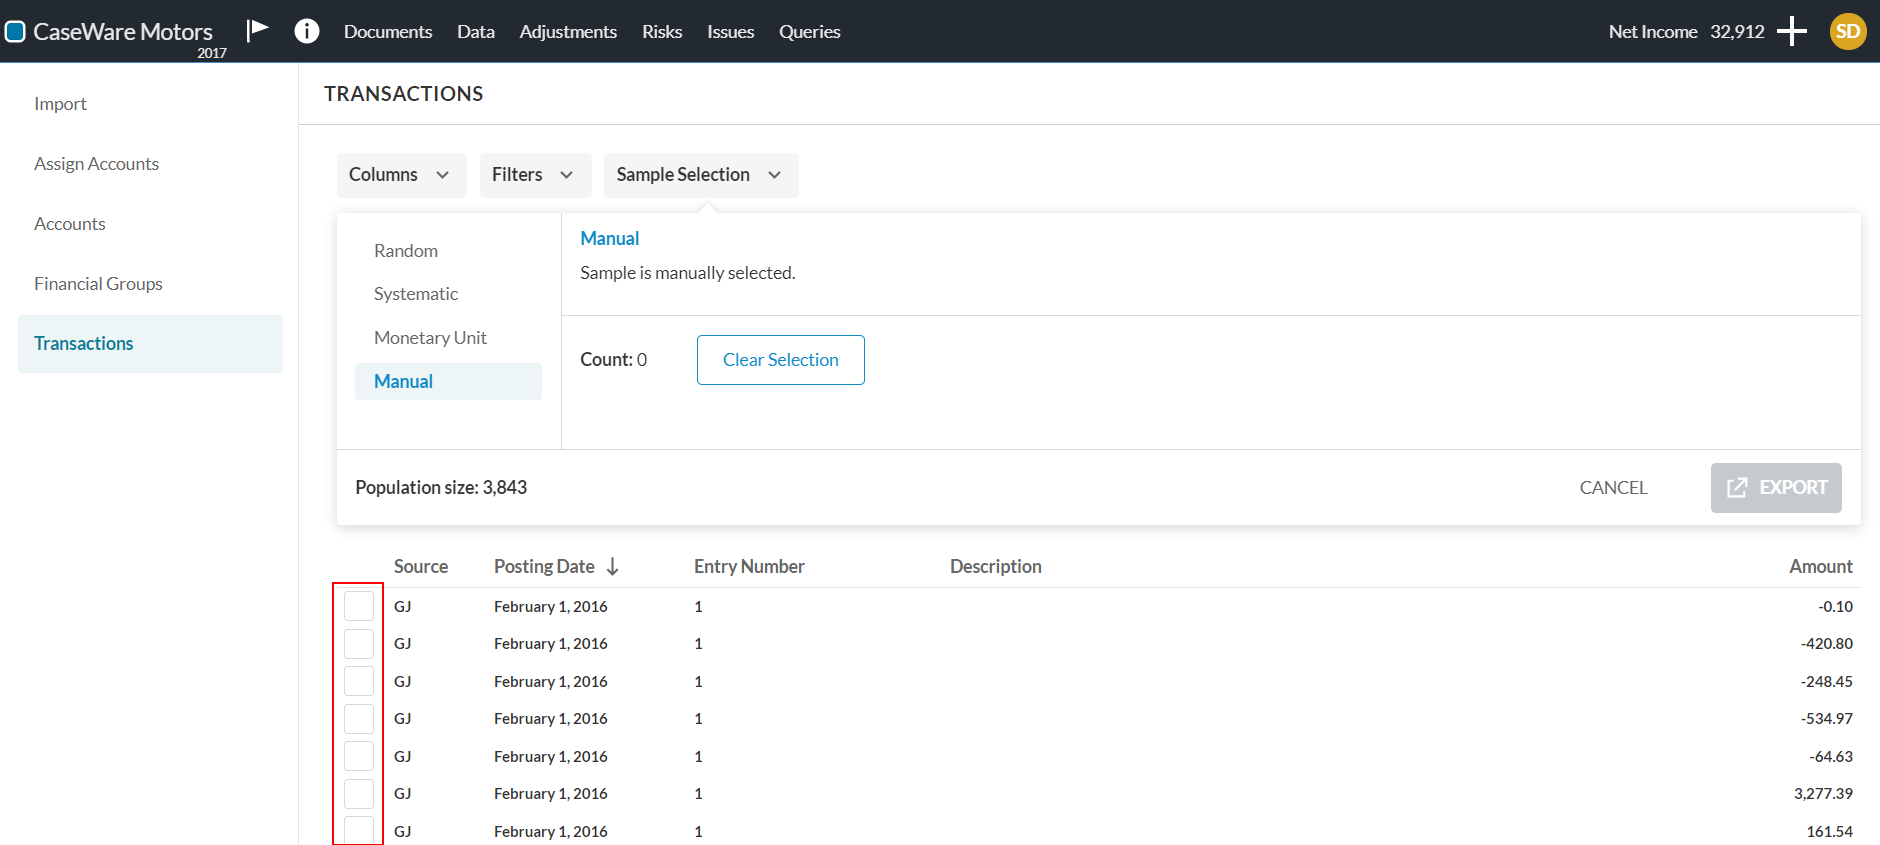
You can select the Posting Date or Amount column to sort the list by posting date or amount as you make your selections. An arrow displays next to the column to denote that the list is sorted ascendingly (
 ) or descendingly (
 ). Note that your selections are not cleared if you sort it. To clear your selections, select the Clear Selection button.
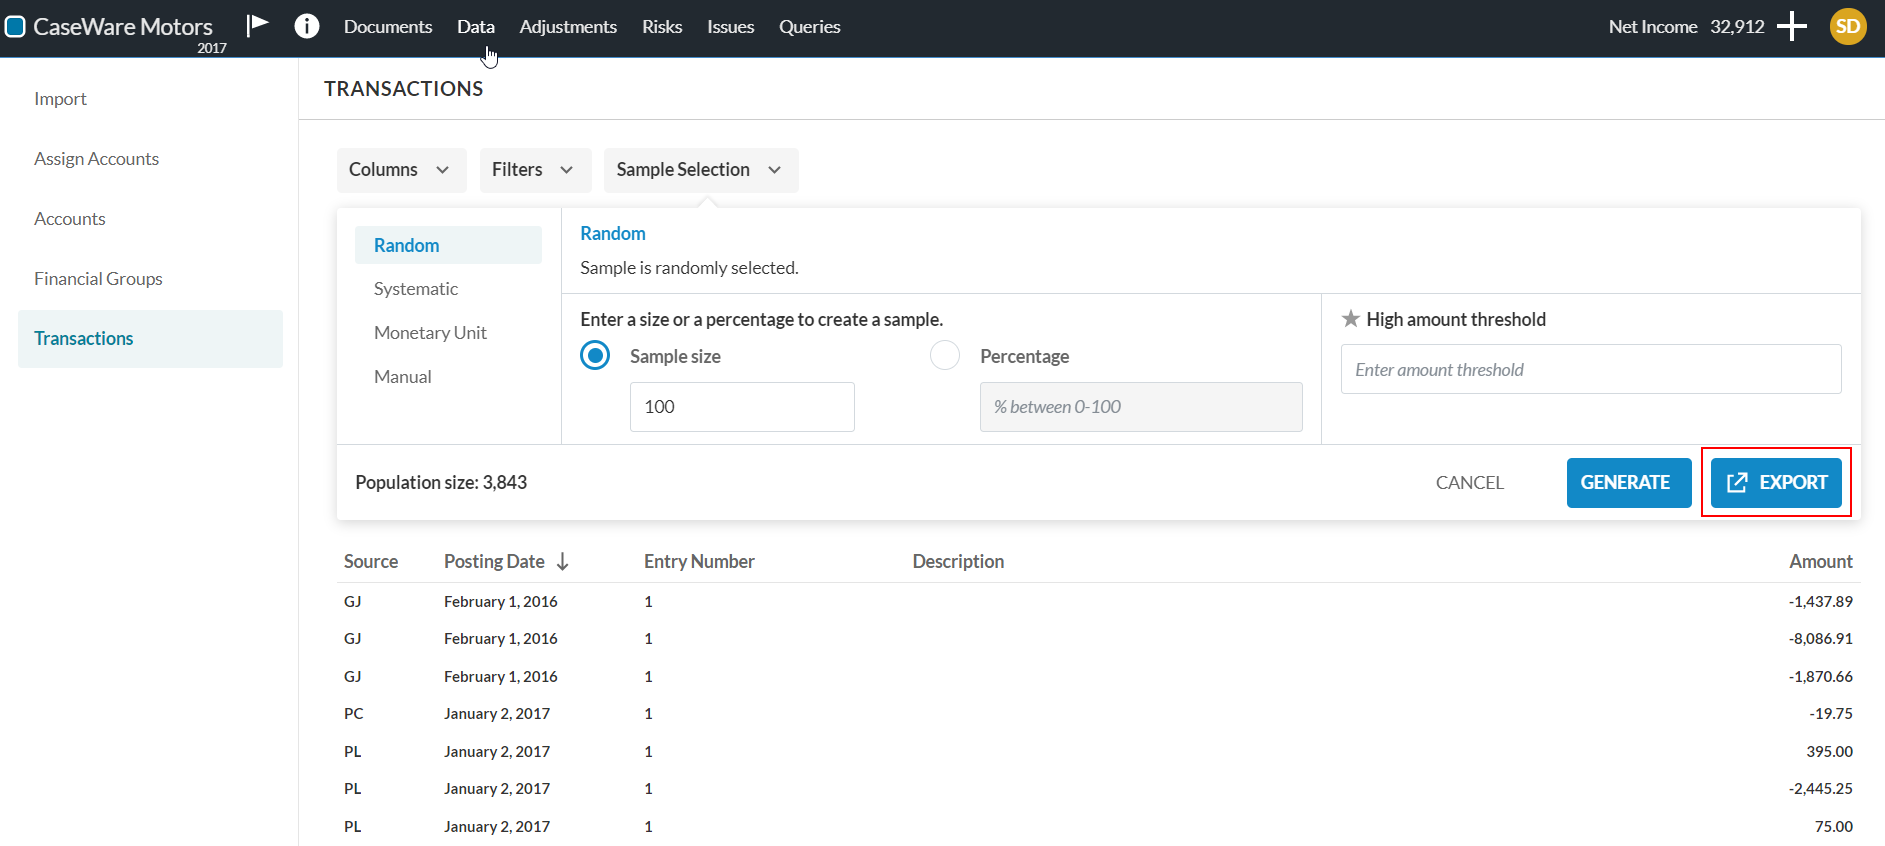
Export a sample
After you generate a data sample, you can export the sample to a CSV file or copy it to clipboard.
To export a sample:
-
Generate a sample.
-
Select the EXPORT button.
-
In the Sample Export dialog, select the export method.
If you select Export to CSV, enter a name for the CSV file.
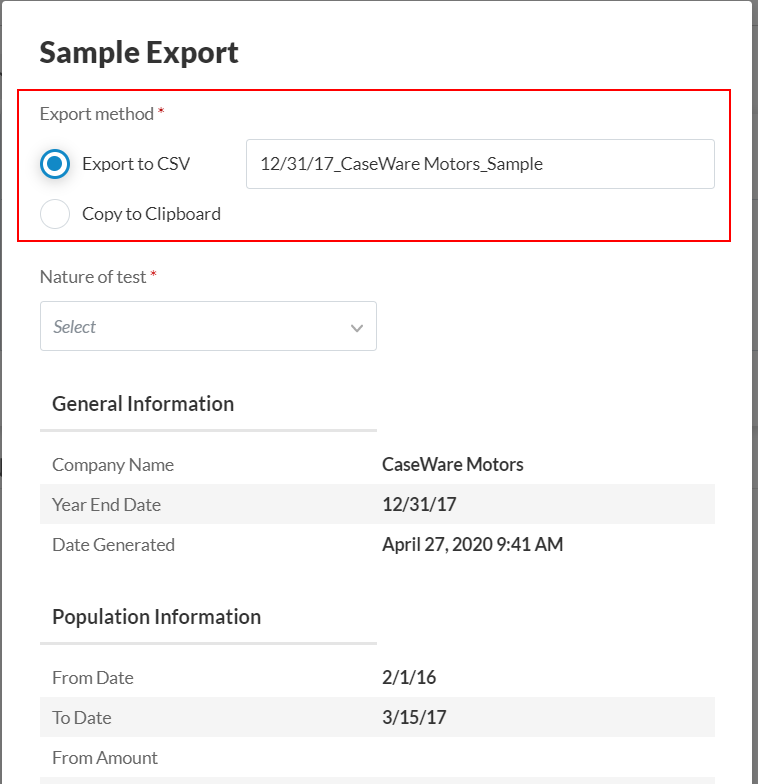
-
Select the Nature of test from the drop-down.
-
Select CONTINUE.
The sample is exported as a CSV file or copied to clipboard based on your selection.