Add or edit a context
Note: This feature is only available if it has been enabled in your product.
You can add new contexts and copy existing contexts from the XBRL review panel.
Add a new context
If the contexts available don’t meet your requirements, you can add custom contexts from the XBRL review panel. Note that if you want to create dimensional contexts, see Add a dimensional or typed dimensional context.
Before you begin, select the XBRL icon (![]() ) in the top menu, select the taxonomy you want to review and Start Review to open the review panel.
) in the top menu, select the taxonomy you want to review and Start Review to open the review panel.
To add a new context:
-
In the financial statements, select the content that requires a custom context.
-
In the Context section of the review panel, select More actions (
 ) | New context.
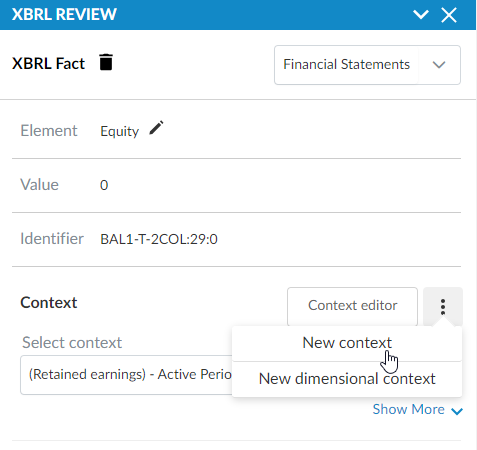
-
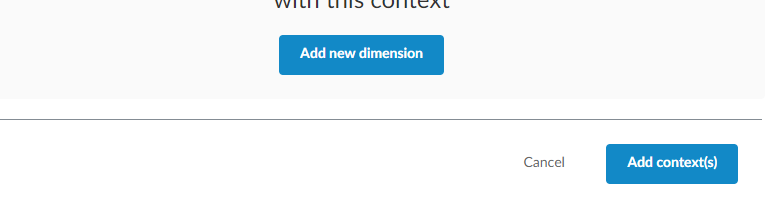
Enter the context details as required.
Note that each context must have a unique name.
Warning: Ensure you do not edit the Entity Identifier field. Editing this field will cause diagnostic and submission errors when you export the XBRL report.

-
Select Add context(s).
The context you created is now available for you to add to tags.
Copy an existing context
If you want to add a context that is similar to an existing context, you can copy the existing context and then make changes to create your new context.
Before you begin, select the XBRL icon (icon) in the top menu, select the taxonomy you want to review and Start Review to open the review panel.
To copy an existing context:
-
In the Context section, select Context editor.
-
Navigate to the context you want to copy from the list and select the Copy (
 ) icon.
Note: You can select the Star (
 ) icon for a context to favorite it. Favorite contexts display at the top of the context list in the Context Editor and in the Context dropdown when you add or edit a tag.
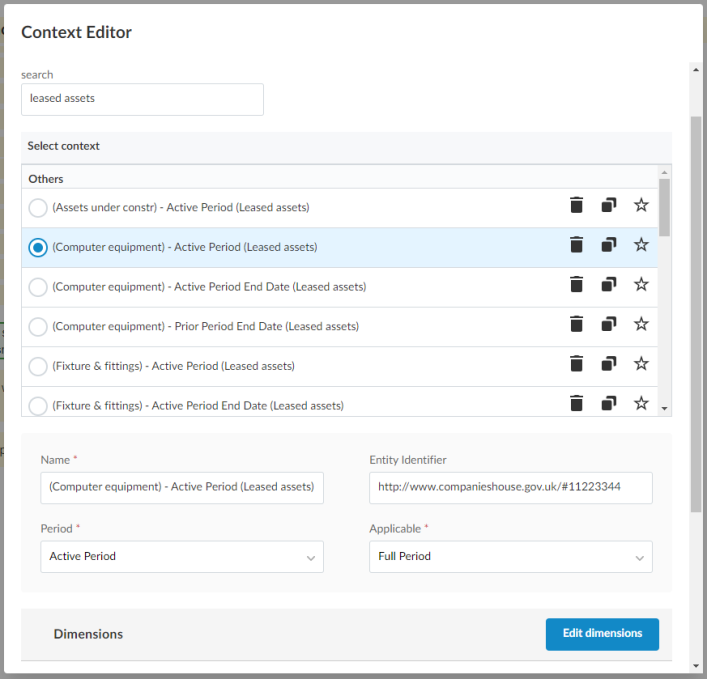
-
Edit the required context fields and dimensions, which will be pre-populated with the information from the context selected in step 3.
Warning: Ensure you do not edit the Entity Identifier field. Editing this field will cause diagnostic and submission errors when you export the XBRL report.
-
Select Add context(s) to create the context
You can now assign tags to the newly created context.
Edit an existing context
You can also edit any contexts you add.
Note: You cannot edit the preexisting system contexts.
Before you begin, select the XBRL icon (icon) in the top menu, select the taxonomy you want to review and Start Review to open the review panel.
To edit an existing context:
-
In the Context section, select Context editor.
-
Navigate to the context you want to edit and select it. You can use the search option if required.
Note: You can select the Star (
) icon for a context to favorite it. Favorite contexts display at the top of the context list in the Context Editor and in the Context dropdown when you add or edit a tag. -
Once you select a context, the details of that context displays below the context list. Edit the Name, Period and Applicable fields as required.
Warning: Ensure you do not edit the Entity Identifier field. Editing this field will cause diagnostic and submission errors when you export the XBRL report.
-
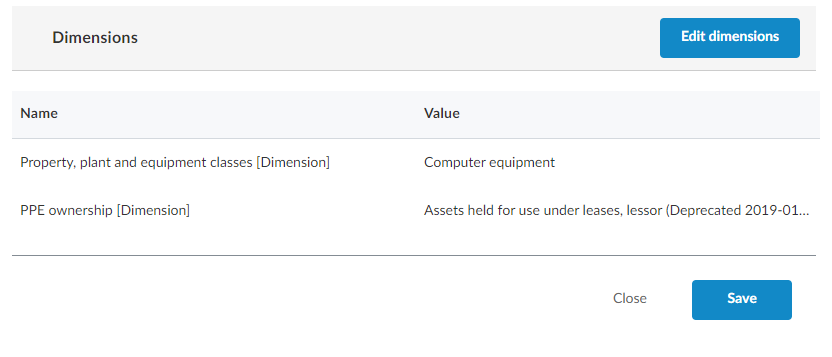
If relevant, select Edit dimensions to edit any dimensions on the context and then select Confirm once you make your changes.
-
Select Save.