Manage your firm account in MyCaseware
If you have administrator access to MyCaseware, you can view your firm’s account information, including order history, address information, user information and invoices, in the My Account section.
Before you start, select either the user icon or your username and then My Account in the top left corner of the page to navigate to the My Account section.
View your firm account information
The My Account tab is the default tab when you navigate to the My Account section of MyCaseware. This tab allows you to view your firm’s account name, number and other information.
On this page, you can verify the following account information for your firm:
-
Account name
-
Account number
-
CICA
-
Account VAT Number
-
CPA Number
Note that you cannot edit the information on this page. If you need to make any changes, please contact Caseware sales or support.
View your order history
You can select the Order history tab to view your completed transactions. Use the date filters if necessary to filter your orders by a specified date range.
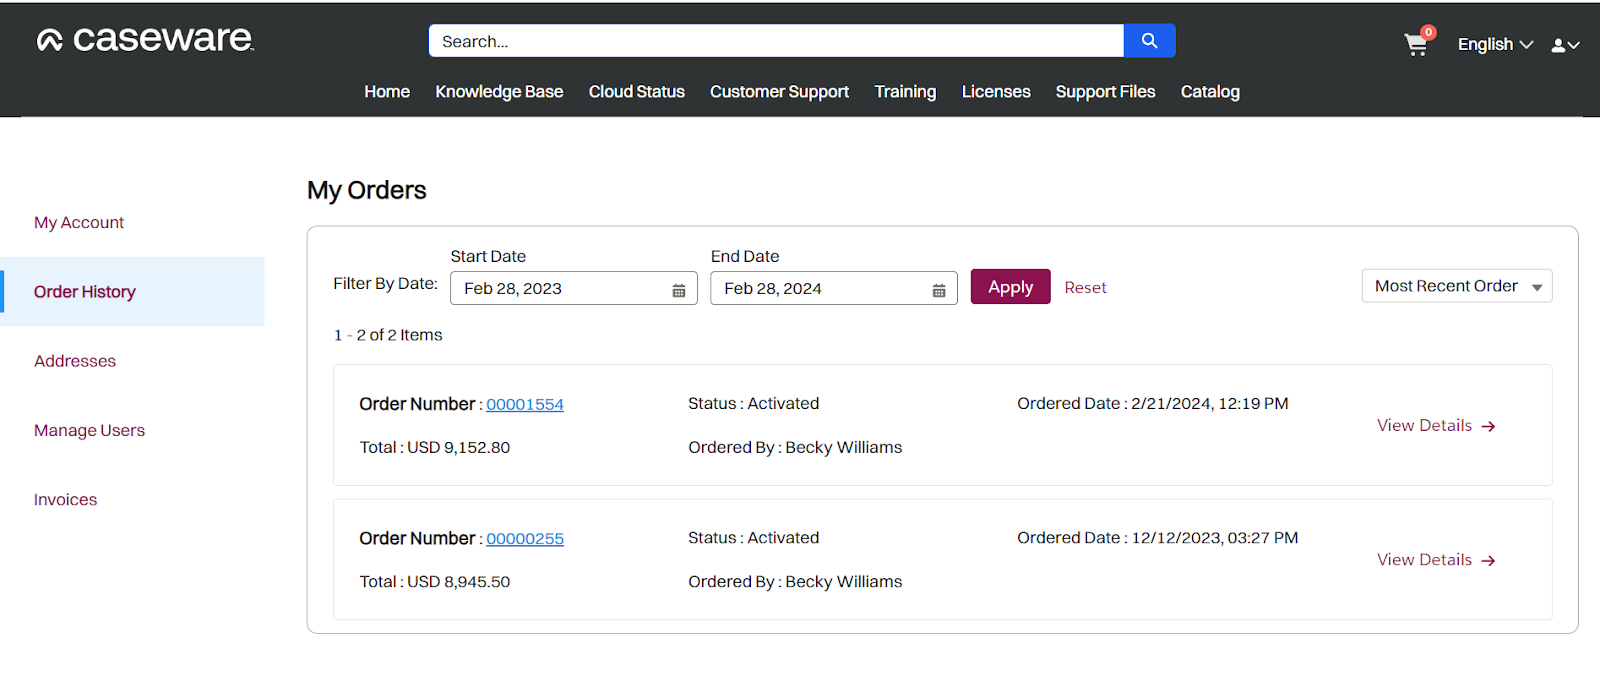
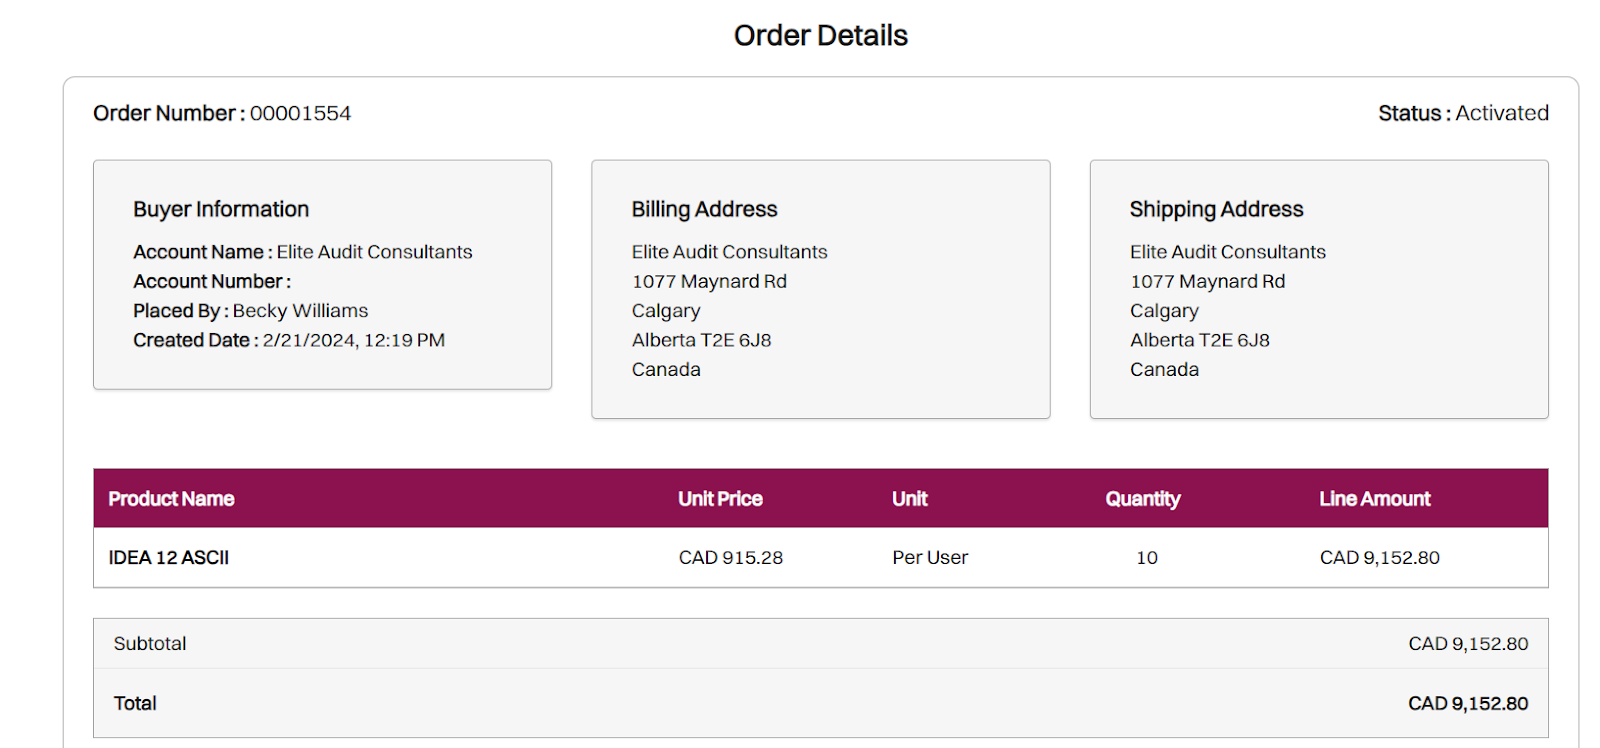
Select View Details or the order number for any order to view the order details, such as the billing address and the items included in the order.
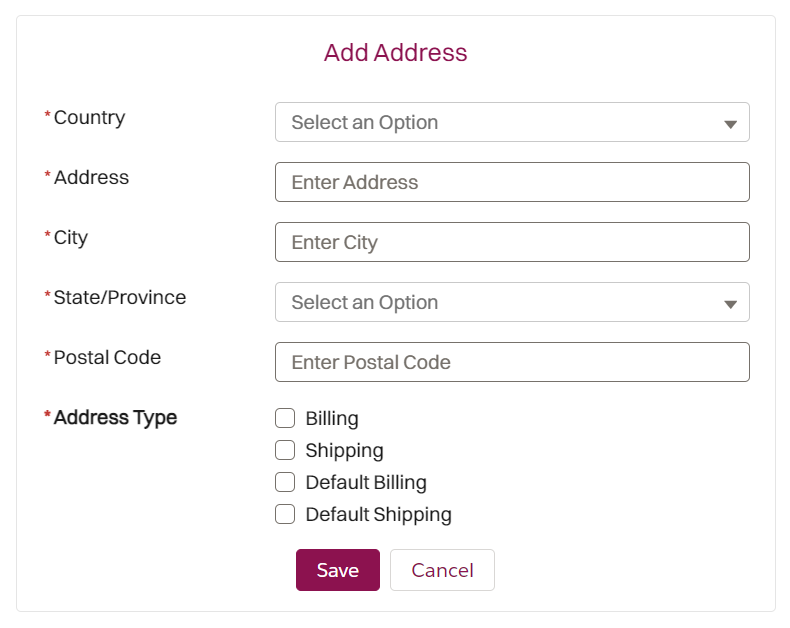
View and manage addresses
You can manage your firm addresses from the Addresses tab.
To add an address for your firm:
-
Select the Addresses tab.
-
Select + Add Address.
-
Enter the address information in the required fields.
If you set the address as your default billing or shipping address, this address will be used by default when you purchase items from the MyCaseware catalog.
-
Select Save.
Your address is validated and added to your account.
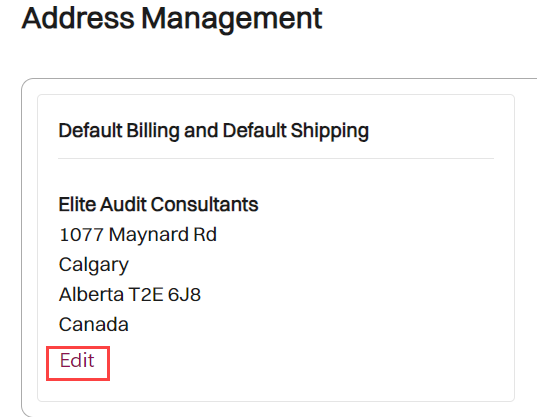
If you want to edit an address, you can select Edit and make any required changes. Note that you cannot delete addresses.
Manage users
You can add and manage your firm’s MyCaseware users, including their access rights to MyCaseware, in the Manage Users tab.
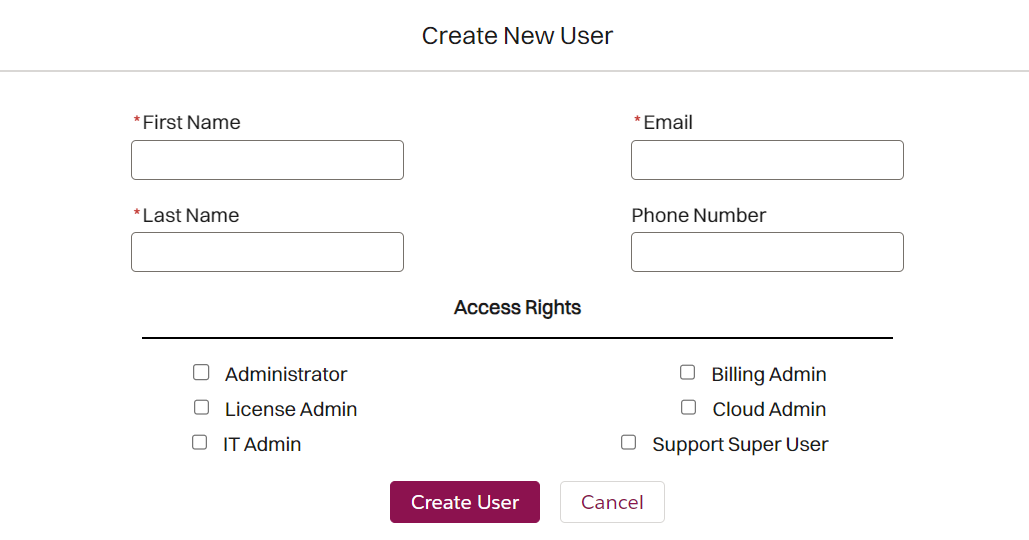
To add a MyCaseware user:
-
Select the Manage Users tab.
-
Select + Create User.
-
In the Create New User dialog, enter the user’s First Name, Last Name, Email. You can also add their phone number.
-
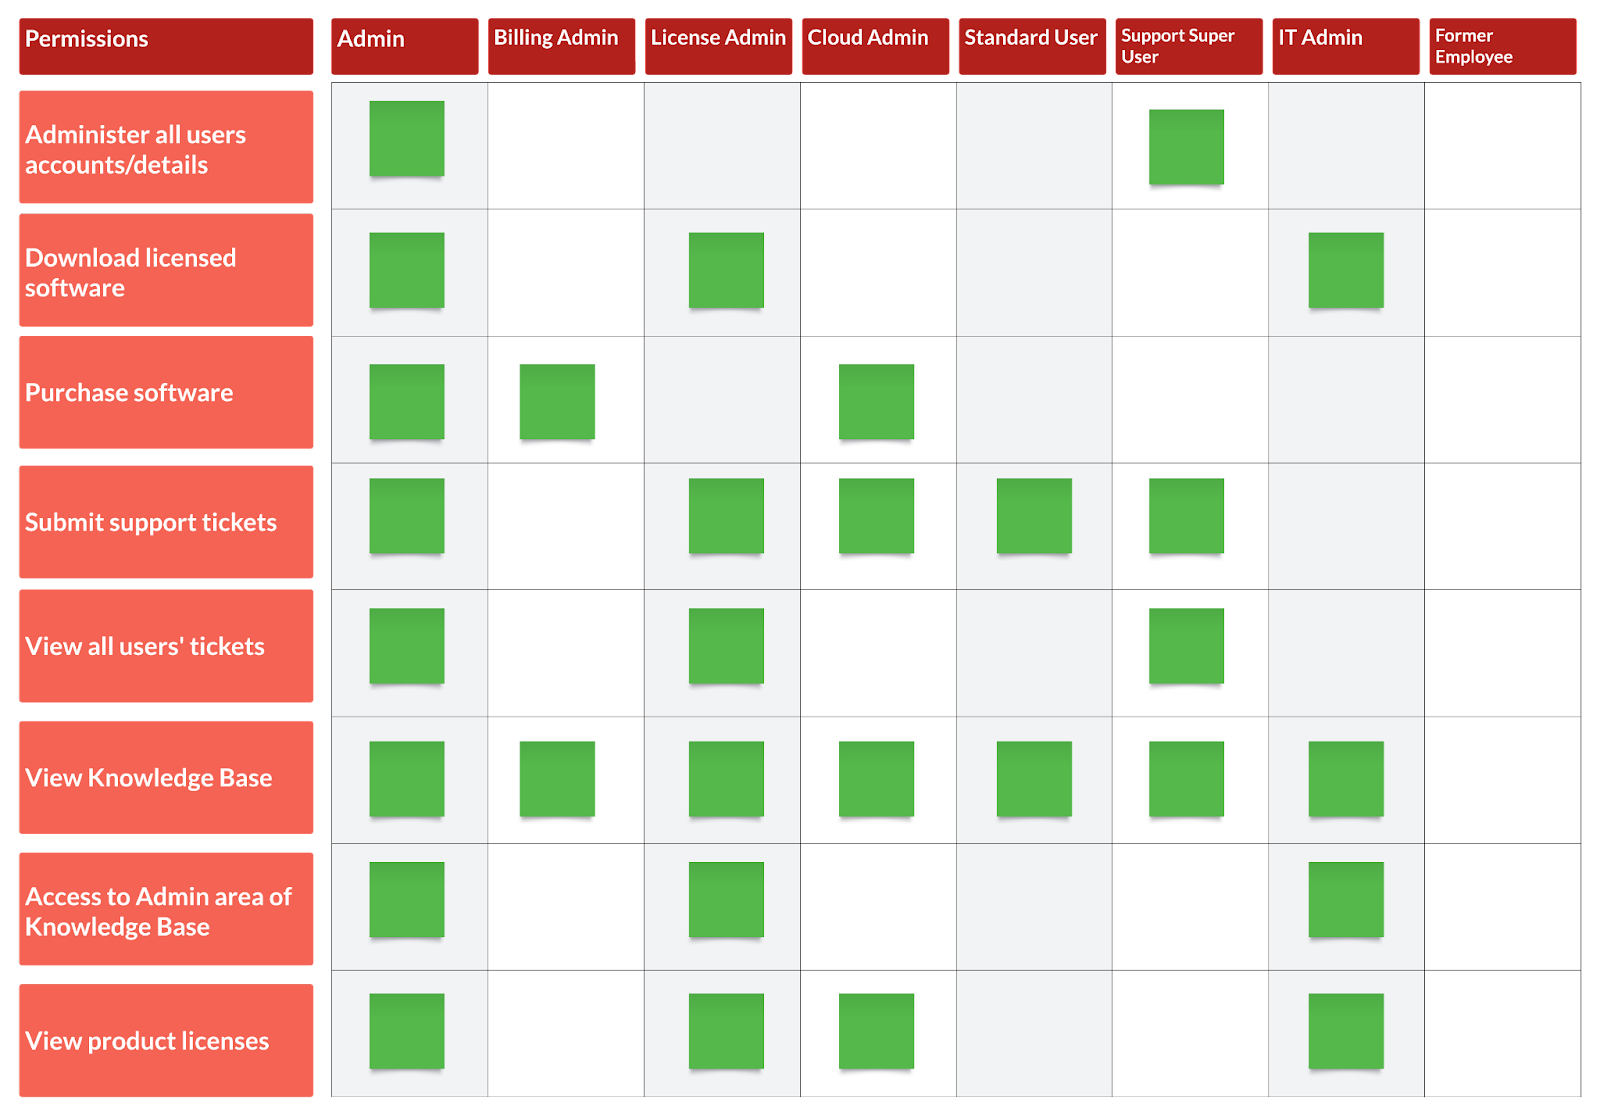
Set the user’s access rights to MyCaseware. The image below outlines what features in MyCaseware users have access to based on their access role.
Note: To set a user as a Standard User who only has access to submit support tickets and view the knowledge base, do not select any access roles.
-
Select Create User.
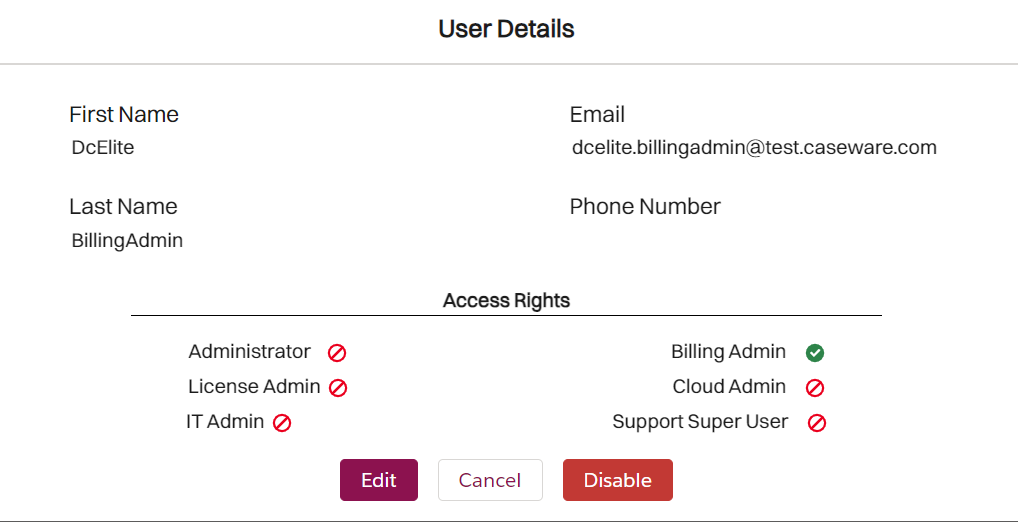
If you want to edit an existing user, you can select Manage in the Action column for the user and then select Edit in the User Details dialog to make any required changes.
If you want to remove login access to MyCaseware for a user, select Disable.
View and pay invoices
You can view and pay any open invoice on the Invoices tab. Once you pay the invoice, you can view the completed transaction in the Order History tab.
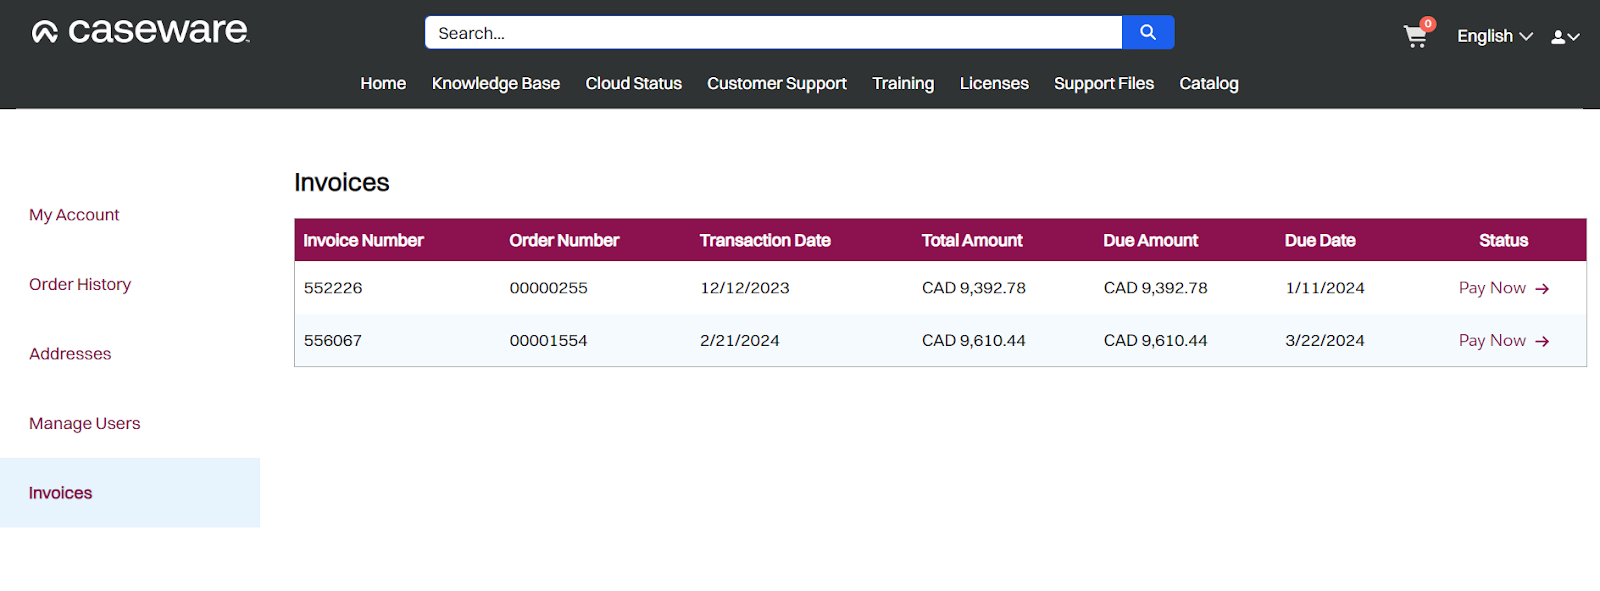
To pay an invoice:
-
Select the Invoices tab.
-
Select Pay Now for the invoice you want to pay.
-
Confirm the invoice details.
-
Select either Pay with Credit or Pay with Debit depending on which payment method you want to use.
-
Complete your payment information to finish paying your invoice.