Engagementdatei erstellen und einrichten
In diesem Thema wird beschrieben, wie eine Engagementdatei erstellt wird, und es wird ein Überblick über ihre Einrichtung gegeben.
Eine Engagementdatei erstellen
Eine Engagementdatei erstellen:
-
Wählen Sie im Caseware Cloud Hauptmenü den Eintrag Engagements.
-
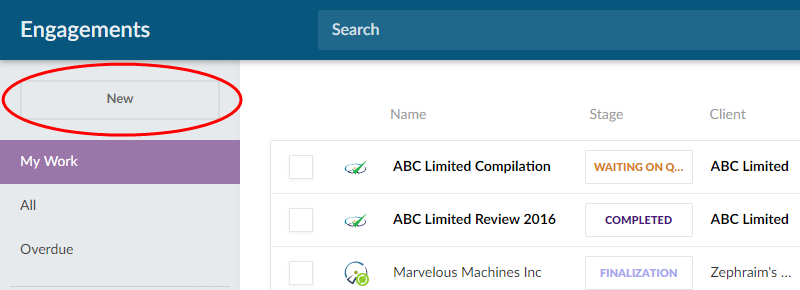
Klicken Sie im Engagementmenü auf die Schaltfläche Neu.
-
Wählen Sie im Dialog Neues Engagement Ihre Cloud App aus.
-
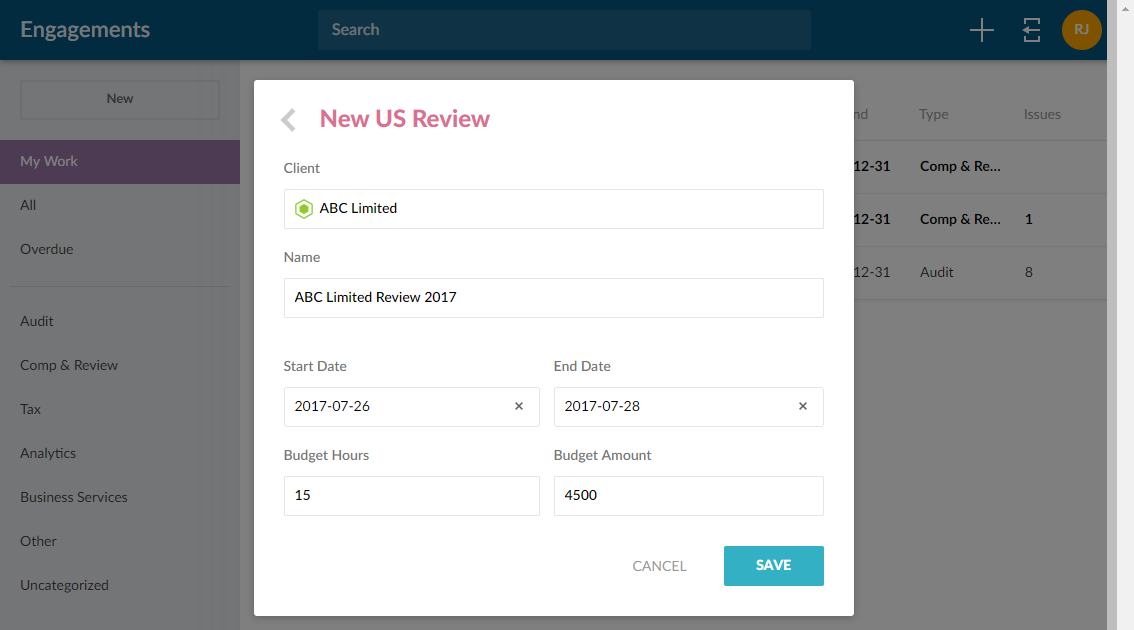
Wählen Sie im nächsten Dialogfeld Ihre Kundenentität aus und geben Sie den Namen für die Engagementdatei ein. Sie können auch das Anfangs- und Enddatum für Ihr Engagement auswählen und Budgetinformationen eingeben.
-
Klicken Sie auf Speichern.
Ihr neues Engagement wird erstellt. Wenn Sie im Menü Engagement die Option Alle auswählen, um alle Engagements für Ihr Unternehmen anzuzeigen, wird das Engagement zu dieser Liste hinzugefügt.
Ersteller und Prüfer zuweisen
Sobald Sie die Auftragsdatei erstellt haben, können Sie ihr Ersteller und Reviewer zuweisen. Siehe auch Mandantenkontakten Zugriff auf Entitäten gewähren, um zu erfahren, wie Sie Kundenkontakten Zugriff auf Aufträge für die PBC-Zusammenarbeit (Prepared By Client) gewähren.
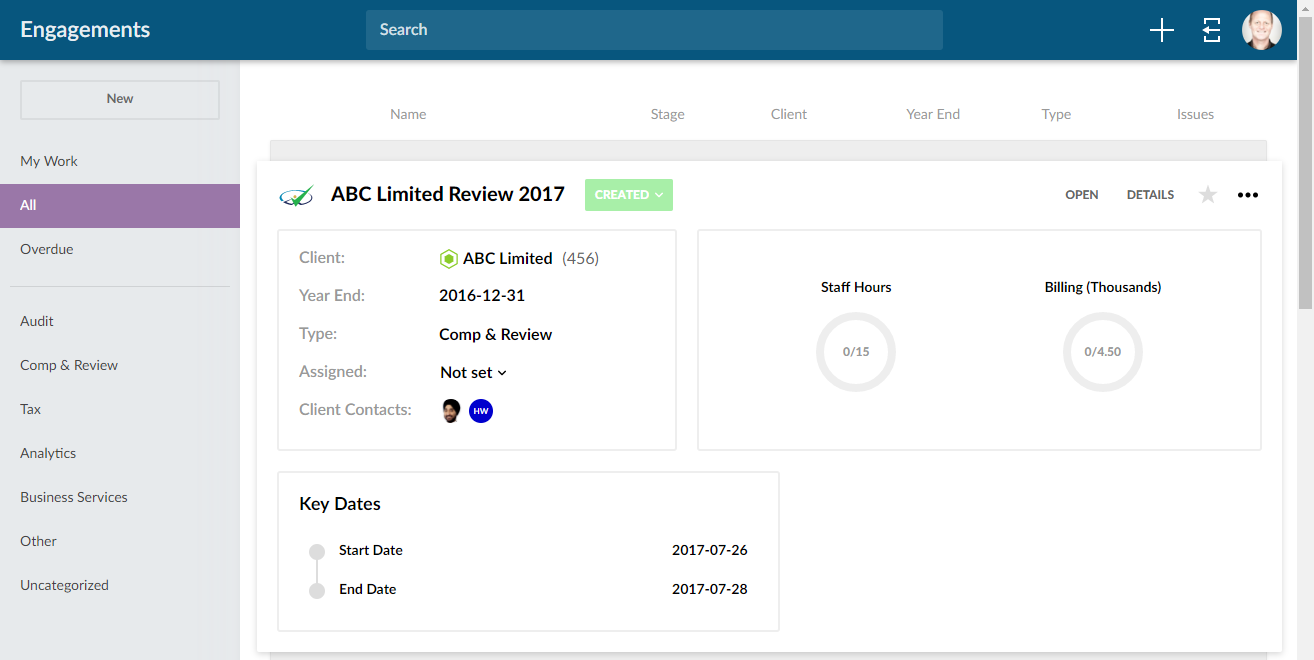
Rufen Sie zunächst die Seite Engagements auf und wählen Sie das gewünschte Engagement aus, um dessen Details anzuzeigen.
Ersteller und Prüfer des Engagements zuweisen:
-
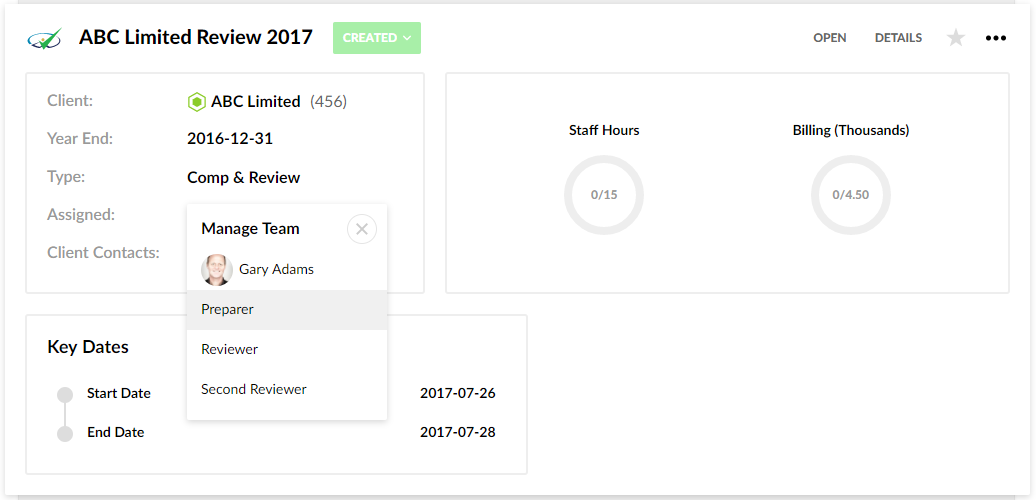
Wählen Sie das Feld Zugewiesen.
-
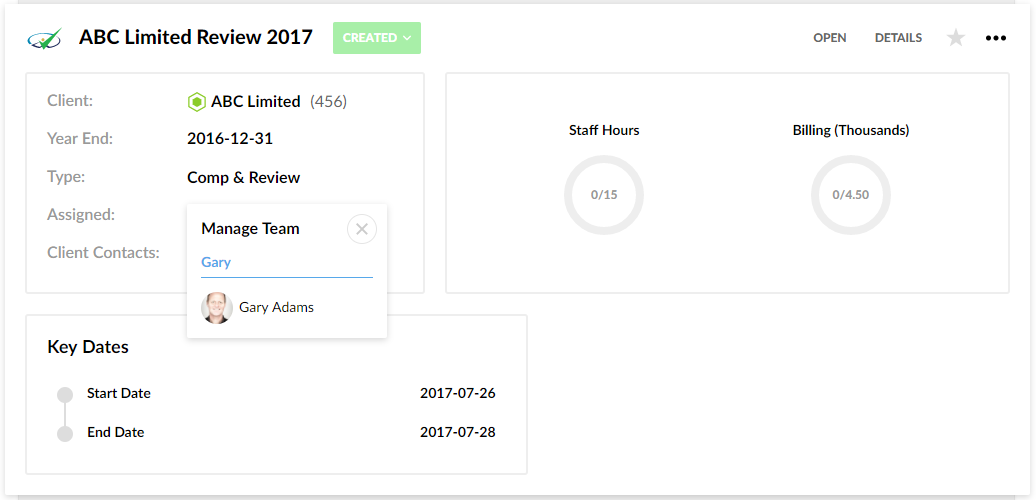
Geben Sie im Popup Team verwalten den Namen eines Mitarbeiters ein, um passende Ergebnisse anzuzeigen.
-
Wählen Sie den gewünschten Mitarbeiter aus und anschließend die entsprechende Rolle aus der Liste.
Tipp: Wiederholen Sie die Schritte, um Mitarbeiterrollen für dieses Engagement zuzuweisen.
Mandantenstammdaten einrichten
Gehen Sie dazu auf die Seite Engagements und öffnen Sie die Engagementdatei.
Mandantenstammdaten einrichten:
-
Wählen Sie den Namen der Entität aus, um das Popup-Fenster Mandantenstammdaten zu öffnen.
In diesem Popup können Sie die folgenden Eigenschaften einstellen:
-
Workflow-Stufe - wählen Sie eine Stufe für den Status der gesamten Engagementarbeit.
-
Auftragsnummer - geben Sie die Auftragsnummer Ihres Unternehmens für diesen Auftrag ein.
-
Firmenname - in diesem Feld wird standardmäßig der Name der Cloud-Einheit angezeigt. Sie können die Standardeinstellung ändern und einen anderen Namen eingeben.
-
Jahresabschlussdatum - wählen Sie ein Jahresenddatum für dieses Engagement.
-
Währung - wählen Sie die Währung für dieses Engagement.
-
Sprache des Inhalts - wählen Sie eine Sprache aus, um die Sprache des aktuellen Engagements zu ändern.
Hinweis: Die Drop-down-Liste Sprache des Inhalts ist nur dann im Popup-Fenster Mandantenstammdaten verfügbar, wenn in Ihrer Cloud App mehrere Sprachen unterstützt werden.
Beachten Sie, dass Sie auch den Namen der Entität in dem Popup auswählen können, um zu der Entität in Ihrer Cloud-Instanz zu navigieren.
-
-
Wählen Sie die Schaltfläche Zweiter Reviewer, um einen zweiten Reviewer für alle Abzeichnungen hinzuzufügen.
Die Option Finale Überprüfung ist in allen Elementen enthalten, die ein Abzeichnen erfordern.
-
Klicken Sie auf die Schaltfläche Konsolidieren, um ein Konsolidiertes Engagement zu erstellen.
-
Klicken Sie auf die Schaltfläche Lockdown, um die Engagementdatei zu sperren. Weitere Informationen finden Sie in Lockdown für Engagement ausführen.
Wenn Sie mit der Aktualisierung der Eigenschaften für Ihr Engagement fertig sind, klicken Sie auf die Schaltfläche Speichern.
Fügen Sie einen oder mehrere externe Verknüpfungen in die Engagementdatei ein
Sie können einen oder mehrere externe Verknüpfungen in die Engagementdatei einfügen, um Hilfevideos für Ihre Kunden oder andere zusätzliche Informationen einzubinden.
So fügen Sie eine Verknüpfung in die Engagementdatei ein:
-
Öffnen Sie die Engagementdatei.
-
Wählen Sie Dokumente aus dem oberen Menü.
-
Klicken Sie auf das Symbol Ein Dokument erstellen (
 ) und anschließend auf Verknüpfung.
 - Geben Sie eine Kennung für den Link in das Feld Kennung ein.
-
Geben Sie in das Feld Name einen Titel für den Link ein.
-
Geben Sie die Webadresse für den Link in das Feld URL ein.
-
Klicken Sie auf Speichern.
Der Dialog Dokumenteneigenschaften wird angezeigt.
Wenn Sie keinen Titel hinzufügen, wird in der Engagementdatei ein Standardtitel für den Link angezeigt.
Sie können Anzeigeeinstellung bearbeiten wählen, um die Sichtbarkeitsbedingungen für die hinzugefügten Verknüpfungen zu ändern.
Informationen aus dem Vorjahr anzeigen oder verbergen
Sie können Ihre Engagementdatei auch so einstellen, dass Informationen aus dem Vorjahr angezeigt oder verborgen werden. Sie können zum Beispiel die Vorjahresinformationen ausblenden, wenn das laufende Jahr nicht direkt mit dem Vorjahr vergleichbar ist.
So verbergen Sie Vorjahresinformationen in einer Engagementdatei:
-
Öffnen Sie die Engagementdatei und wählen Sie das Symbol Engagementinformation (
 ) ganz oben.
 -
Deaktivieren Sie das Kontrollkästchen Übertragsinformationen anzeigen.
Vorjahresinformationen sind in der Engagementdatei ausgeblendet.
Aktivieren Sie das Kontrollkästchen Übertragsinformationen anzeigen, um die Vorjahresinformationen im Engagement anzuzeigen.
