Tax group assignment
Note: Caseware Taxflow supports 2022, 2023 and 2024 tax exports for C-Corporations, S-Corporations and Partnerships for the following tax vendors:
-
CCH ProSystem fx® Tax
-
CCH Axcess™ Tax
-
Lacerte® Tax
-
GoSystem® Tax
-
UltraTax CS
After importing the client’s data, your accounts are automatically assigned to a default tax group. You can review or modify the tax groups using the 1-560 Tax groups assignment form. The form includes a list of financial group accounts, account details, final balances for the current and prior years and the default tax group.
Modify tax group assignments
You have the option to modify the default tax groups that have been automatically assigned to your financial group accounts.
To modify the tax group assignment:
-
In the 1-560 Tax groups assignment form, select the expand icon (
 ) to open the financial group account you want to modify, then select the Tax groups field.
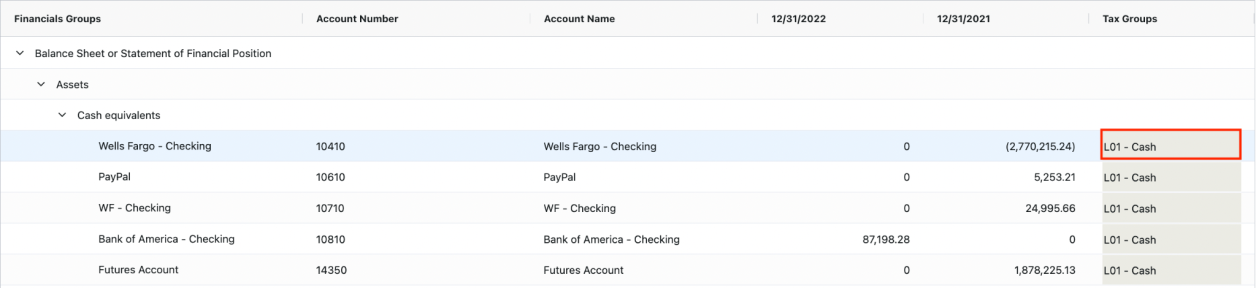
-
In the override prompt, select Yes to change the tax group.
-
From the tax group drop-down, select the new tax group you would like to assign to the account.
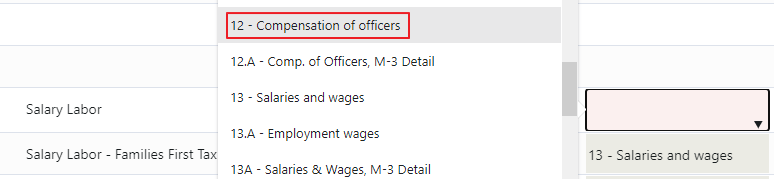
The tax group field now has a red background to indicate that the default value has been overridden. When you hover over the overridden field, a tooltip displays where you have the option to remove your changes.
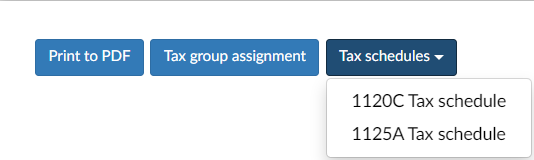
If you need to create, modify or delete a tax group, select Tax Group to quickly access the 1-570 C-Corp - Tax groups form. You can also access the available tax schedules. To learn more, see Tax groups and Tax schedules.
Note: If an account is not assigned to a tax group, a warning displays at the top of the form.
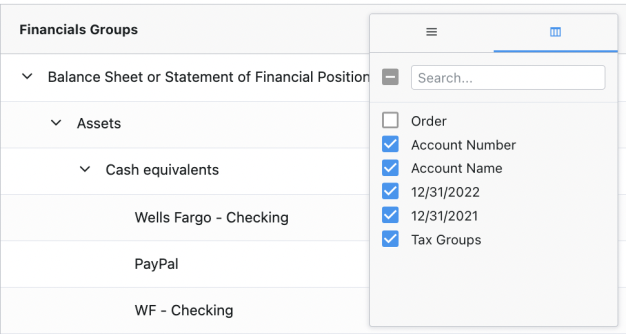
Adjust table settings
When reviewing the tax group assignments, you have the option to adjust the table settings. You can adjust the column view and filter column headings.
To adjust the column view:
-
Hover over the heading of the column you want to adjust and select the Settings menu (
 ).
). -
By default, the Settings menu (
 ) should be open, if not select it again.
 -
You can choose to pin, autosize, expand, collapse or reset the column view.
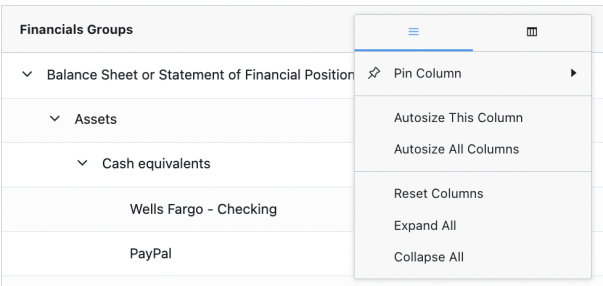
Tip: Autosize will automatically adjust the width of your column to fit the length of your data.
To filter column headings:
-
Hover over the heading of the column you want to adjust and select the Settings menu (
). -
Select the Headings filter (
 ).
). -
Select the columns you want to include. To quickly add or remove all columns, select the All icon (
 ).
).