Change the display option for table rows
You can change the current display option for table rows. Based on the row type, you can have three or two display options to choose from.
-
Apply default behavior
The default behavior differs based on the row type:
For input rows:
-
Always display this row in the financial statements.
-
Display this row in the document PDF print copy if it has a non-zero balance (that is, the cell is not empty and its value is not zero) - otherwise, hide the row in the PDF print copy.
-
Always display this row in the financial statements.
-
Display this row in the document PDF print copy if the group includes more than one account with non-zero balance (that is, the cells are not empty and their values are not zero) - otherwise, hide this row in the PDF print copy.
-
Display this row in the financial statements and in the document PDF print copy if the balances for current or prior years exist - otherwise, hide this row in both.
-
Always display this row
The row always displays in the financial statements and in the PDF print copy.
-
Always hide this row
The row is always hidden in the financial statements and in the PDF print copy.
Note: This option is only available for input rows and group rows (trial balance group rows, custom group Title and Total rows).
For group rows (trial balance group and custom group Total or Title):
For trial balance rows:
To change the display option for a row:
-
Select the table.
-
Select More actions (
 ), then choose Edit Dynamic Table.
 -
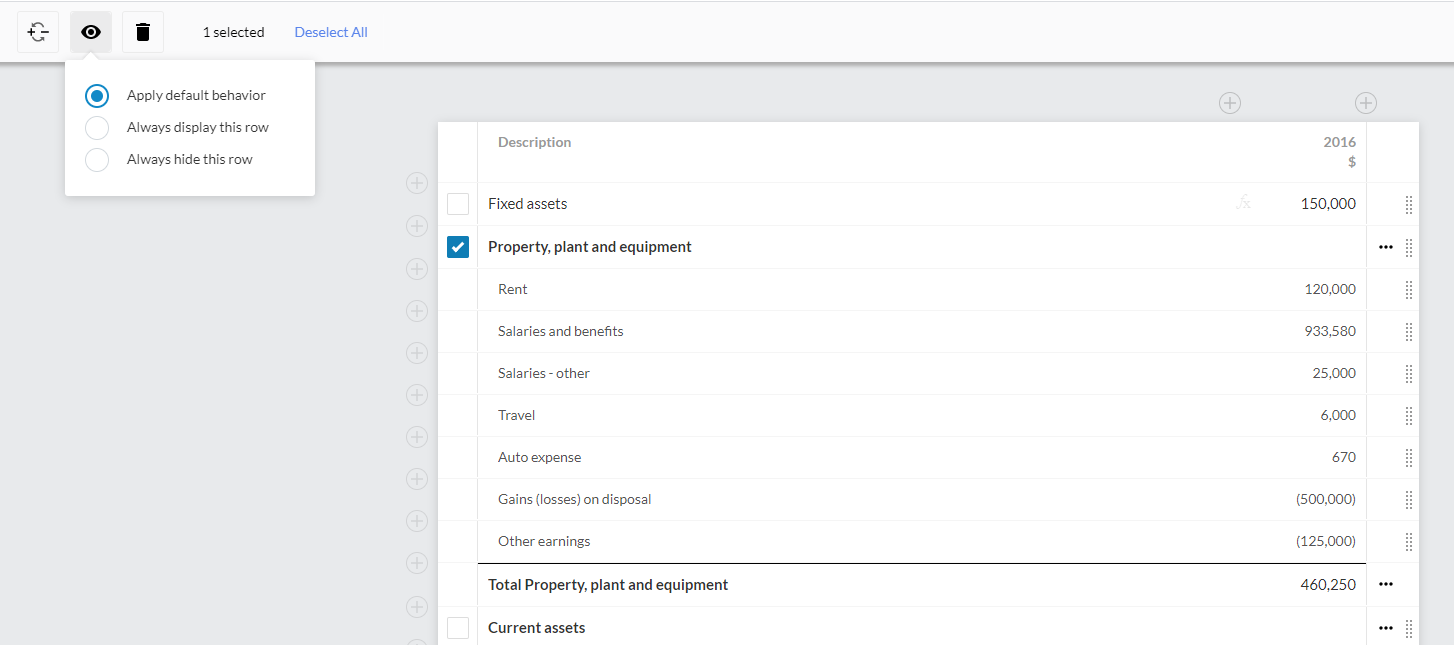
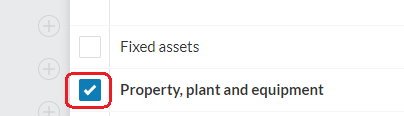
Using the check boxes on the left side, select the desired row.
-
Select the eye icon (
 ).
). -
Select the desired display option.
-
Select SAVE or SAVE&CLOSE.
The table opens in edit mode.
A drop-down opens showing the available display options for the selected row.
Apply the default behavior is selected by default.
Note: If the row is an input row or a group row, the Always hide this row option is available in the list - otherwise, only Apply default behavior and Always display this row are available.
Tip: If you don't want to change the current display option, clear the row check box.
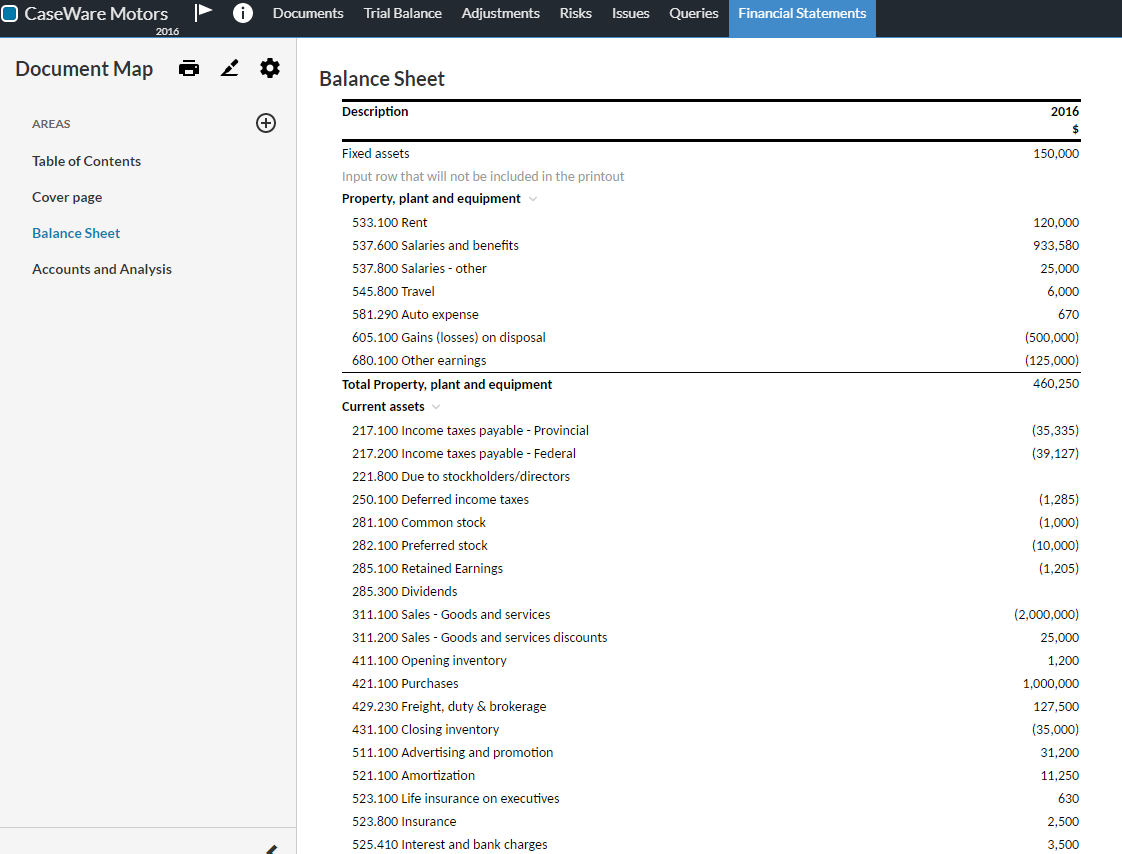
Note that rows that will not be included in the document printout display in gray, so you can easily spot them.