Start the engagement
![]()
Content in this topic requires OnPoint PCR.
Create an OnPoint PCR Engagement
To get started, create a new OnPoint PCR engagement file. You can set key dates, budgets and assign staff members to the engagement file to prepare and review the engagement work.
To create an OnPoint PCR engagement:
-
From the Cloud menu (
 ), select OnPoint PCR.
 -
Select the New button.
-
Corporate
-
Partnership
-
Sole proprietorship
-
Limited liability company (LLC)
-
Limited liability partnership (LLP)
-
Select the entity from the top right drop-down list.
-
In the Entity Details page, select the Edit icon (
 ).
). -
Update the Country of Registration to the United States of America.
-
Select a supported Organization Type and select Save.
-
Choose your client Entity.
-
Enter a Name for the engagement file and specify the year of the engagement.
-
You can also:
-
Choose to carry forward data from a previous engagement.
-
Select a Start Date and End Date for your engagement.
-
Enter budget information.
-
Enter a description.
-
-
In the Preparer field, enter the names of staff members who will complete work in the engagement file.
-
In the Reviewer field, enter another staff member's name. Select them from the drop-down list to assign them as a reviewer.
-
Select Save.
The OnPoint PCR dialog displays.
Note: OnPoint PCR provides guidelines and programs in line with the requirements of the following organization types:
To change your Country of Registration and Organization Type settings:
For more information, see Create client entities.
The engagement file automatically opens in your browser.
Set the workflow status and year end date
When you first open the engagement, a pop-up displays showing the engagement's Workflow status.
The Workflow status lets clients and other stakeholders know how far along you are in the engagement process. If you intend to start working on the engagement right away, set the Workflow status to In Progress.
You can also change the Operating name, Reporting period and Year end date for the engagement.
Note: An incorrect year-end date affects trial balance imports.
Once you select Save, you can view the Documents page.
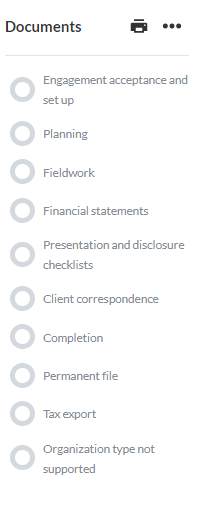
Documents page
The Documents page acts as OnPoint PCR's central hub. When you first open this page, two documents are available. To populate content in the Documents page, complete the 1-100 Engagement set up checklist.
Note: There will only be one document available on the Documents page if the organization type selected in Collaborate is not supported. See Create an OnPoint PCR Engagement for a list of organization types supported.
Documents are available within phases, which have been broken down further to allow for ease of navigation throughout the document manager:
-
Engagement acceptance and set-up
-
Planning
-
Fieldwork
-
Financial statements
-
Presentation and disclosure checklists
-
Client correspondence
-
Completion
-
Permanent file
-
Tax export
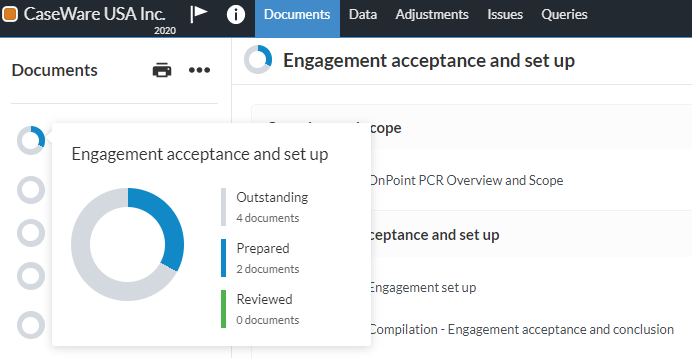
Each phase has its own indicator that shows the document sign-off progress. For example, if two out of eight planning documents in a specific phase have been reviewed, the indicator shows 25%.
Only documents and phases applicable to your engagement type are visible. For example, if you select Review as your engagement type in 1-100 Engagement set up, only documents relevant to a review engagement become visible in the phases mentioned above. To see all documents available in OnPoint PCR, select More Actions (![]() ) | Hidden Items.
) | Hidden Items.
You can view a list of the current documents in the engagement by selecting the folder icon (![]() ). A panel opens on the right side displaying the available documents grouped by phase. You can also select a document to open it. Once you open a document, you can pin it for quick access using the pin icon (
). A panel opens on the right side displaying the available documents grouped by phase. You can also select a document to open it. Once you open a document, you can pin it for quick access using the pin icon (![]() ). To learn more about engagement documents see, Manage the engagement documents.
). To learn more about engagement documents see, Manage the engagement documents.