Complete the Optimiser document
![]()
Content in this topic requires Caseware PBC Requests.
Note: The default content that comes with PBC Requests is only available in English. To learn more, see Author content in multiple languages.
The Documents page acts as a central hub for PBC Requests engagement documents. It consists of documents within various phases. You can select a document to open it. You can also pin documents that you use frequently by selecting the pin icon (![]() ). You can also move documents and copy them to the Cloud site.
). You can also move documents and copy them to the Cloud site.
To see all the available documents in PBC Requests, select More Actions (![]() ) | Hidden Items. To learn more, see Manage the engagement documents.
) | Hidden Items. To learn more, see Manage the engagement documents.
Initially, the Documents page displays one document and one phase: the START HERE phase and the Optimiser document.
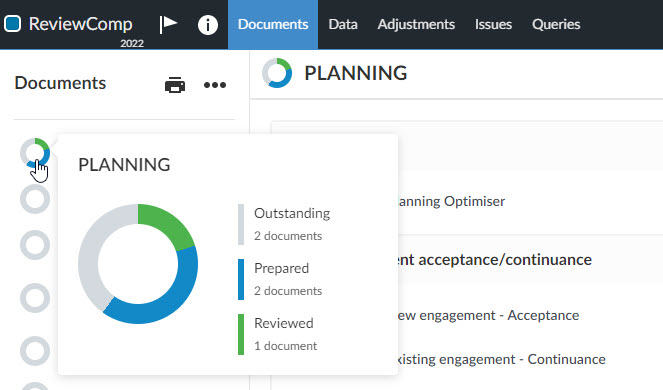
Each phase has its own progress indicator that shows the document sign-off progress. You can hover over the progress indicator to view how many documents are Outstanding, Prepared or Reviewed.
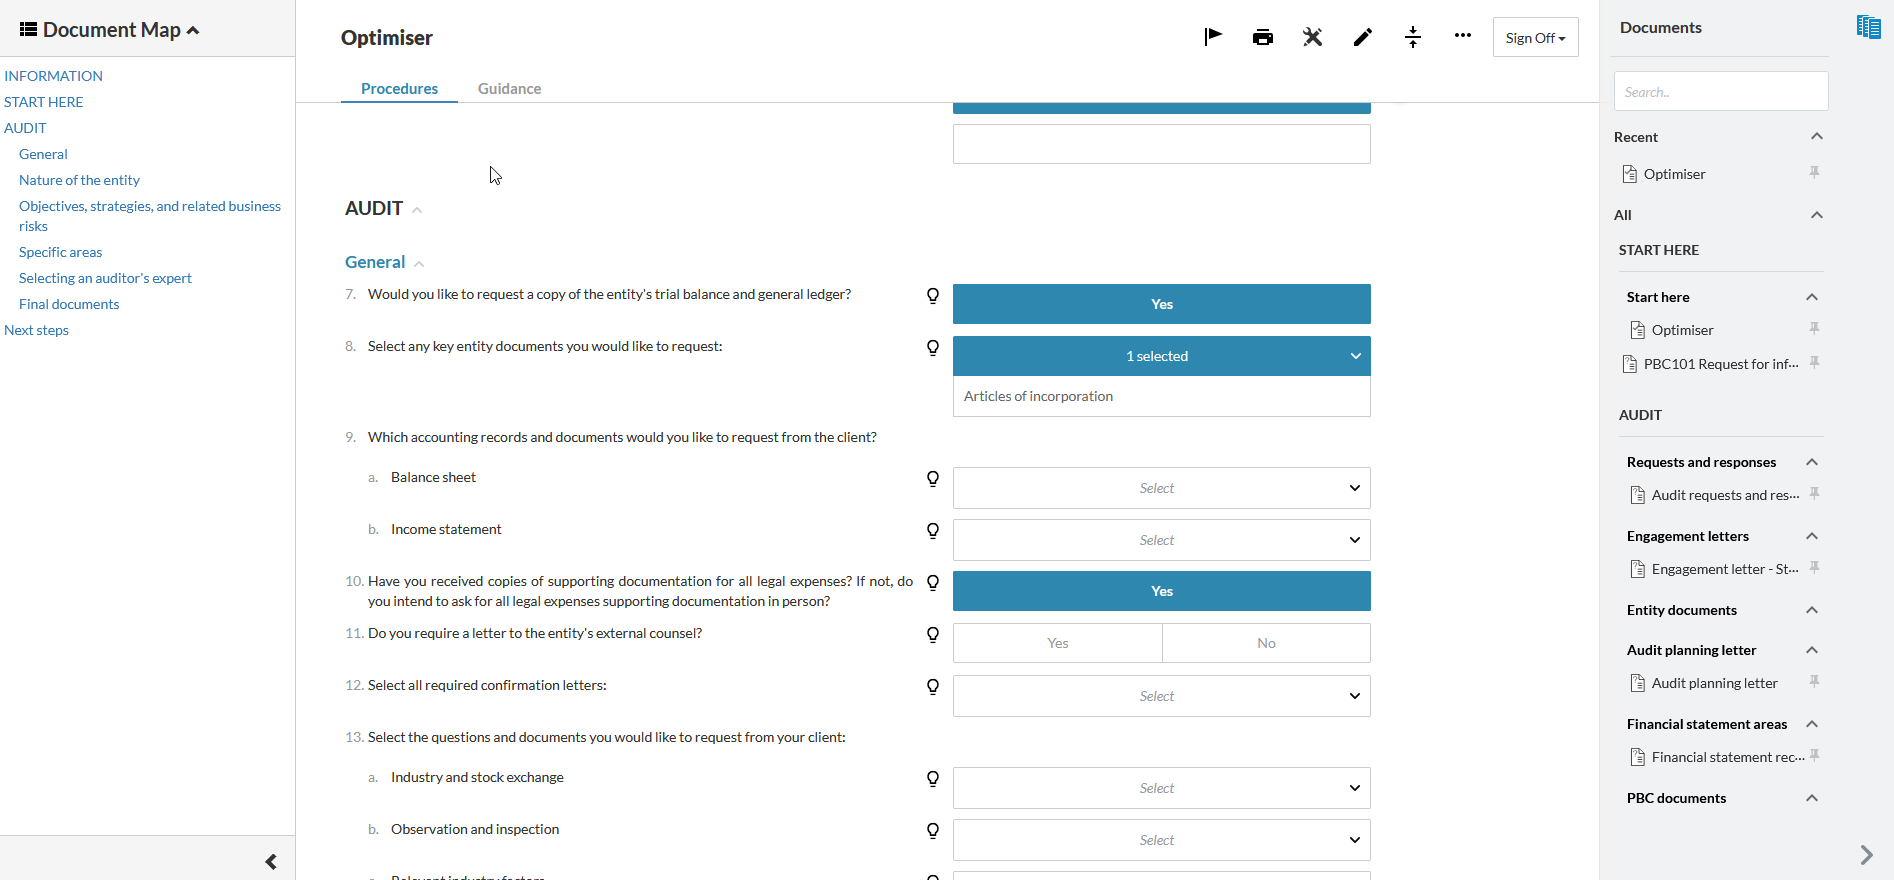
The Optimiser document is a checklist that consists of questions and inquiries that you need to respond to. The responses you provide automatically populate additional content and documents in the engagement. For details on how to complete a checklist, see Complete a checklist.
The first question in the Optimiser prompts you to choose the engagement workflow that you prefer.
-
Choose Use PBC Templates if you want to follow predefined content, folders and documents based on context, such as the type of the engagement being performed. With this choice, you get information request lists that are tailored to your situation and ready to send.
-
Choose Build my own query if you want to create custom information request lists.
Use PBC Templates
If you choose Use PBC Templates, additional questions and inquiries populate in the Optimiser. For example, if you respond Audit to the What type of engagement is being performed question, then you're presented with further inquiries relevant to audit engagements.
Each response you provide populates additional documents and folders in the Documents page within various phases.
Once you respond to the last question, the Next step section displays with a link to the document that you'll need to complete next.
To sign off on the Optimiser as your designated role, select Sign Off at the top-right corner of the document.
Note: You can change the signoff workflow for a document by creating custom signoff roles and schemes. To learn more, see Define signoff roles and Set up signoff schemes.
Create your own query
If you choose Build my own query,
-
The Next step section displays a link to a blank query document (titled Build your own query).
-
In the Documents page, the CUSTOM phase populates with the Build your own query document.
To add the necessary information request items in the document, see the Queries section.
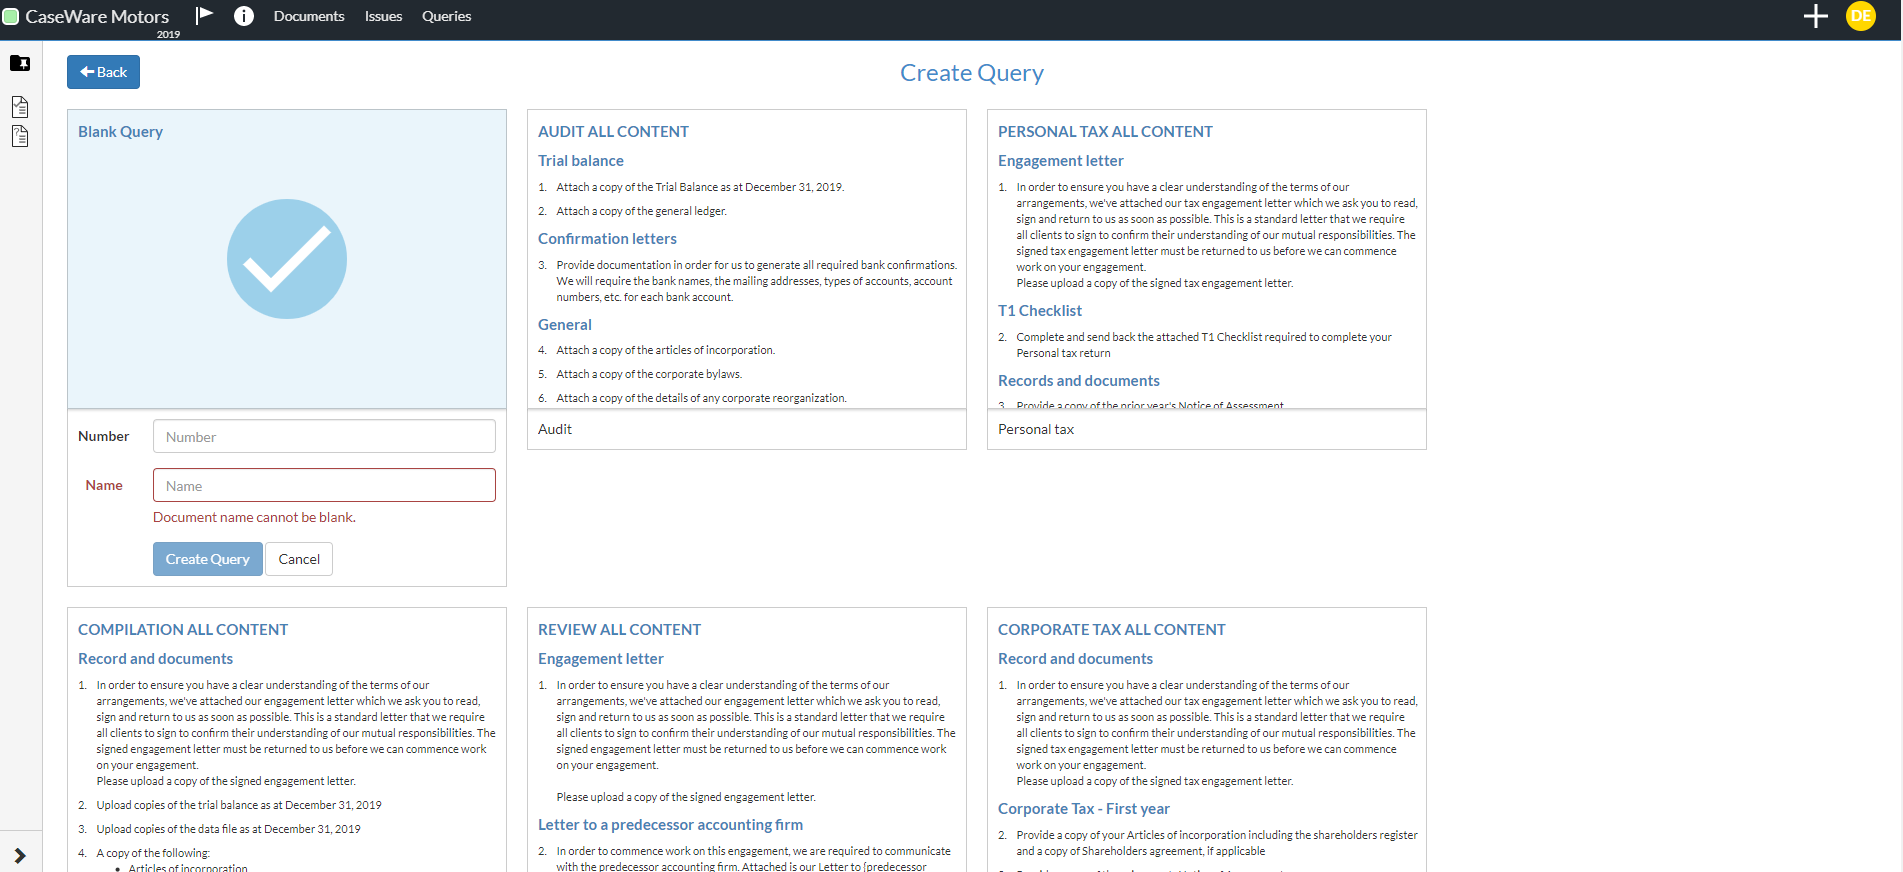
You can also create your own query document using one of the PBC Requests built-in templates. The templates include predefined content tailored to specific contexts, such as audit, personal tax and compilation. Note that you can fully customize the content in the query created from a template.
To create your own query using the built-in templates:
-
In the Documents page, select Add (
 )
) -
Go to the query template you want to include and enter a name for it.
-
Select Create Query.
The query document displays in the Documents page. Open the document to review the content and make customizations if needed.
A query is an interactive smart document that consists of the following components:
-
Query questions - The requests and inquiries that clients need to respond to.
-
Question sets - To group related query questions.
-
Response types - To specify the expected user response. The following table describes the available response types:
Response type
Expected user response
Text
Enter the requested information.
Picklist
Select one item from the drop-down list.
Multi Picklist
Select one or more items from the drop-down list.
File Upload
Browse and add a requested file (or drag the file).
Note: The maximum upload size is 500 MB per file. For a secure file exchange, the system prevents upload of suspicious files, such as: .com, .bat, .exe, .cmd, .sh, .dll, .so, .o, .deb, .msi, .rpm, .ko, .sys, .php, .py, .vbs, .js, .app.
Date
Select a date from the calendar.
Simple Electronic Signature Choose whether to sign the document manually or accept it electronically.
Note that:
-
If clients accept the document electronically, a signature log is generated and available for download.
-
If necessary, users can delete and replace the document before they accept the client's response.
-
When the document is replaced, the signature log is deleted. A new log is generated when clients accept the new document.
-
The log includes the following information:
-
Query question details
-
Signer name and email
-
Signer location (if the clients have chosen to enable location access)
-
Signer IP Address
-
Signature date
-
Document name
-
Document MD5 hash
-
-
-
Instructions - To provide guidance information for the clients. For example, add the supported file types for a document request.
To sign off on the Optimiser as your designated role, select Sign Off at the top-right corner of the document.
Note: You can change the signoff workflow for a document by creating custom signoff roles and schemes. To learn more, see Define signoff roles and Set up signoff schemes.