Create a custom mapping file (.ini)
You can quickly and efficiently create custom mapping files for data transferred through CloudBridge for each of your Cloud engagement apps.
To create a custom mapping file:
-
Launch CloudBridge and connect to your Cloud server.
-
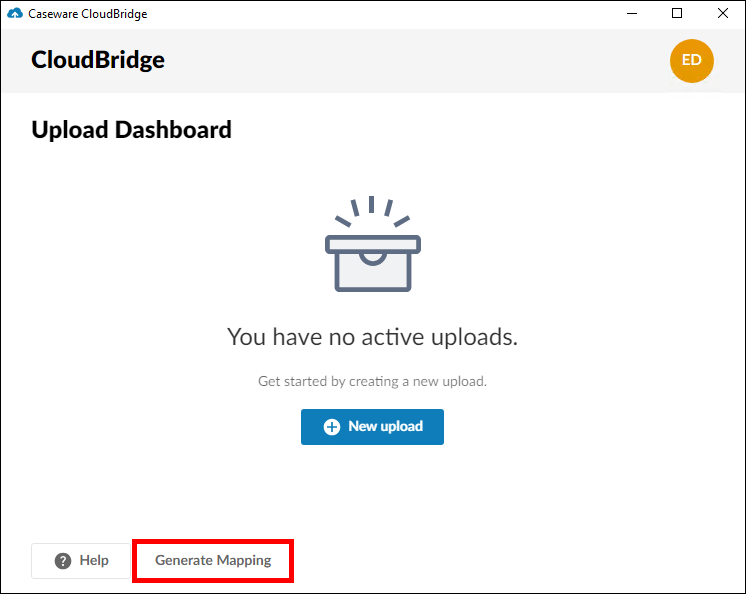
On the Upload Dashboard, click Generate Mapping.
-
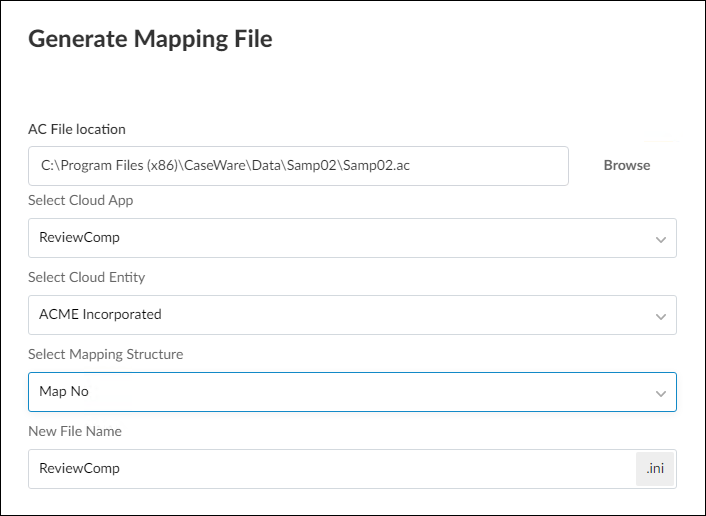
In the Generate Mapping File dialog, complete the fields as required.
-
Click Browse and select the source Working Papers engagement for your mapping/grouping structure.
-
Select which Cloud app you are mapping to.
-
Select an entity on your Cloud server.
-
Select the applicable mapping/grouping structure from the source Working Papers engagement.
-
Enter a name for the mapping file or use the default name provided.
Click Next.
-
-
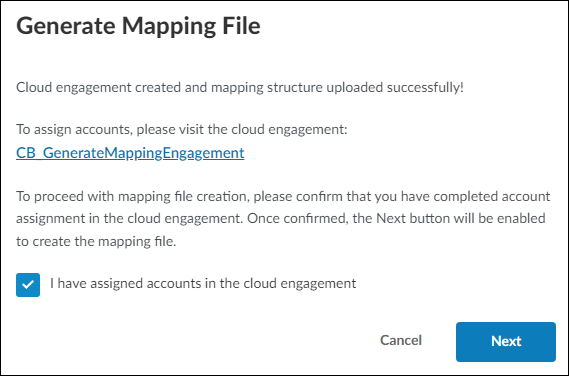
A Cloud engagement is created automatically based on your selections and opens in your browser. If it does not open automatically, click the link in the Generate Mapping File dialog.
-
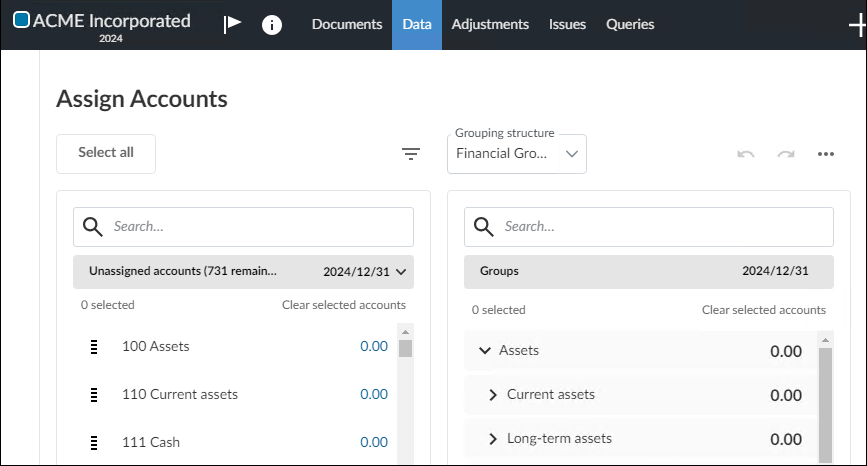
In the browser engagement, manually assign accounts as required to generate your intended mapping structure.
Note: You can disregard the balances in this engagement, as they are not relevant when generating the mapping structure.
Once finished, simply close the browser.
-
Select the confirmation box stating that you have assigned the accounts in the Cloud engagement, then click Next.
-
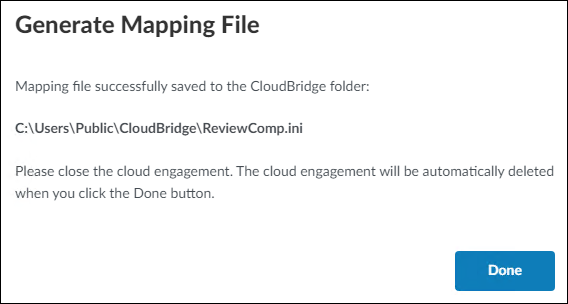
The custom mapping file is created in the destination folder provided. Additionally, the Cloud engagement used for mapping will be deleted upon clicking Done.
You can now use the custom mapping file during your CloudBridge data transfer.