Create custom fields, tags and workflows
While Cloud has several built-in categorization tools to help you organize your staff, internal teams, contacts, and clients, you may want to customize these categories and add or edit the categories in order to more closely reflect your organization's operations.
Creating tags
Tags are keywords that you can assign to people, entities, or files in Cloud. Tags can be used as search terms, making it easy for users to locate relevant materials and personnel. Administrators can create both system-wide tags that can be assigned to all categories and specialized tags that users can only assign to staff, contacts, files, or entities.
To create tags:
-
Ensure you have the Settings Admin role or equivalent privileges.
-
From the Cloud menu, select Settings.
-
Select Customization | Tag Management.
-
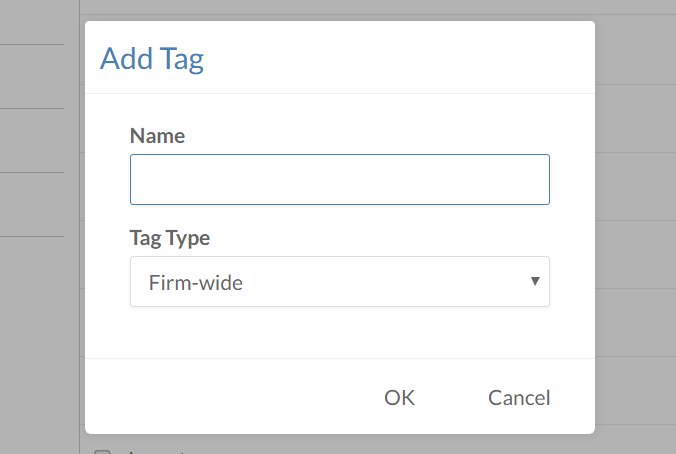
Select Add to open the Add Tag dialog.
-
Enter a Name and specify the Tag Type (System-wide, Staff, Contacts, Files, or Entities) for your new tag.
-
Select OK.
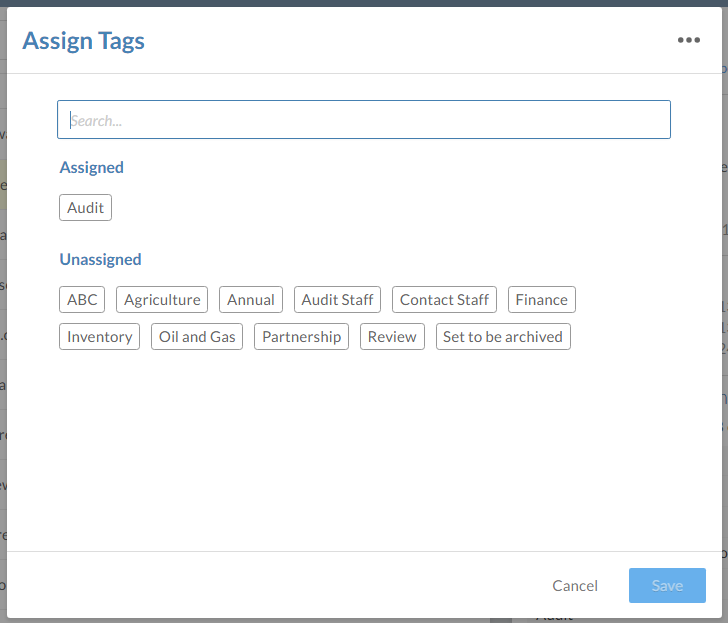
You will see the created tags in the Tag (![]() ) dialog for any Cloud objects the tags are available for. Select Unassigned tags to Assign them to the object, and select Save to apply your changes.
) dialog for any Cloud objects the tags are available for. Select Unassigned tags to Assign them to the object, and select Save to apply your changes.
Creating custom fields for entities
Cloud comes with a predefined set of properties users can assign to each entity type when they add or edit an entity, but you can also add custom property groups.
For example, assume you want users to be able to classify Other entities by the type of service they provide for your organization, such as Office Supplies, Legal Consulting, or Staffing. You can add a property group called Service Type to Other Entities, then add each type of service provided as an option.
To add custom fields for entities:
-
Ensure you have the Settings Admin role or equivalent properties.
-
From the Cloud menu, select Settings.
-
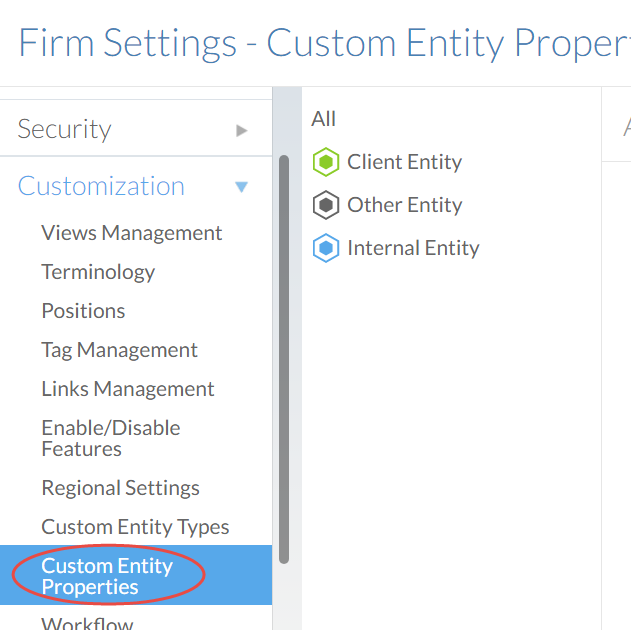
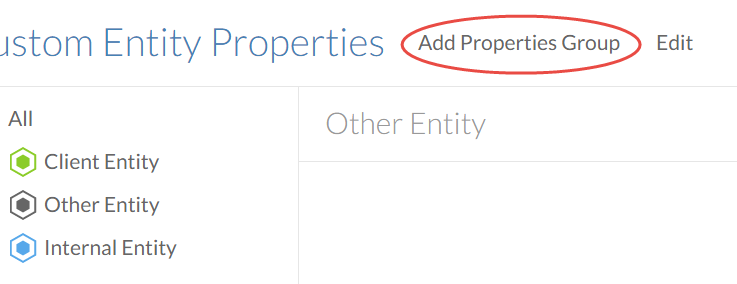
Select Customization | Custom Entity Properties.
-
Select the type of entity you want to add a property group for (All, Clients, Other Entities, or Internal Entities), then select Add Properties Group.
-
Enter a Group name in the first text field, and select Add Property to add text fields for the properties.
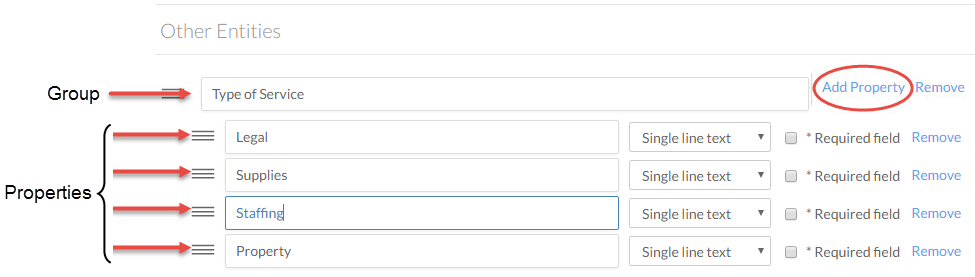
-
In the drop-down boxes next to each property, select the Type of input required from the user for that property, such as a URL or an amount.
-
For any field in which user input is required for the entity to be saved, select the Required field checkbox.
-
Select Save to create the custom entity properties.
Your saved property group appears in the create and edit dialogs for the type of entity you specified.
Creating workflows
In Cloud, a workflow is a process that can be created for any user, entity, or Cloud object type. Workflows assign stages on these objects as a way to help organize them according to how far along they are in the designed "flow."
For example, you may want to create a workflow for Client Entities to help categorize your clients by the current stage of your business relationship (such as New or Long-term client). See Workflow Examples for more workflow suggestions.
To create a new workflow:
-
Ensure you have the Admin role.
-
From the Cloud menu, select Settings.
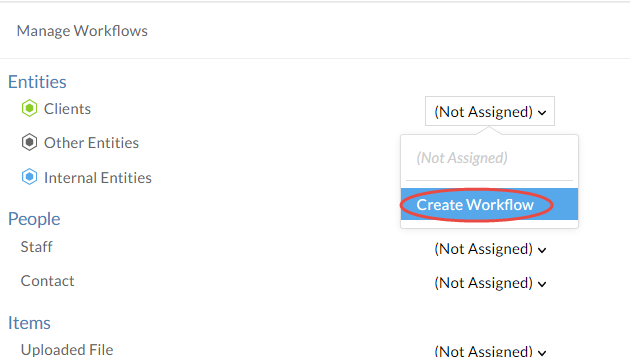
- Select Customization | Workflow Management.
-
Next to the type of item want to create, select (Not Assigned) | Create Workflow.
-
Enter a Workflow Name and Select Add Stage (
 ) to begin specifying the stages of this workflow.
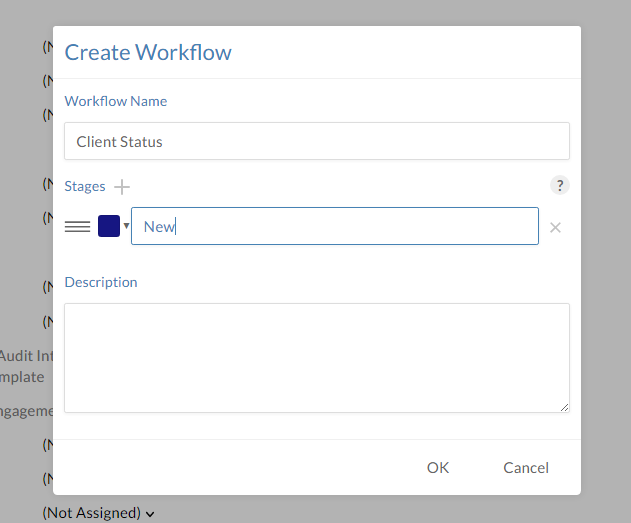
-
Select the color drop-down (
 ) to change the workstage color or drag the (
  ) icon to reorder the stages.
 -
Click OK.
To modify an existing workflow:
-
Ensure you have the Admin role.
-
Go to Settings | Customization | Workflow Management.
-
Select Manage Workflows.
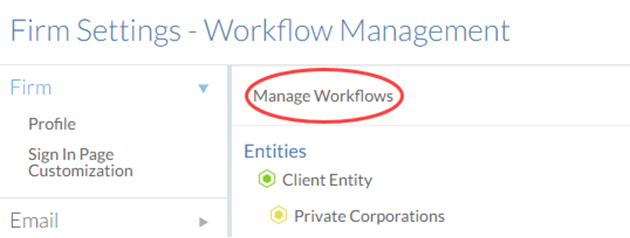
-
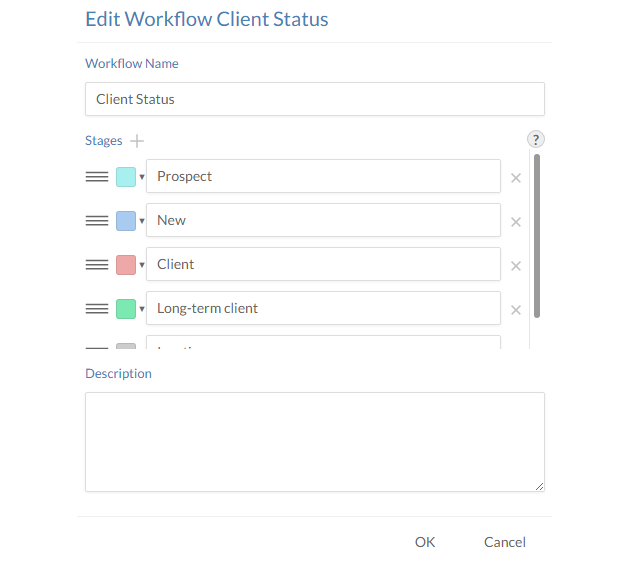
In the Manage Workflows dialog, select an applicable workflow stage and select Edit.
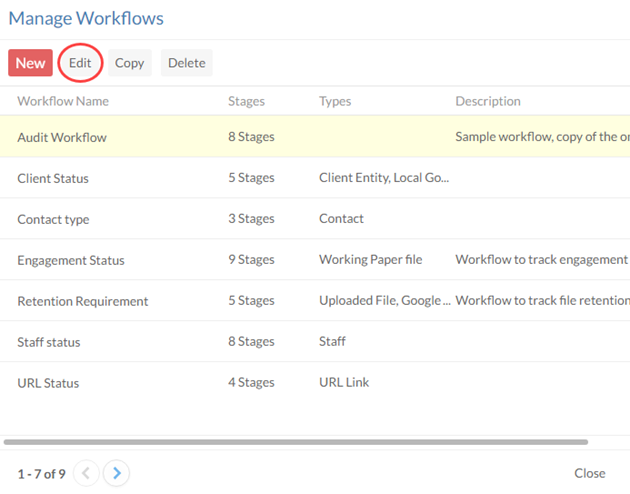
-
Make your changes to the workflow and select OK.
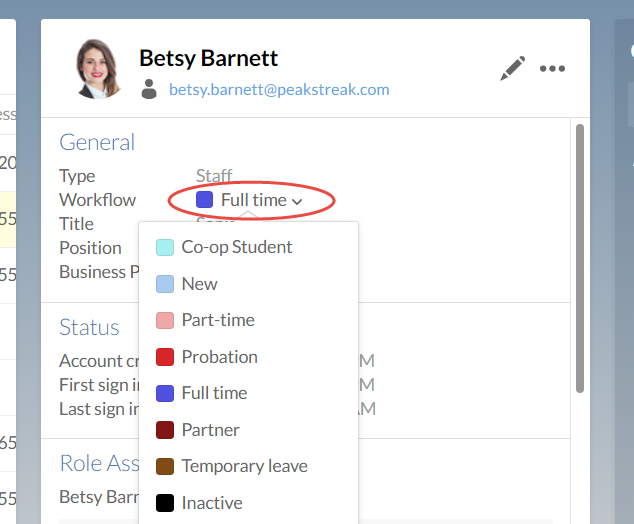
Once you create workflows, you can assign them to items. For example, you can create a Staff status workflow with stages such as new, probation, full time, and temporary leave. Once a staff member workflow is in place, you can set the status for your new users.
To assign workflows to users:
-
Ensure that you have the Staff Admin role or equivalent rights.
-
From the Cloud menu, select Staff or Contacts.
-
Select the user whose workflow stage you want to change.
-
In the user's menu, select the current workflow, then select the new workflow option.