Create invoice templates

This feature is only available with CasewareCloud Time, part of the Caseware Cloud suite.
Cloud enables you to customize invoices to meet the needs of your organization and your client. You can edit default invoice options, create invoice templates, and manage billing codes directly from Cloud.
Creating invoice templates
Creating an invoice template enables you to generate new invoices that meet the specific requirements of your organization.
You can create a custom invoice in Settings to match the requirements of your client or engagement type.
To create an invoice template:
-
Ensure you have the Settings Admin role or equivalent privileges.
-
From the Cloud menu, select Settings.
-
Select Time and then, in the Invoice section, select Templates.

-
Select New.
-
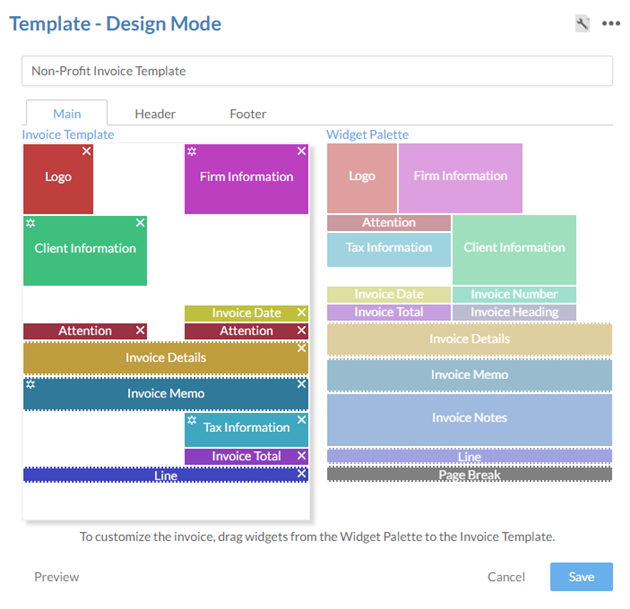
Drag widgets from the Widget Palette to the Invoice Template on the Main, Header, and Footer tabs as required.
-
Configure widgets on the Invoice Palette by selecting their Settings icon (
 ).
). -
Modify the template's appearance by selecting Page Setup(
 ).
).
-
-
Select Save.
You have created an invoice template. You can apply it when you generate invoices using the Billing app, or see a list of available templates in Settings | Time | Templates.
Editing and deleting invoice templates
If a template no longer meets your needs you can edit or delete it.
To edit or delete an invoice template:
-
Ensure you have the Settings Admin role or equivalent privileges.
-
From the Cloud menu, select Settings.
-
Select Time and then, in the Invoice section, select Templates.
-
Select an invoice template.
-
Select Edit or Delete.

You have edited or deleted an invoice.
Adding a tax registration number to a new invoice template
You can automatically add a tax registration number to invoices that require it by creating a custom invoice template.
To add a tax registration number to a new invoice template:
-
Ensure you have the Settings Admin role or equivalent privileges.
-
From the Cloud menu, select Settings.
-
Select Time and then, in the Invoice section, select Templates.
-
Select New.
-
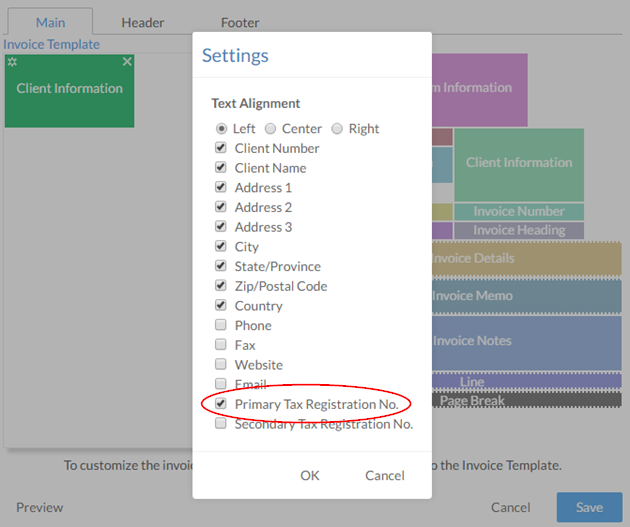
Add the Client Information widget, the Organization Information widget, or both. These widgets can be added to the Main, Header or Footer sections of your template.
-
Selecting the Settings icon (
). -
Choose the Primary Tax Registration No. checkbox, and select OK.
-
Complete your invoice template as desired and select Save.
Invoices created with your template will display a tax registration number.