Complete the Allocation overview worksheet
The 2-11 Allocation overview worksheet is designed to assist in managing your fund balances to implement fund reporting in the financial statements. You can set automated allocation methods to easily allocate your trial balance accounts to the appropriate funds and identify any unallocated balances.
Before you start, ensure you have implemented fund reporting in your engagement.
To complete the 2-11 Allocation overview worksheet:
-
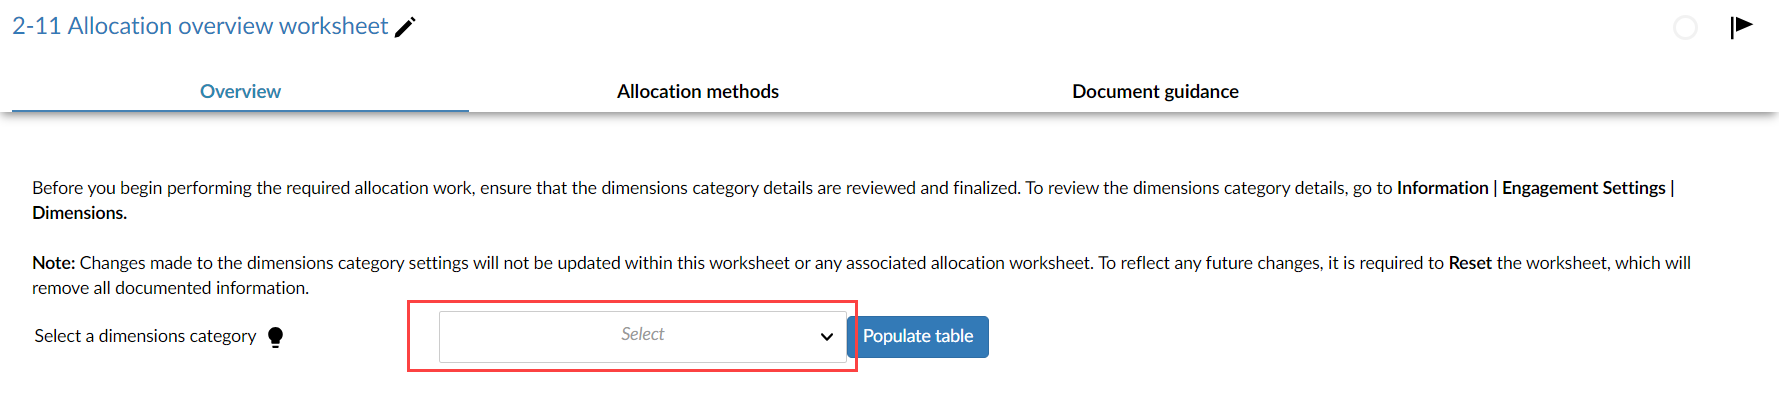
From the drop-down, select the dimension category that contains the dimensions you want to allocate your account balances to.
-
Select Populate table.
-
In the confirmation dialog, select Continue.
-
Select Create worksheet to create your allocation worksheet.
-
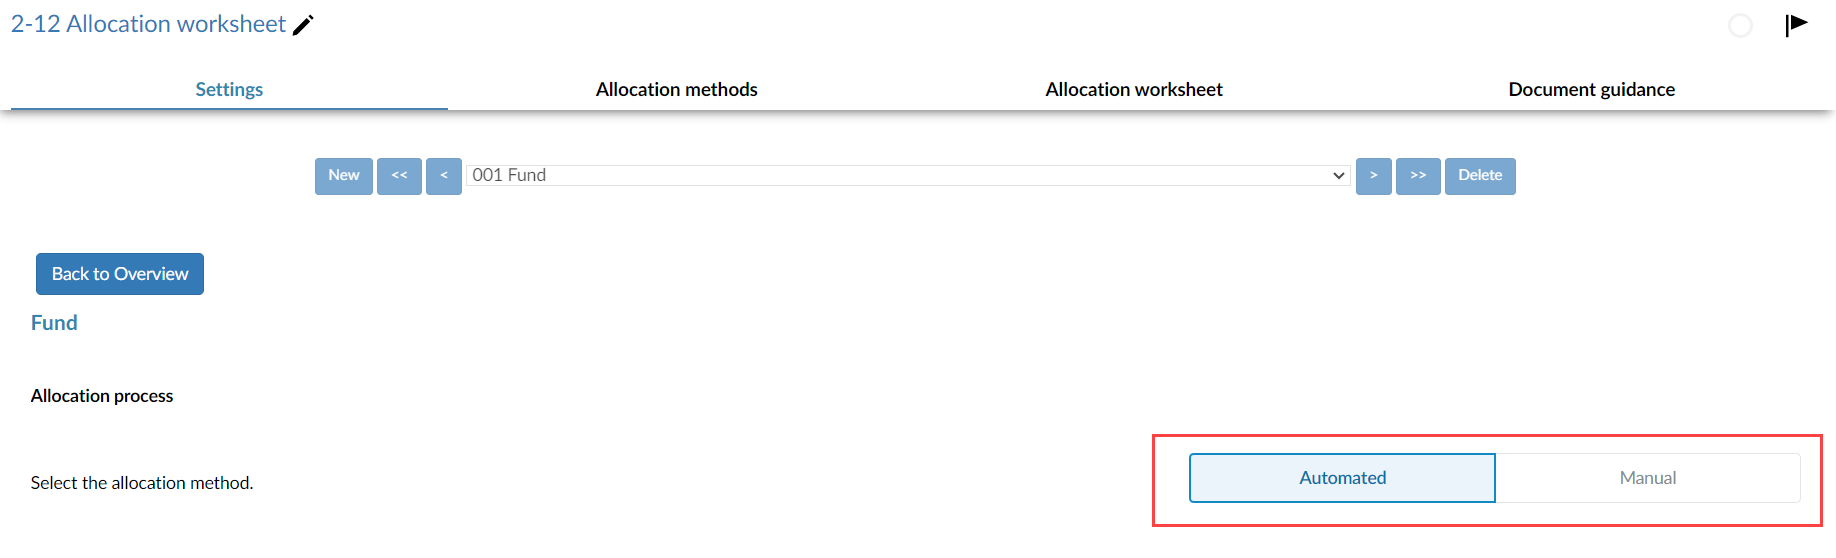
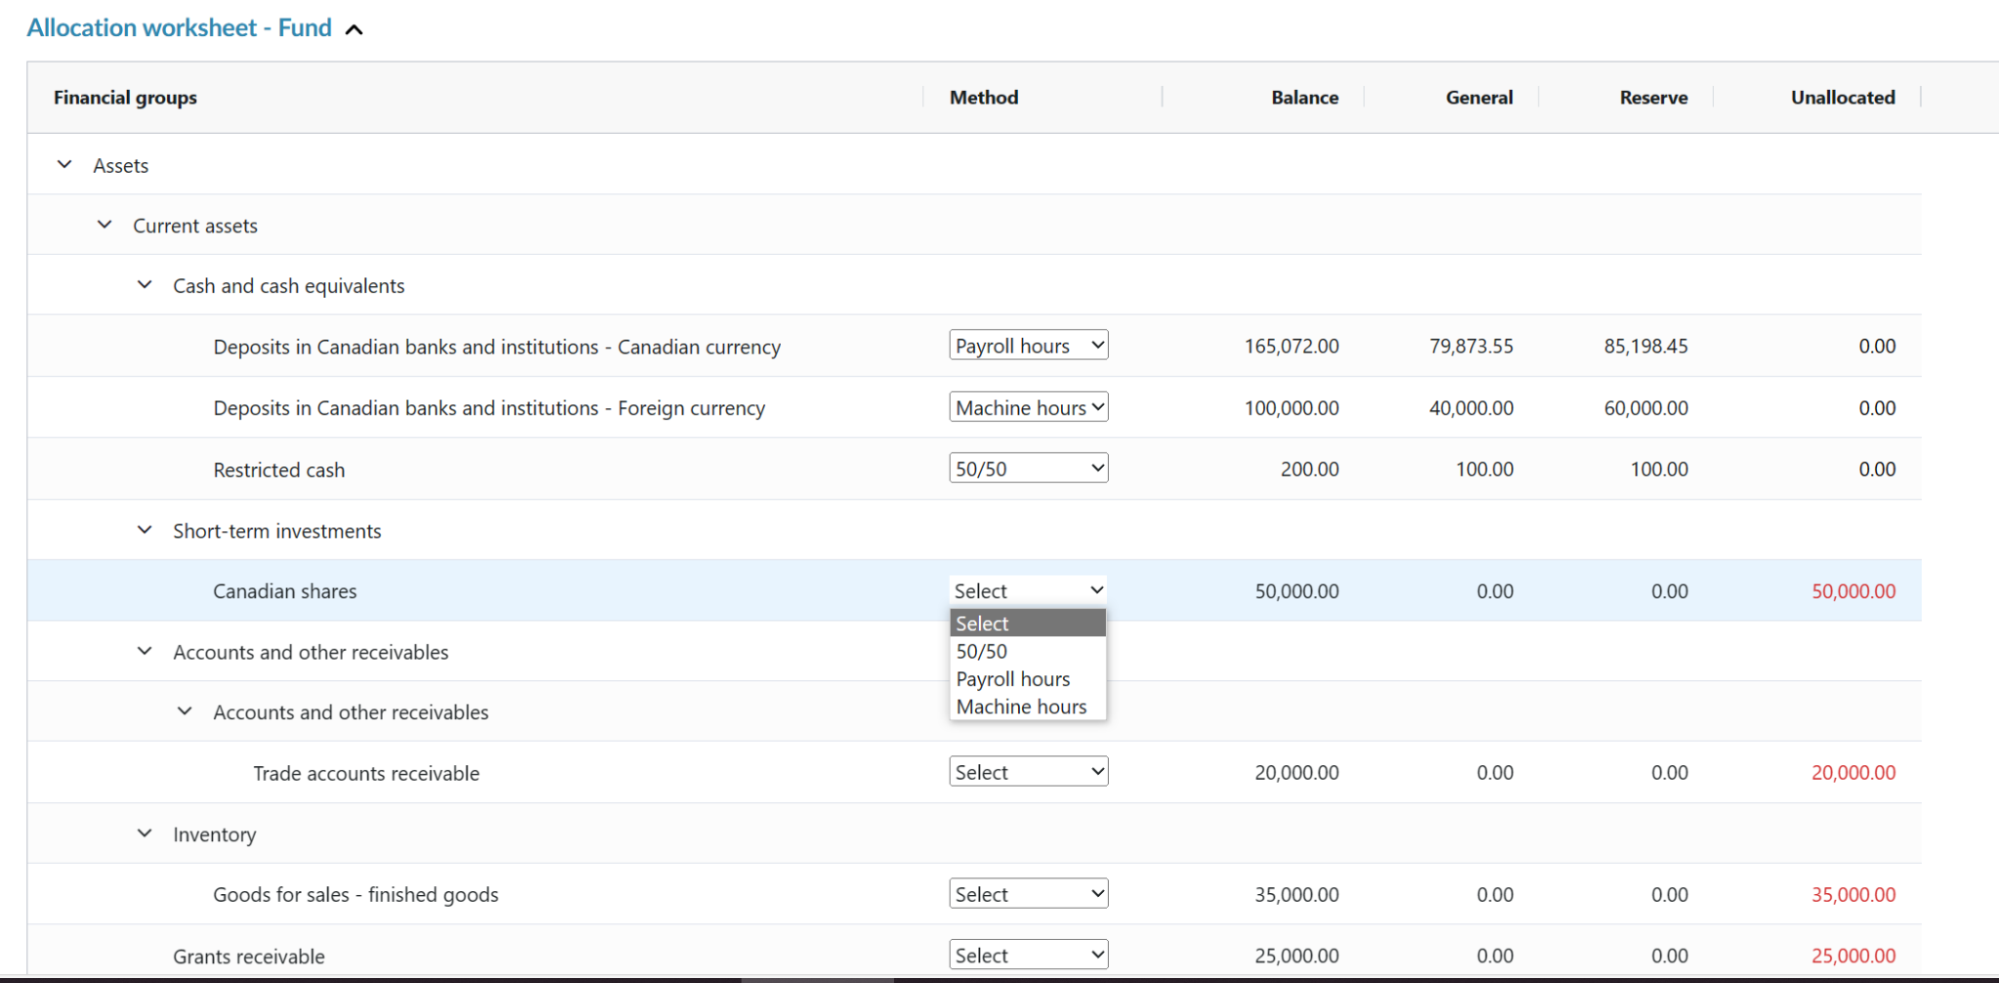
In the worksheet, notice you can select to either automatically or manually allocate your balances in the Settings tab. Select Automated to select your allocation methods and automatically calculate the correct values for your financial groups.
Note that if you select Manual, the Allocation methods tab does not display and you must manually enter the correct values in the Allocation worksheet tab.
-
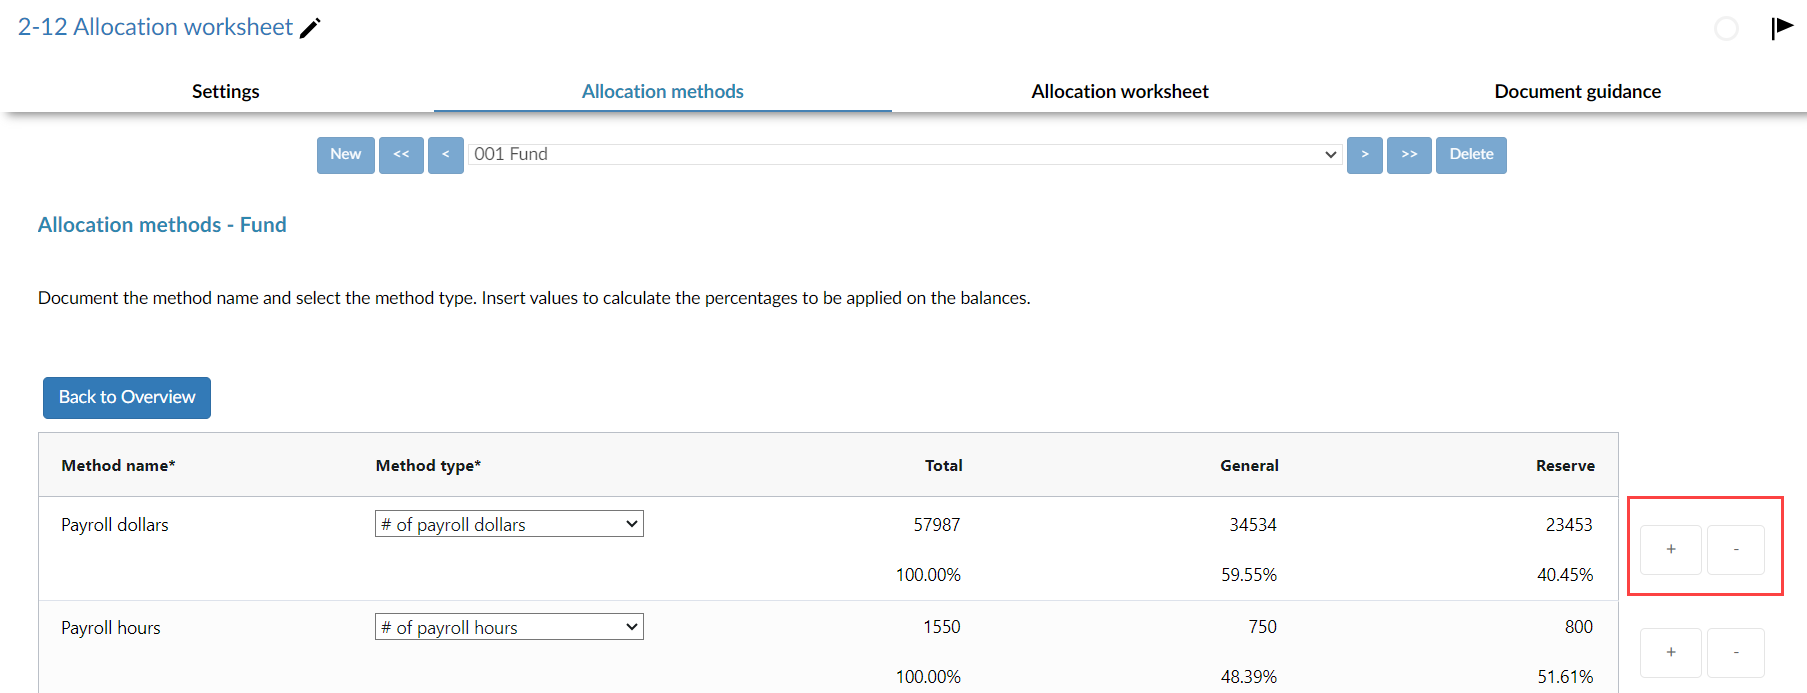
In the Allocation methods tab set your allocation methods from the pre-defined list. You can use the plus and minus buttons to the right of the table to add and delete methods.
-
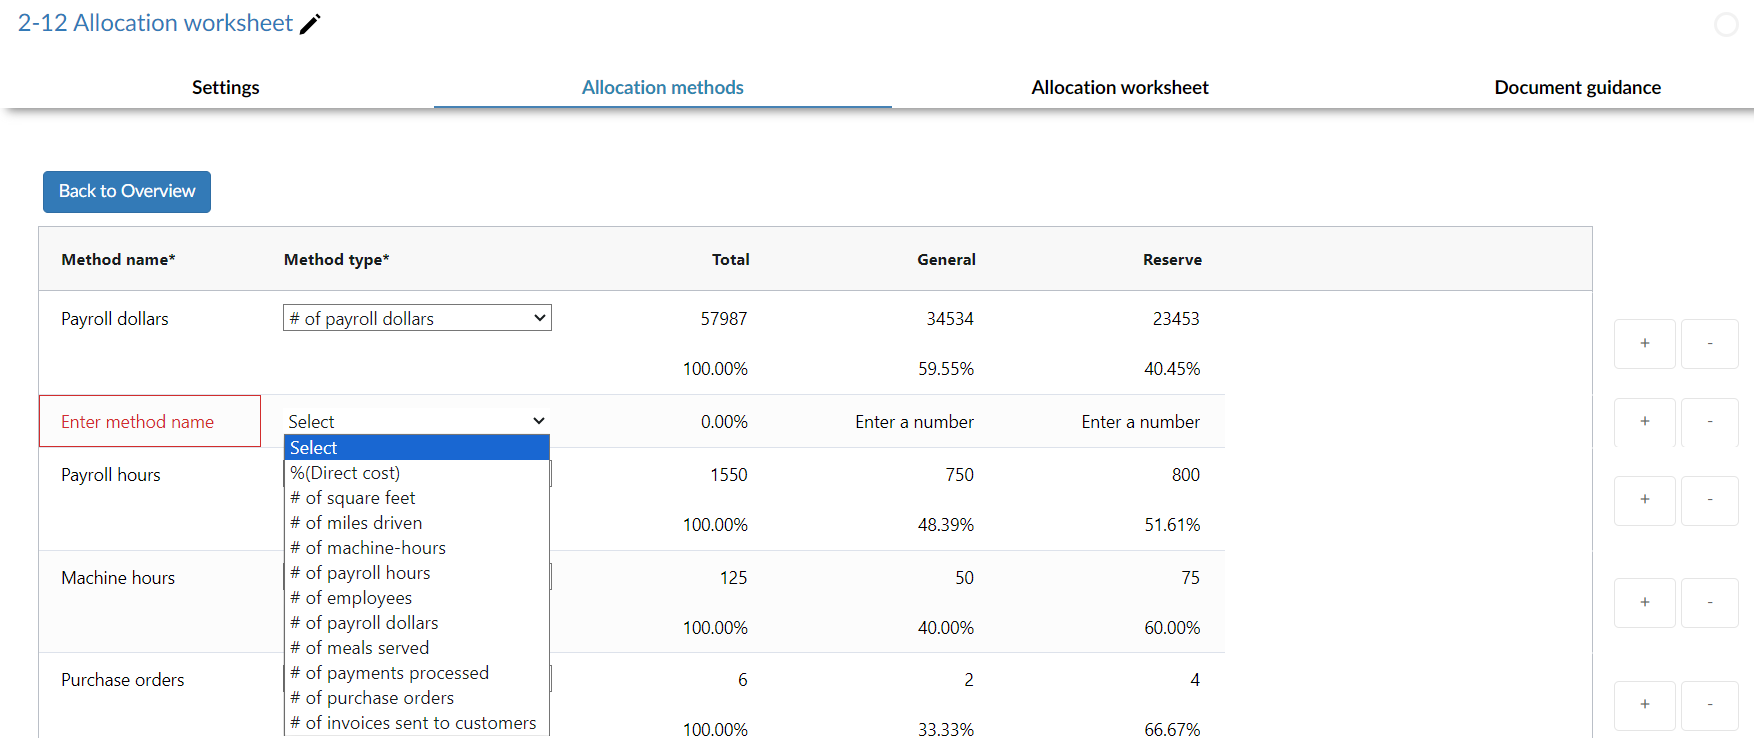
For each method you want to:
-
Enter the Method name in the corresponding column.
-
Select the Method type from the drop-down.
-
In the columns for each dimension, enter the correct value for each dimension. For example, if you select the # of employees method, indicate the number of employees associated with each dimension. The values you enter are used when calculating the percentage breakdown to allocate your balances.
-
-
Once you have finished setting your methods, select the Allocation worksheet tab.
-
For each financial group, select the allocation method you want to use from the drop-down. Note that any unallocated balances are indicated in the Unallocated column.
-
After you select an allocation method for each group, select Post adjustment at the top right of the worksheet.
You can view the details of the adjustment on the Adjustments page.
After you complete the allocation worksheet, you can update your financial statements to implement fund reporting. To learn more, see Modify dynamic tables in the financial statements.